Odoo Payroll on Cloud Master Management
Odoo Payroll Master Management is helps to define the required master data such as employee, contracts grade, rank, payroll structure to run the payroll process.
1. User Login
A login is a set of credentials used to authenticate a user. Most often, these consist of a username and password. Security measure designed to prevent unauthorized access to confidential data.
Enter the Application URL in the web browser and hit ‘Log in’ Button
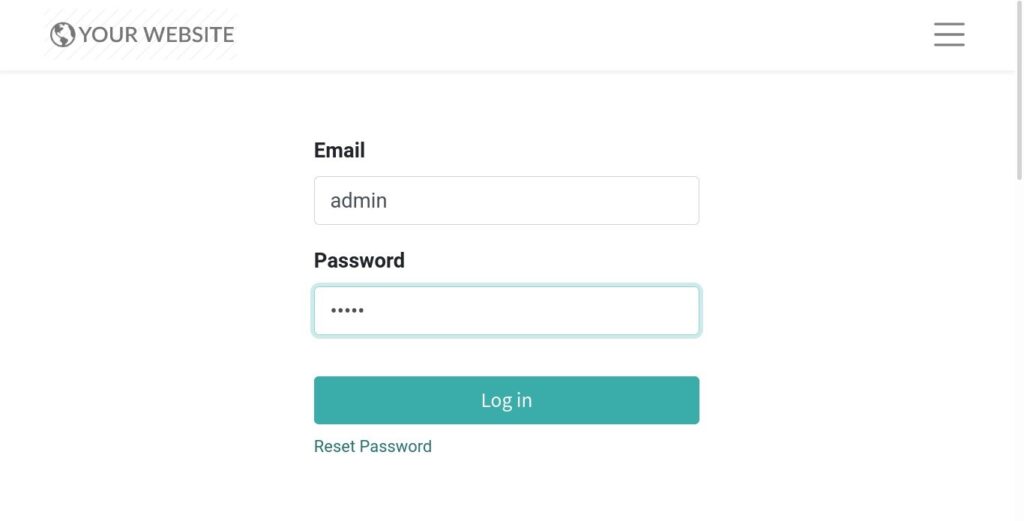
Field Description
- User – Enter the Login User ID
- Password – Enter the Login Password
2. Manage Companies
A centralized management environment allows you to select multiple companies simultaneously and set their specific warehouses, customers, equipment, and contacts. It provides you the ability to generate reports of aggregated figures without switching interfaces, which facilitates daily tasks and the overall management process.
Go to Settings → Click on Users & Companies → Select Companies
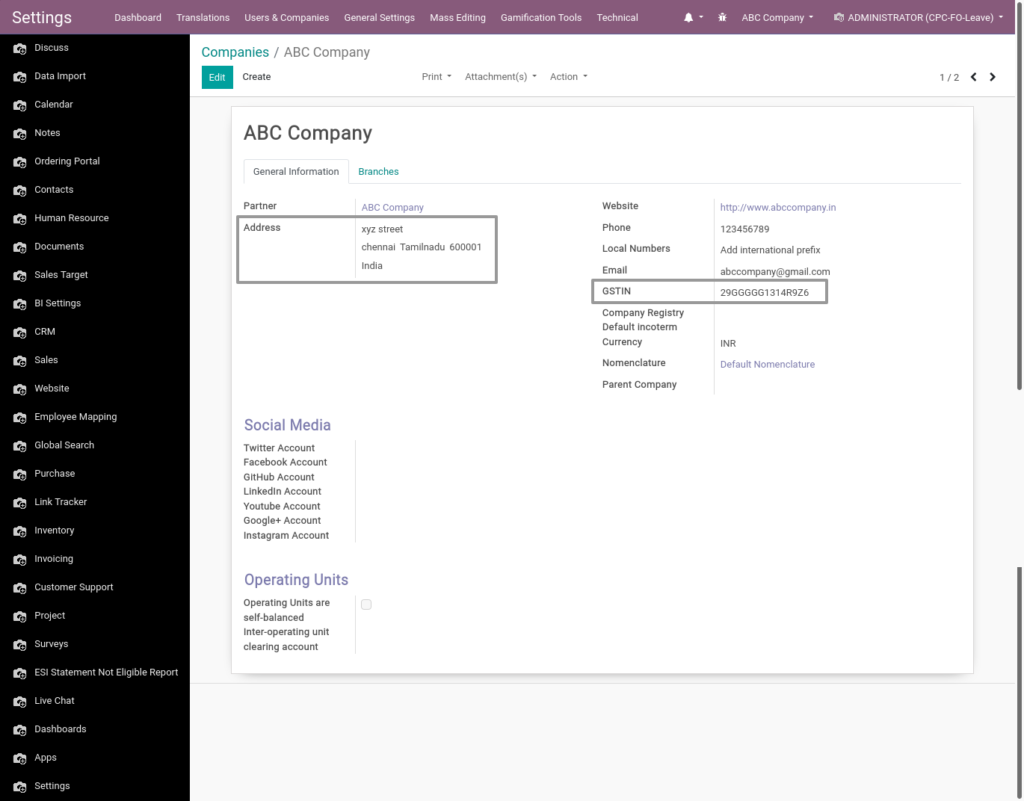
Field Description
- Create – Click on create button to create a company
- Address – Enter the address of the company
- GSTIN – Enter the GST register number of the company
3. Manage Departments
A centralized management that allows you to create and select multiple departments in a company.
Go to Human Resource → Click on HR Management → Select Departments
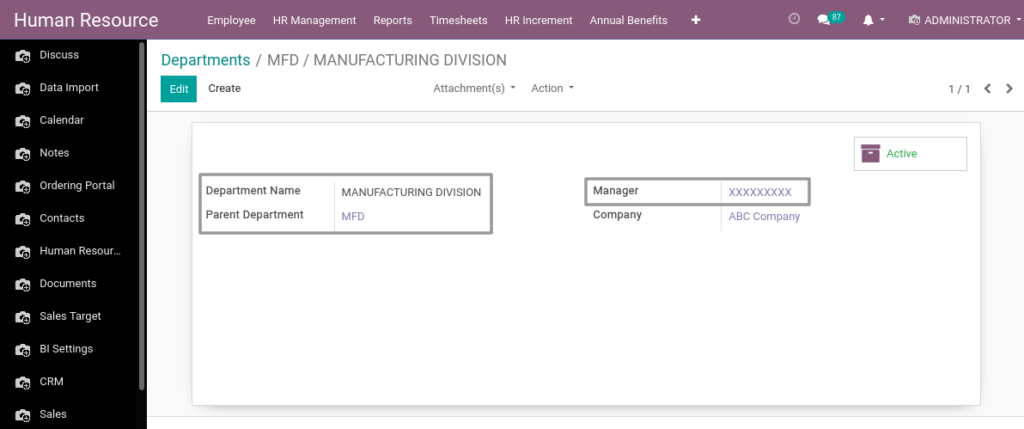
Field Description
- Department Name – Enter the department name
- Parent Department – Select the parent department
- Manager – Select the manager for the department
4. Manage Employee Grades
Define the employee grades to assign employee position. You can add as many grades as you need.
Go to Human Resource → Click on HR Management → Select Employee Grades
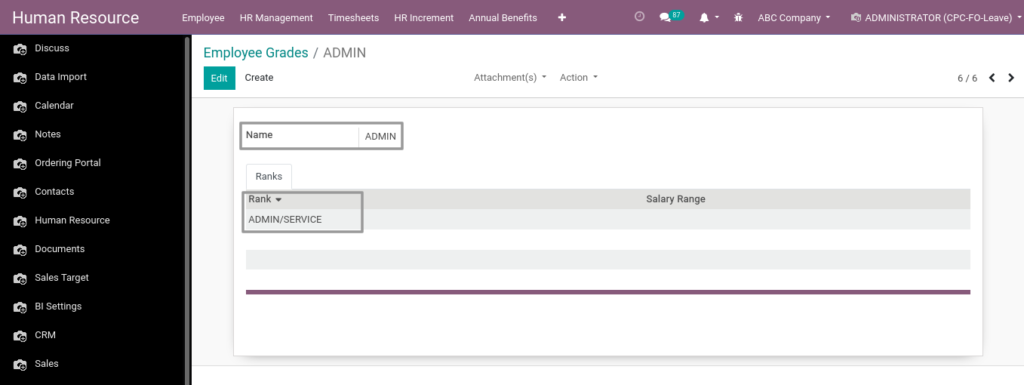
Field Description
- Name – Enter the name of the grade
- Rank – Select the rank for the grade mapping
5. Manage Employee Ranks
Define the employee ranks and the earnings based the employee grades. You can add as many ranks as you need.
Go to Human Resource → Click on HR Management → Select Employee Ranks
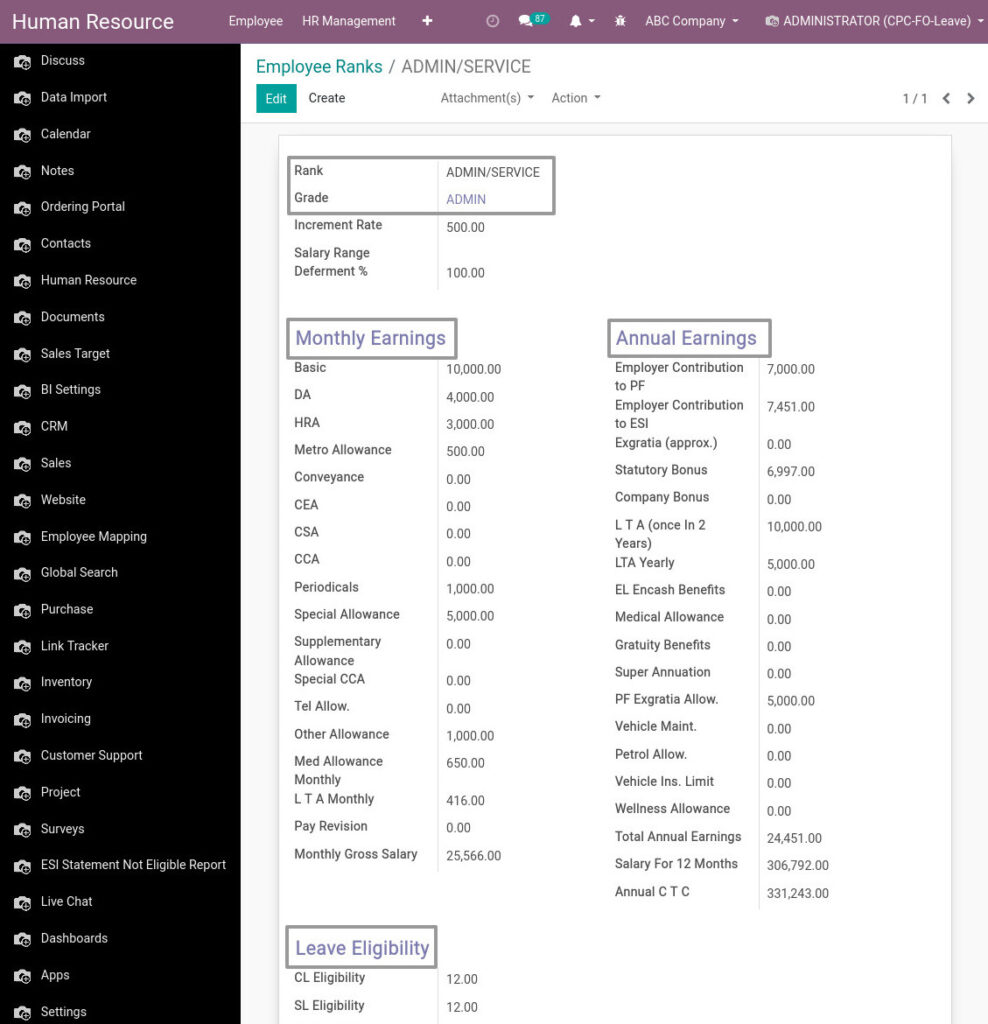
Field Description
- Name – Enter the name of the rank
- Grade – Select the grade for the rank
- Monthly Earnings – Define the monthly earning for the rank
- Annual Earning – Define the annual earning for the rank
- Leave Eligibility – Define the leave eligibility for the rank
6. Manage Job Positions
Define the job positions for the employee and for recruitment process. You can add as many job positions as you need.
Go to Human Resource → Click on Configuration → Select Job Positions
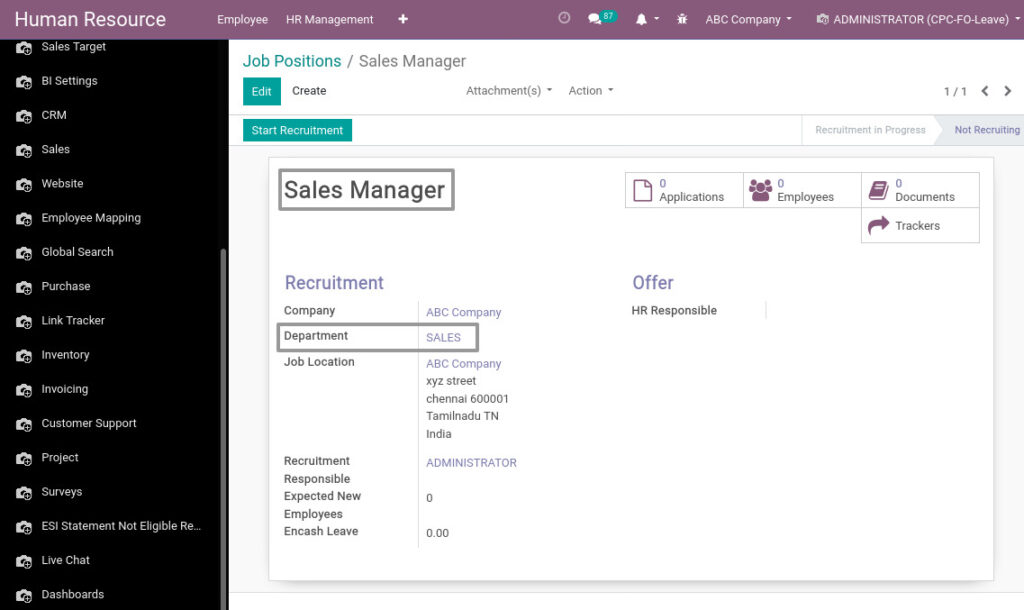
Field Description
- Sales Manager – Enter the name for the job position
- Department – Select the department name
7. Manage Job Title
Define a job title for the employee. You can add as many job titles as you need.
Go to Human Resource → Click on Configuration → Select Job Title
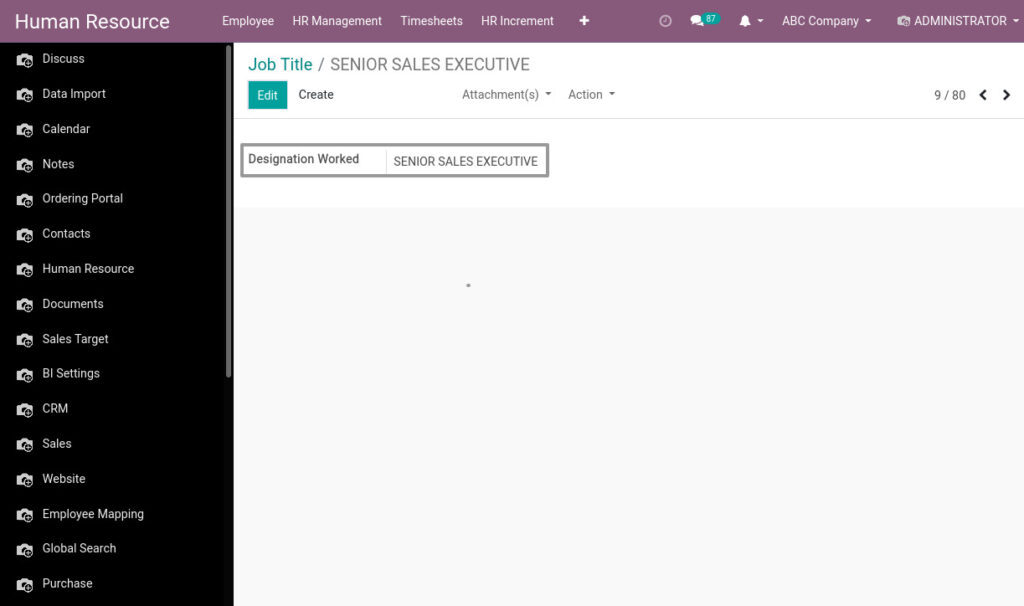
Field Description
- Designation Worked – Enter the name of the job title
8. Manage Work Location
Create a work location for the employee. You can add many cities as work location as you need.
Go to Human Resource → Click on Configuration → Select Work Location
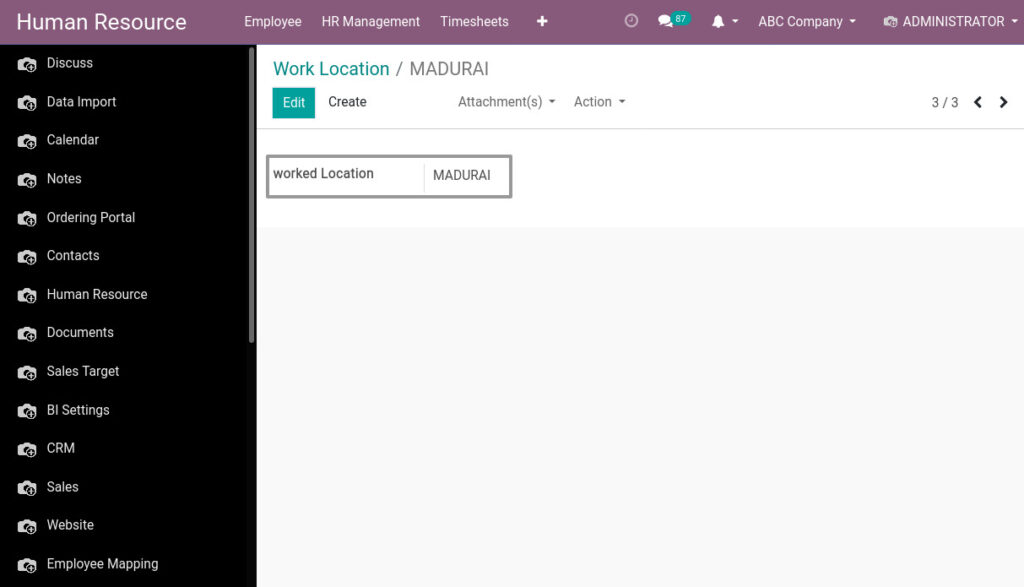
Field Description
- Worked Location – Enter the name of the work location
9. Manage Contracts
Create a contract between the employer and the employee and define the job details, pay, leaves, etc. of the employee.
Go to Human Resource → Click on HR Management → Select Contract
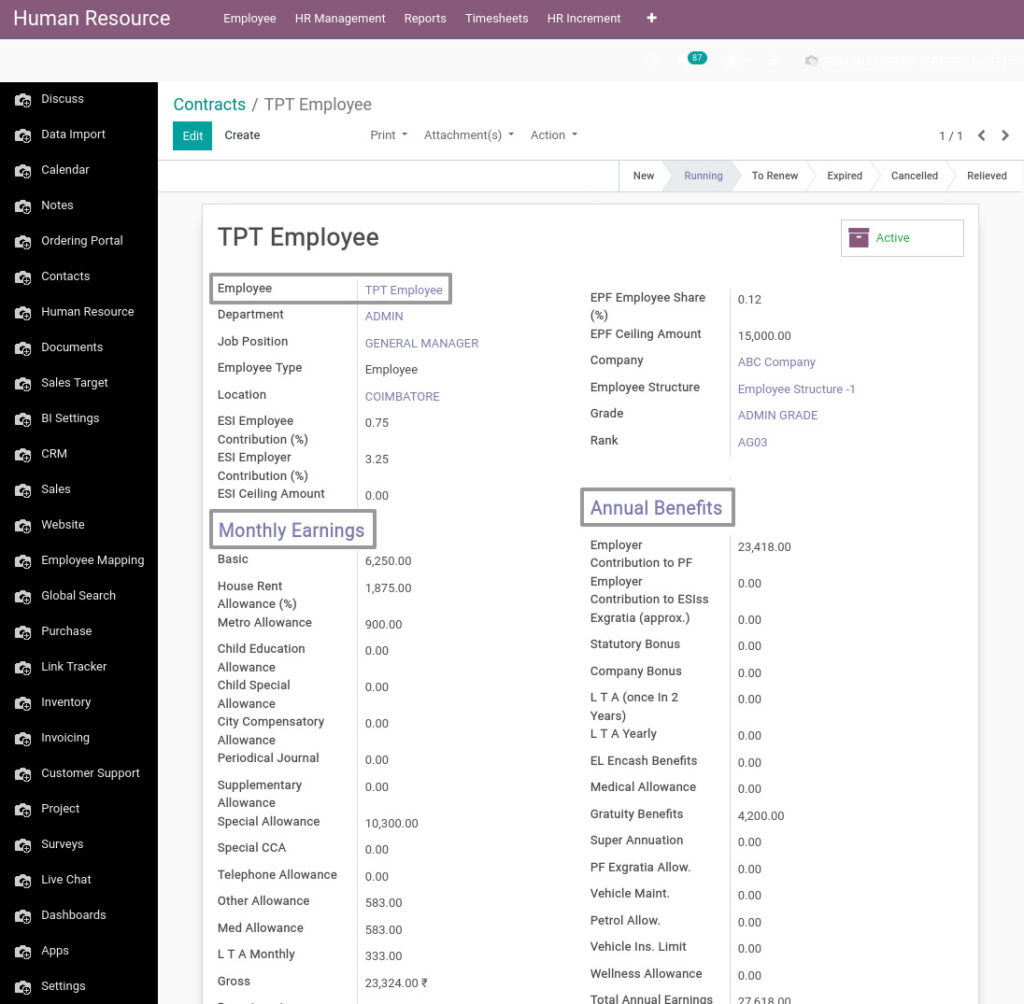
Field Description
- Employee – Enter the name of the Employee
- Monthly Earnings – Enter the month earnings of the employee
- Annual Benefits – Enter the annual benefits of the employee
NOTE – Monthly Earning and Annual Benefits are automatically loads from employee rank.You can also change the monthly earnings and annual benefits.
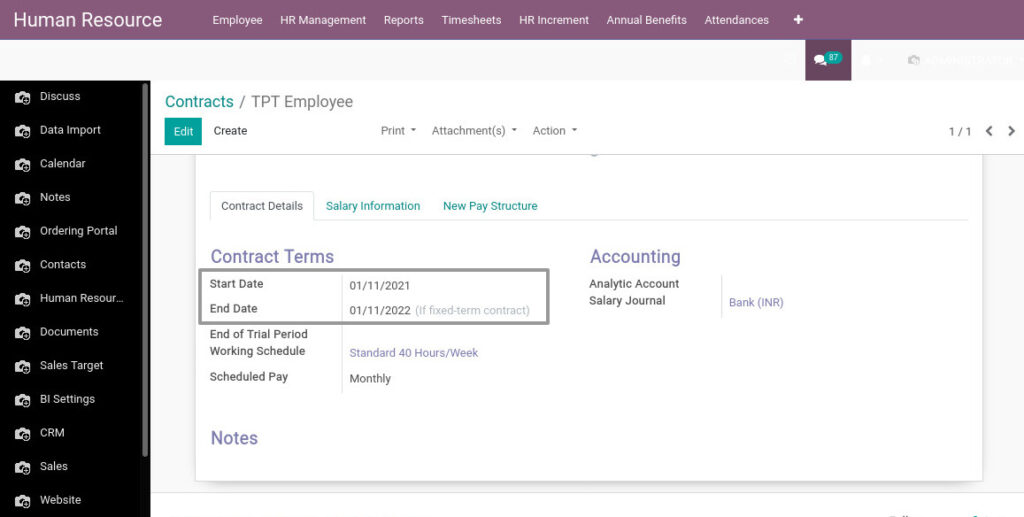
Field Description
- Start Date – Enter the starting date of the contract
- End Date – Enter the end date of the contract
10. Manage Contract Types
Define the contract types to find to whom we have what type of contracts. You can create many contracts as you need.
Go to Human Resource → Click on Configuration → Select Contract types
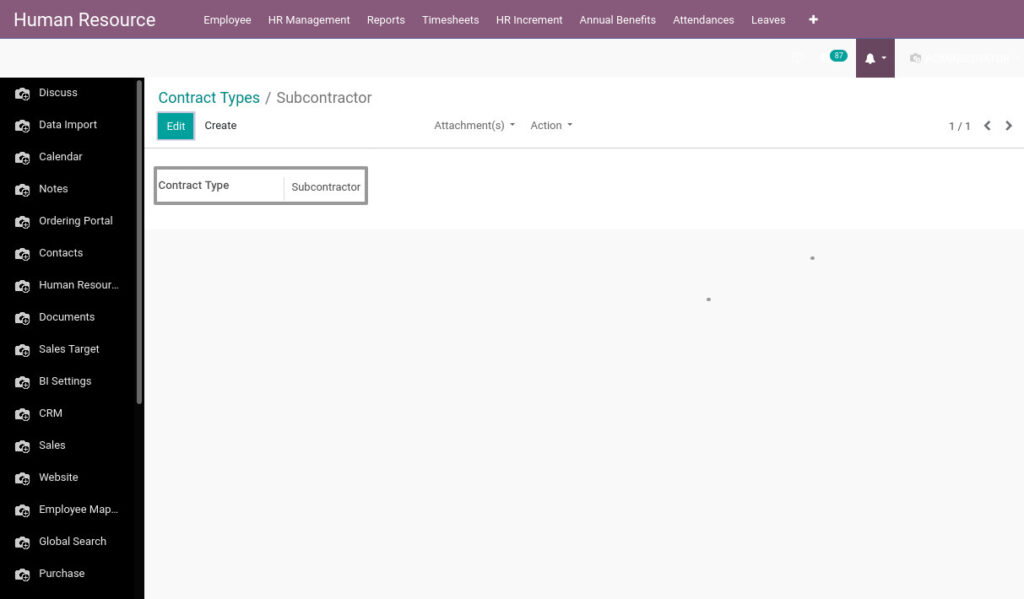
Field Description
- Contract Type – Enter the name of the contract type
11. Manage Employees
Create an employee and manage all his/her details in one place. You can create many employees for those who work for you.
Go to Human Resource → Click on Employee → Select Create
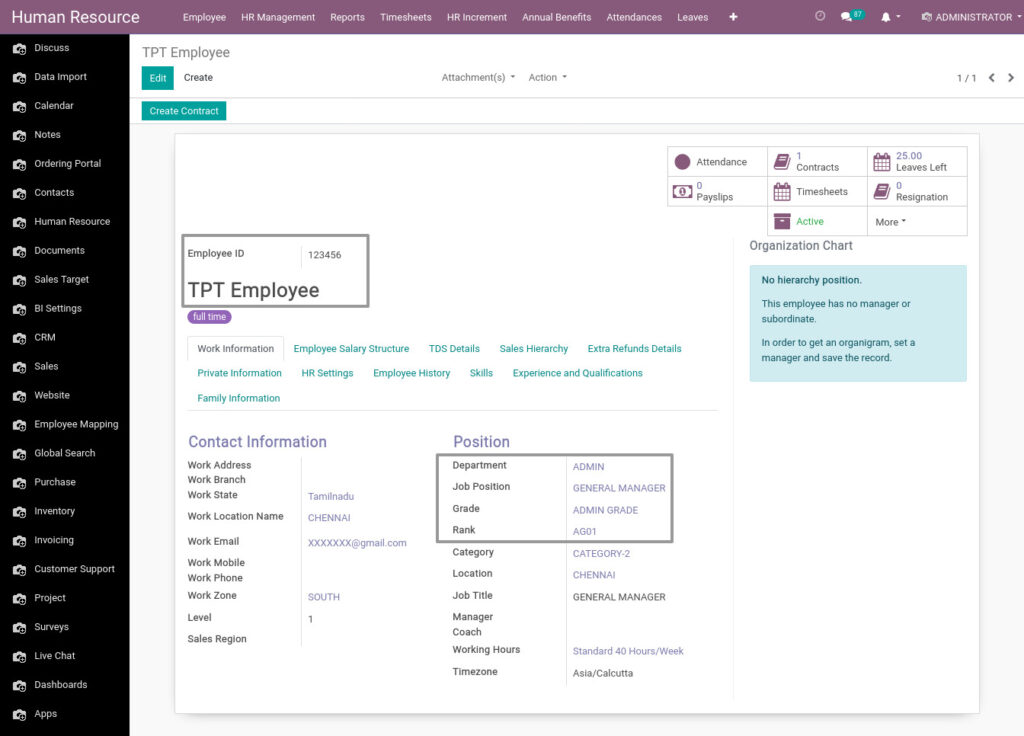
Field Description
- Employee ID – Enter an ID number for the employee
- TPT Employee – Enter the name of the employee
- Department – Select the employee’s department
- Job Position – Select the employee’s job position
- Grade – Select the employee’s grade
- Rank – Select the employee’s rank
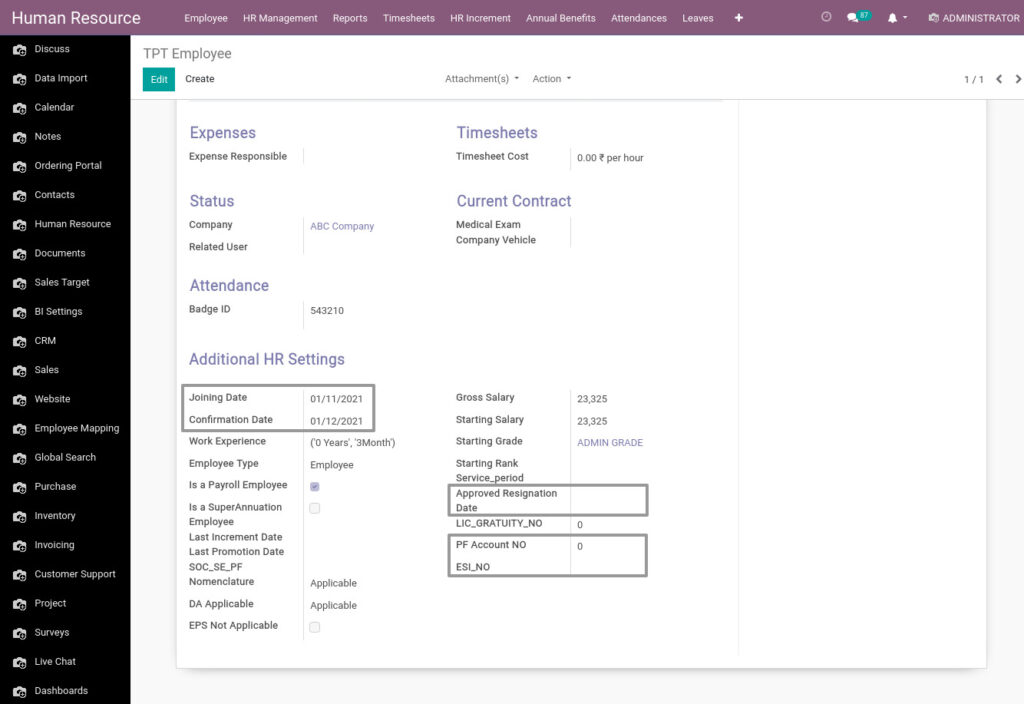
Field Description
- Joining Date – Enter the joining date of the employee
- Confirmation Date – Enter the confirmation date of the employee
- Approved Resignation Date – Date of resignation of the employee approved by the company
- PF Account No – Enter the PF account number of the employee
- ESI No – Enter the ESI number of the employee
12. Manage Employee’s Family
Manage the family details of the employees. So, you can contact the employee’s family in case of emergency.
Go to Human Resource → Click on HR Management → Select Employee Family Details
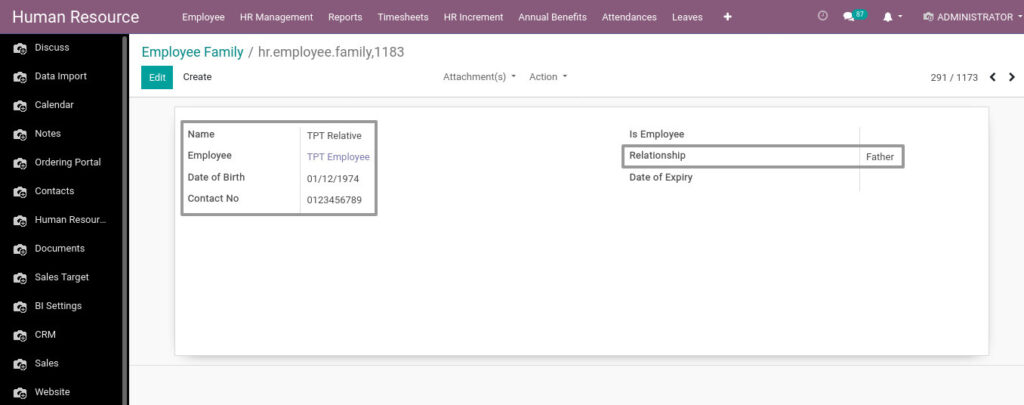
Field Description
- Name – Enter the name of the person who related to employee
- Employee – Enter the name of the employee
- Date of Birth – Date of birth of the person who related to employee
- Contact No – Enter the contact number of the person who related to employee
- Relationship – Enter the relationship between the employee and the person who related to employee
13. Manage Degrees
We can add a list of the degree we want. Therefore, we can easily choose the degree of the employee.
Go to Human Resource → Click on Configuration → Select Degrees
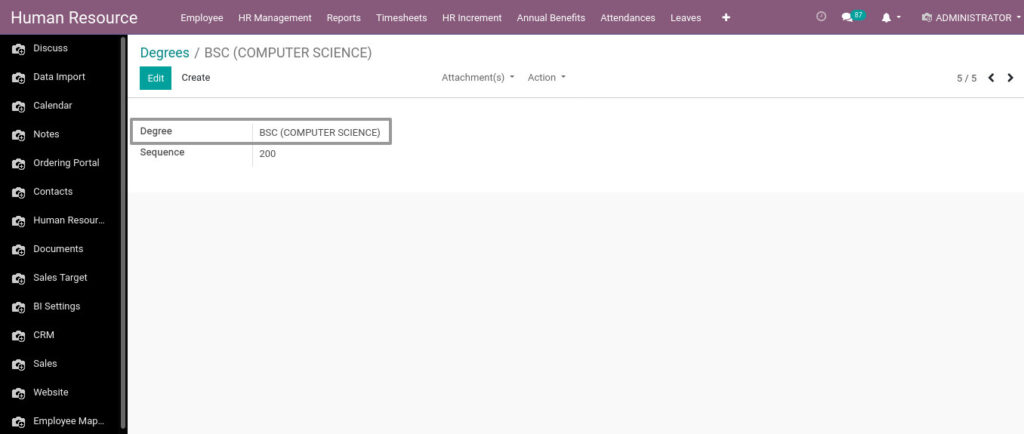
Field Description
- Degree – Enter the name of the degree
14. Manage Institute
We can add a list of the institute we want. Therefore, we can easily choose the institute of the employee.
Go to Human Resource → Click on Configuration → Select Institute
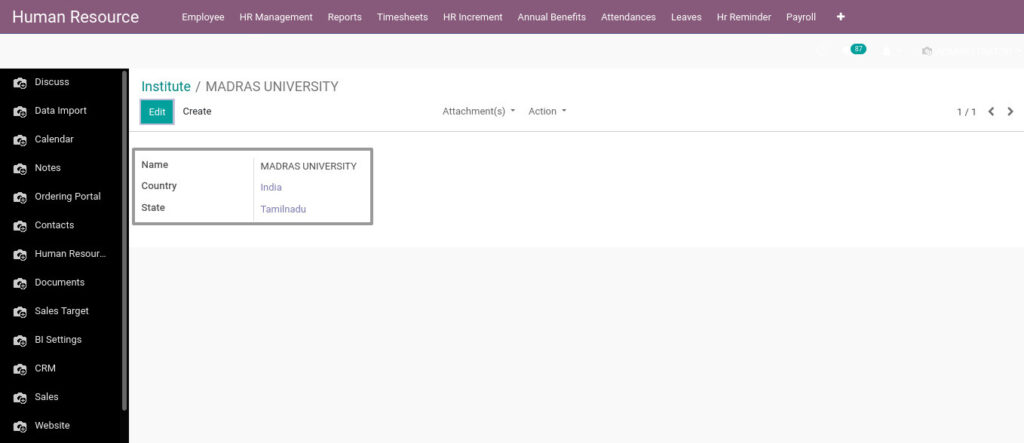
Field Description
- Institute – Enter the name of the institute
15. Manage Certifications
We can add a list of certified courses we want. Therefore, we can easily select the certified course of the employee.
Go to Human Resource → Click on Configuration → Select Certifications
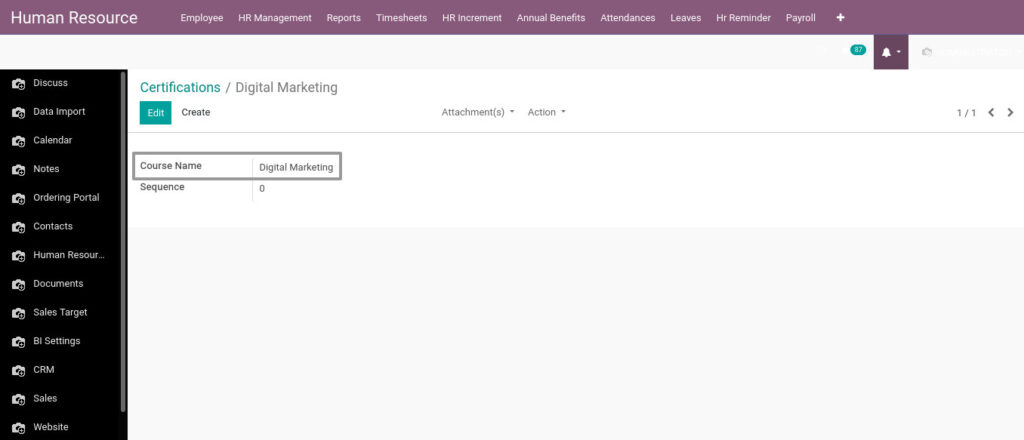
Field Description
- Course Name – Enter the name of the course
16. Manage Technical Skills
We can add a list of technical skills. So, the employee can easily select the technical skill he/she had.
Go to Human Resource → Click on Configuration → Select Technical Skills
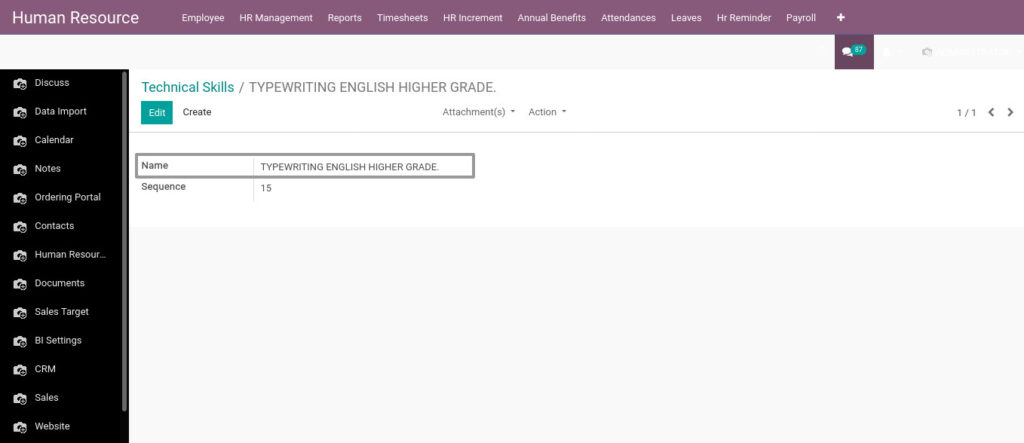
Field Description
- Name – Enter the name of the technical skill
17. Manage Non-Technical Skills
We can add a list of non technical skills. So, the employee can easily select the non-technical skill he/she had.
Go to Human Resource → Click on Configuration → Select Non Technical Skills
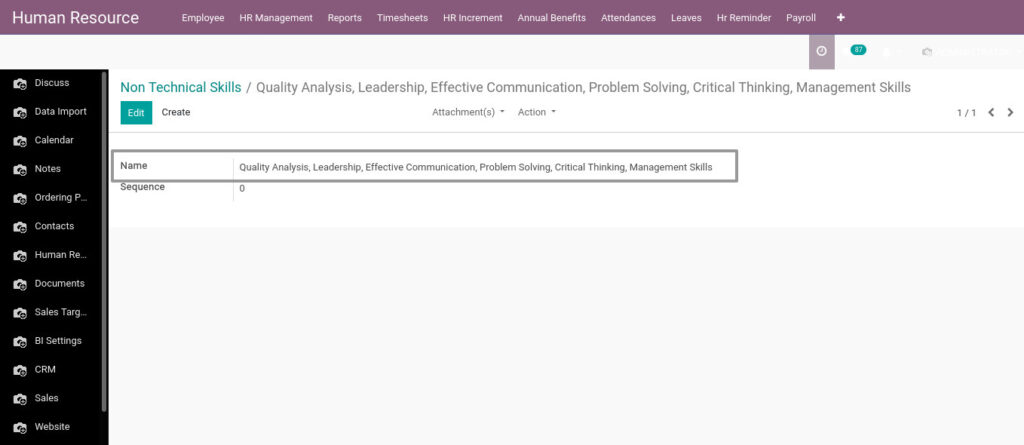
Field Description
- Name – Enter the name of the non technical skill
18. Manage Employee Banks
Manage the details of the bank, where the employees had their bank account.
Go to Human Resource → Click on HR Management → Select Employee Banks
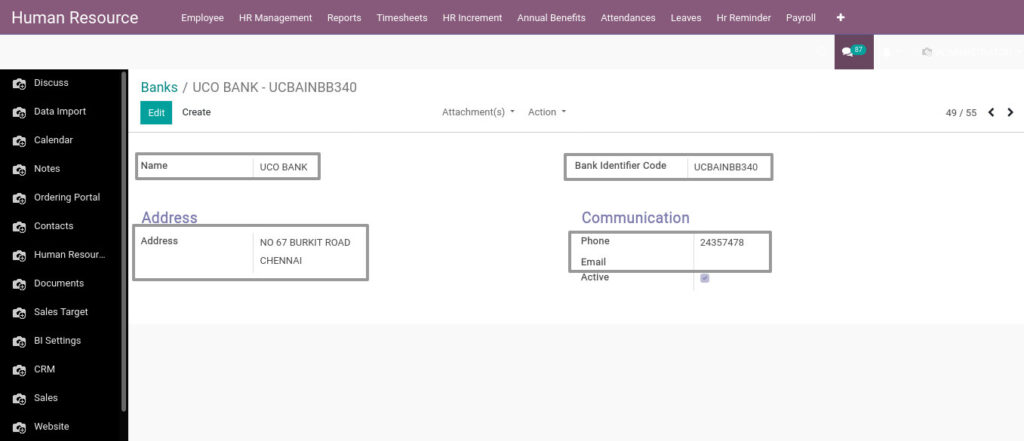
Field Description
- Name – Enter the name of the bank
- Bank Identifier Code – Enter the bank identifier code
- Address – Enter the address of the bank
- Phone – Enter the phone number of the bank
- Email – Enter the email address of the bank
19. Manage Employee Bank Accounts
Manage the employees bank accounts to debit their salary in their accounts.
Go to Human Resource → Click on HR Management → Select Employee Bank Accounts
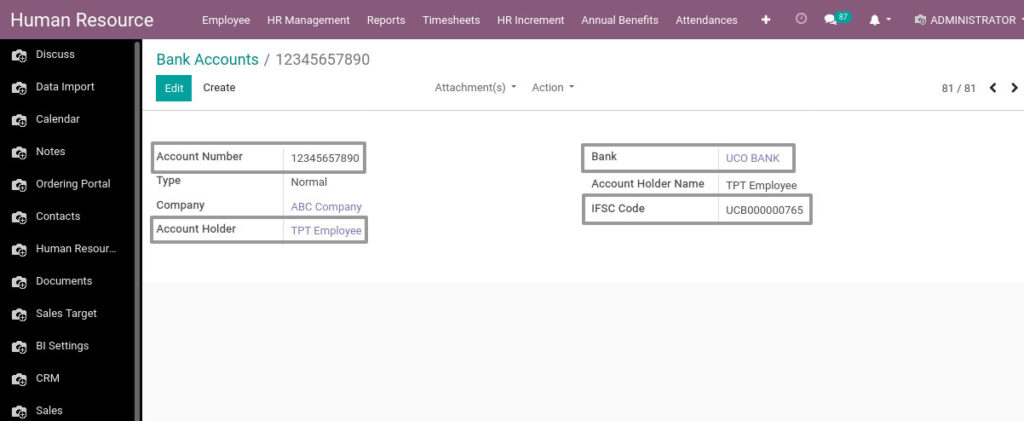
Field Description
- Account Number – Enter the account number
- Account Holder – Enter the account holder name
- Bank – Enter bank name
- IFSC Code – Enter the IFSC code of the bank
20. Manage Leave Allocation
Manage the leave allocate request of the employee and allocate the leaves to employees.
Go to Human Resource → Click on Leaves → Select Allocations
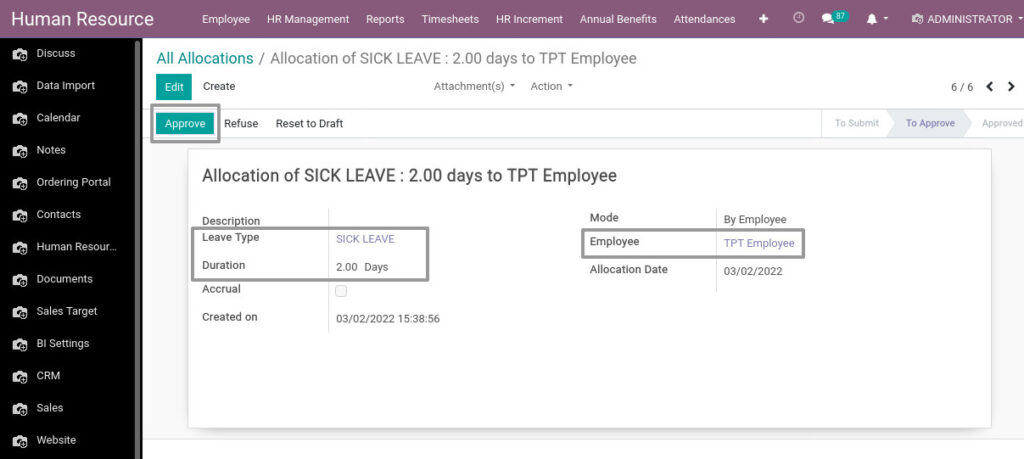
Field Description
- Approve – Click Approve button to approve the leave allocation
- Leave Type – Select the leave type
- Duration – Enter leave duration
- Employee – Enter the employee name
21. Manage Leave Types
Create the leave types. So, you can allocate the different types of leave on the employees.
Go to Human Resource → Click on Configuration → Select Leave Types
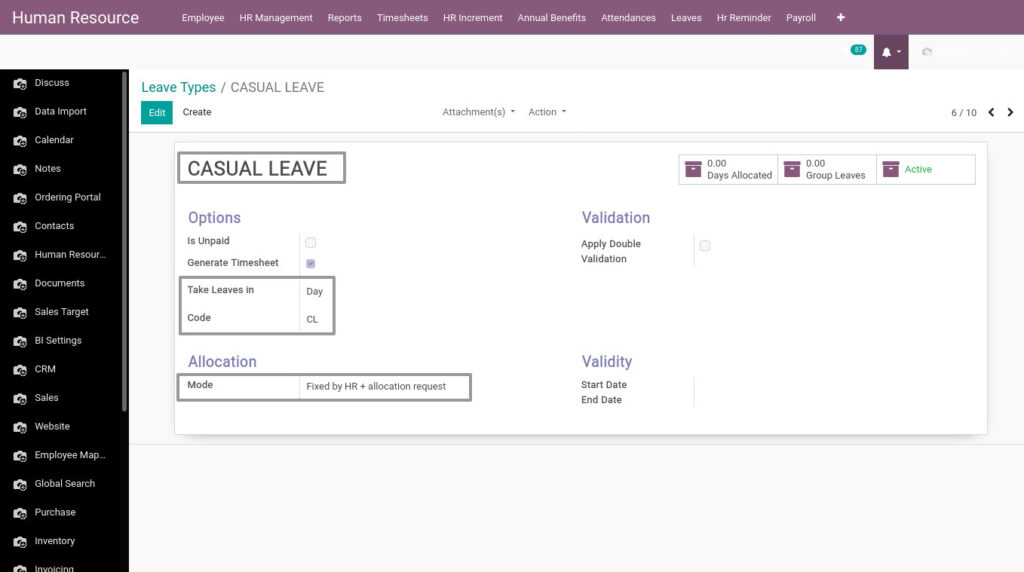
Field Description
- Casual Leave – Enter the name of the Leave type
- Take Leaves in – Select the leave takes in
- Code – Enter the code for the leave type
- Mode – Select the allocation mode
22. Manage Allowance Categories
Create allowance categories based on employees’ location. So, you can add allowance to employee according to the location.
Go to Human Resource → Click on HR Management → Select Allowance Categories
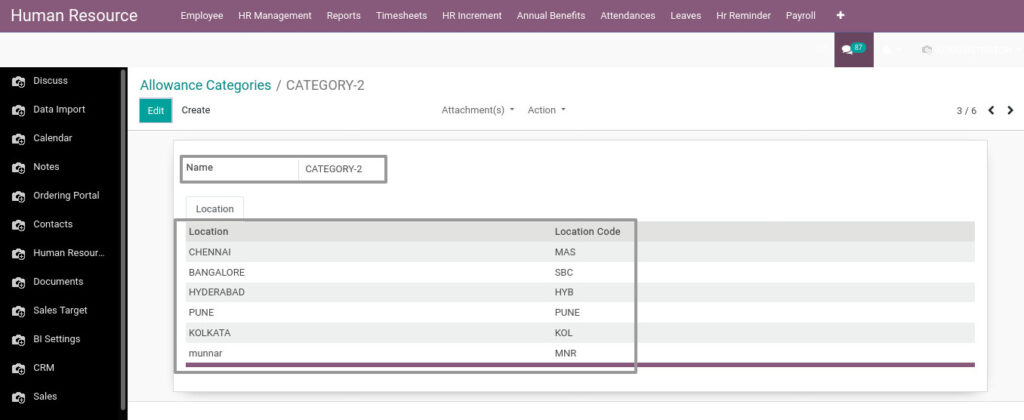
Field Description
- Name – Enter the name of the allowance categories
- Location – Select the location which want to add in allowance location
- Location Code – Enter the location code
23. Manage Employee Allowance
Create the employee allowance. So, you can control/manage the employee allowance.
Go to Human Resource → Click on HR Management → Select Employee Allowance
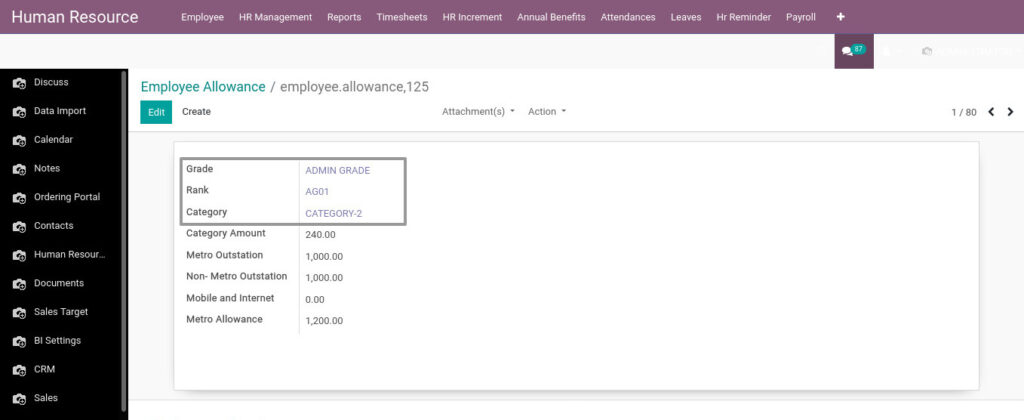
Field Description
- Grade – Select the grade
- Rank – Select the rank which the grade belongs
- Category – Select the category which the rank belongs
