How to process Lot Products order in Odoo POS?
In Odoo POS, to process an order for lot products (i.e Branded or Unbranded Products), first add the product to the order in the POS interface and select the specific lot or serial number. Then confirm the quantity and proceed to complete the payment. Once the order is validated, the stock for the selected lot is automatically updated.
Branded & Unbranded Product Identification and in Odoo POS Cart Management
In Odoo, a product is considered branded when it is linked to a brand in the Product Master and the ‘Unbranded’ checkbox is disabled. Branded products are handled consistently across the system. For ‘Unbranded’ products “Unbranded” checkbox is enabled

Quantity Handling for Branded & Unbranded Products in Odoo POS
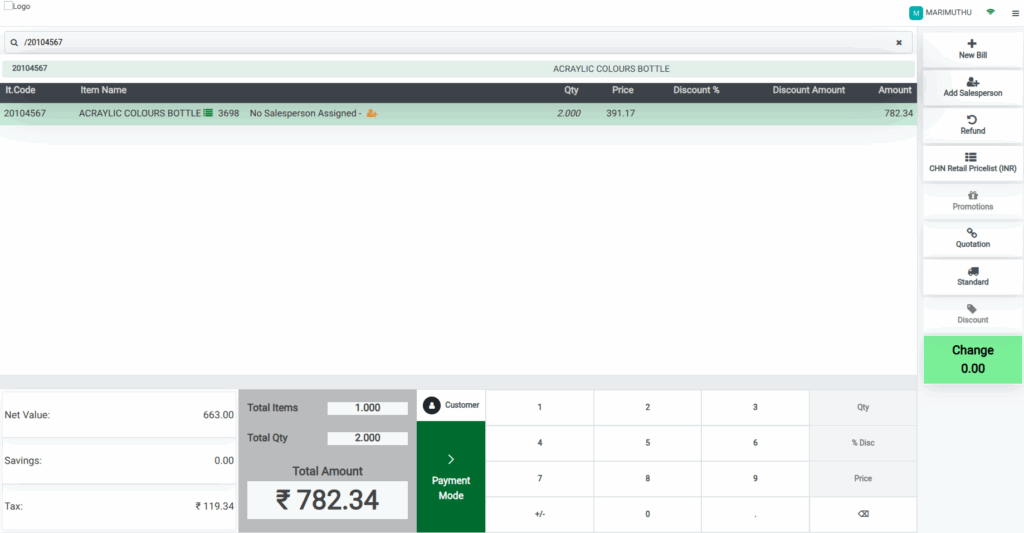
To add them to the POS cart, open the POS screen and use a product code, scan the Barcode/EAN, or scan the lot barcode for tracked items, with each scan automatically increasing the product quantity.
Branded & Unbranded products in Odoo use the PC (Piece) unit, allowing only whole numbers, which can increase with scans or be adjusted manually for accurate inventory tracking.
Pricing, Amount Calculation, and MRP-Based Products
Each product in the POS cart shows its selling price, with the amount calculated automatically. For MRP-based products,when MRP is greater than selling price,then savings are displayed ensuring pricing transparency.
Lot with Landed Cost based Products for Unbranded Products
Some unbranded products in the system are set as Lot with Landed Cost, and their sales price is calculated accordingly and shown in the price field. For these products, the savings displayed in the POS cart will always be zero.
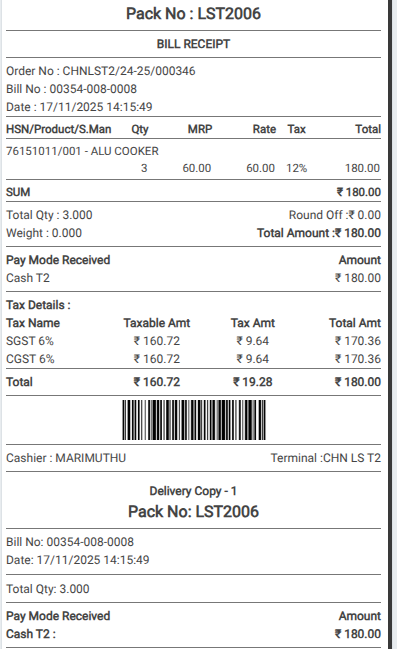
Cart Verification, Payment, and Bill Receipt
Before proceeding to payment, all items in the cart should be reviewed, including product name, quantity, selling price, total amount, and any applicable savings. To complete the sale, click the Payment Mode button or press F4 to open the payment screen, choose the preferred payment method, and click Validate or press Alt + V to confirm.
Once the payment is successful, a bill receipt is printed, showing total quantity in pieces, MRP if applicable, selling price per piece, any savings, and all other required fields, providing a clear record of the transaction for both the cashier and the customer.