How to create a New Warehouse & Location in ADempiere Retail
Warehouse & Location setup refers to configuring the physical or logical storage structure for managing inventory. It helps track where products are stored, received, moved, or dispatched inside a warehouse or multiple warehouses.
User Access
Who Can Access
- Admin
- Back office
- Cashier
What User Can Do
- Create and manage multiple warehouses (Main, Regional, Transit, etc.)
- Define sub-locations or zones (e.g., Aisle A, Bin B1, Rack R2)
- Assign default location for product inward or outward
- Set capacity, category, and access rules for each location
- Enable tracking of product movement between locations
Pre-Requisite Activities
- Finalize warehouse structure (central, regional, transit)
- Assign naming conventions for warehouses and locations
- Identify critical items that need location-wise tracking
- Set up user roles with warehouse/location access permissions
- Configure integration with Inventory, Purchase, and Sales modules
Business Rules
- A product must always be linked to a valid warehouse/location
- Stock movement between locations must generate movement log
- No over-capacity stock can be added if limits are set
- Only authorized users can transfer or modify stock location
- Inventory counting or GRN must happen at the correct location
- Separate rules may apply for FIFO/LIFO per location
- Location-level minimum/maximum quantity setup must be enforced
User Interface
Step 1: Select ‘Warehouse and Locators’ in Menu -> Product Management -> Warehouse and Locators or Search Warehouse and Locators in Lookup.

Step 2 : Click the ‘New Record’ button to create a new Warehouse.

Step 3 : Enter Warehouse Name, Address, Warehouse Type.

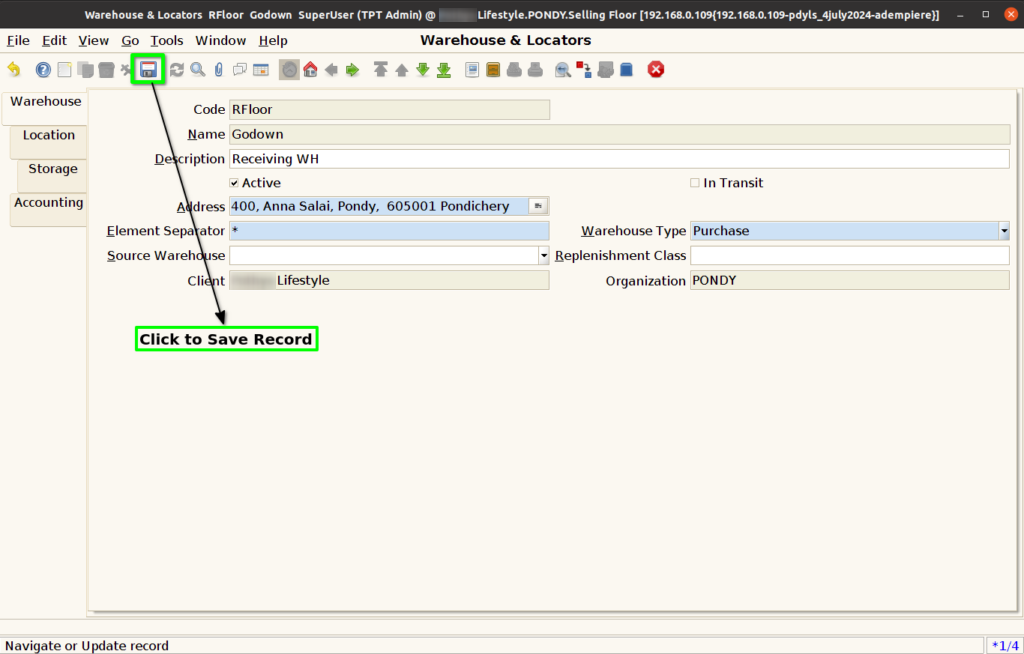
Step 4 : Click the “Save” button to save the Warehouse.
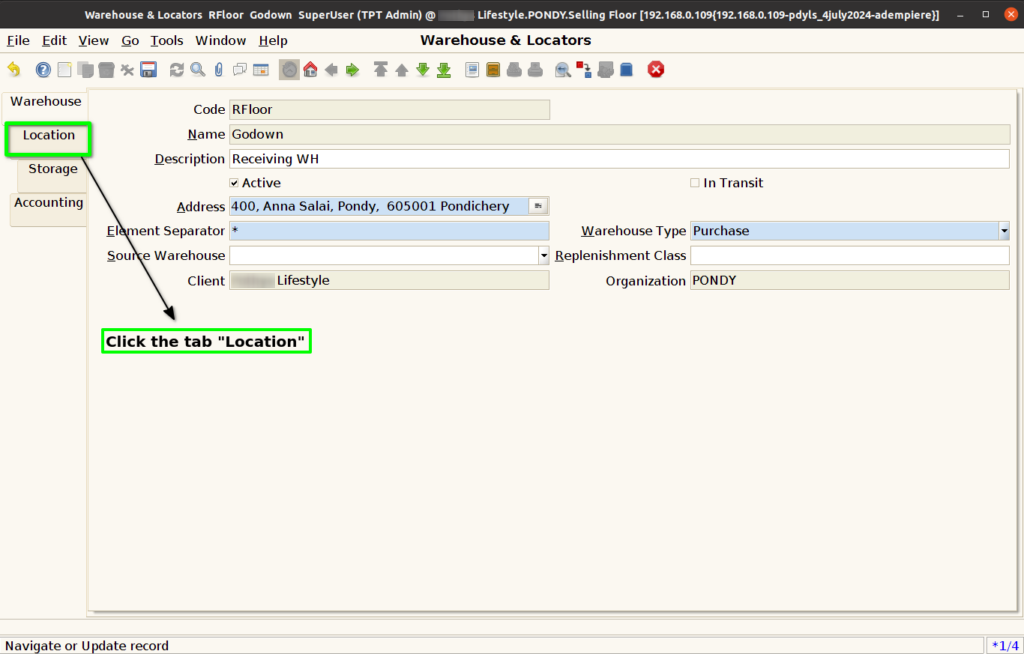
Step 5 : Click Location tab to Create Locator.
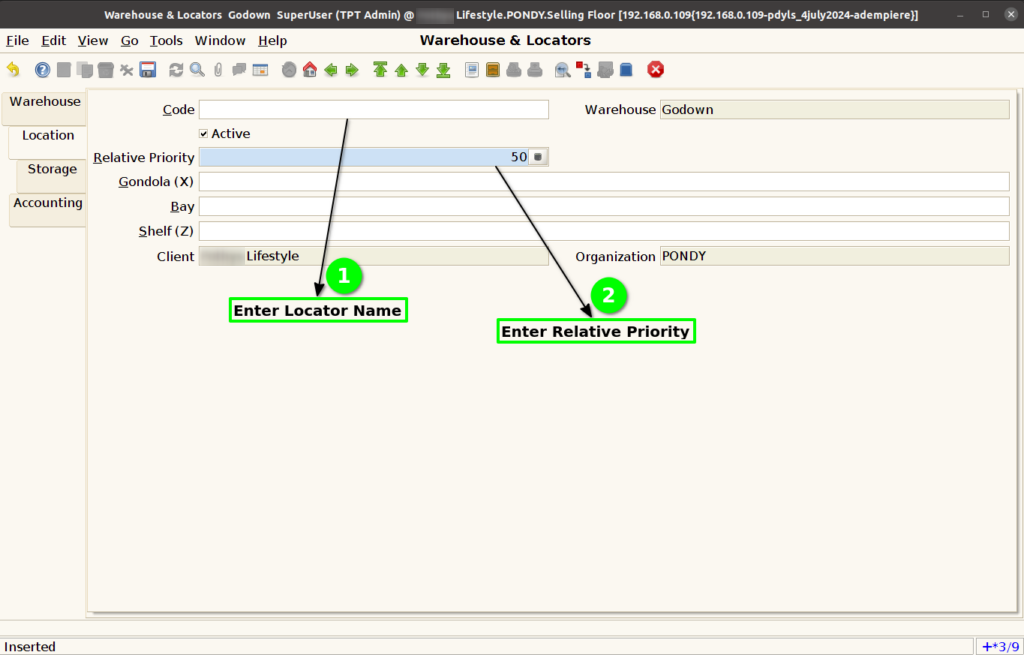
Step 6 : Enter Locator Code and Relative Priority.
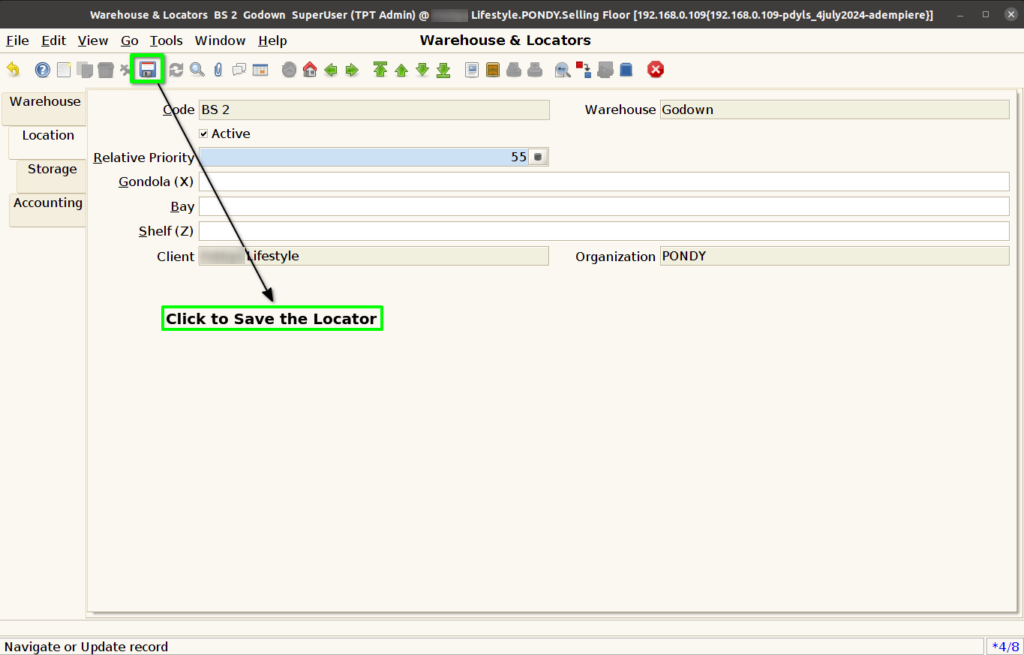
Step 7 : Click the “Save” button to save the Locator.