How to Create Purchase Order in ADempiere Retail
Purchase Orders issued by a buyer (our organisation) to a seller (the vendor). It specific information like product details, quantity, price, vendor details, purchase date, expected delivery date , tax and other product related details. It is also called as PO.
User Access
Who Can Access
- BackOffice
- Purchase Manager
- Manager
- Admin
What User Can Do
- Create PO
- Edit PO
- Void PO
Pre-Requisite Activities
- Vendor and item master should be created
- Tax and charge structure should be defined
- PO numbering and format should be configured
- User roles and permissions should be granted
Business Rules
- PO must have a unique number and valid vendor
- Only authorized users can approve or cancel
- PO can be edited only before approval
- GRN and invoice should match PO for validation
- Cancelled or expired POS cannot be used for receiving goods
User Interface
Step 1 : Select ‘Purchase Order’ in Menu -> Purchase Management -> Purchase Order OR Search Purchase Order in Lookup.

Create Purchase Order
Step 2 : Click the ‘New Record’ button to create a new purchase order.
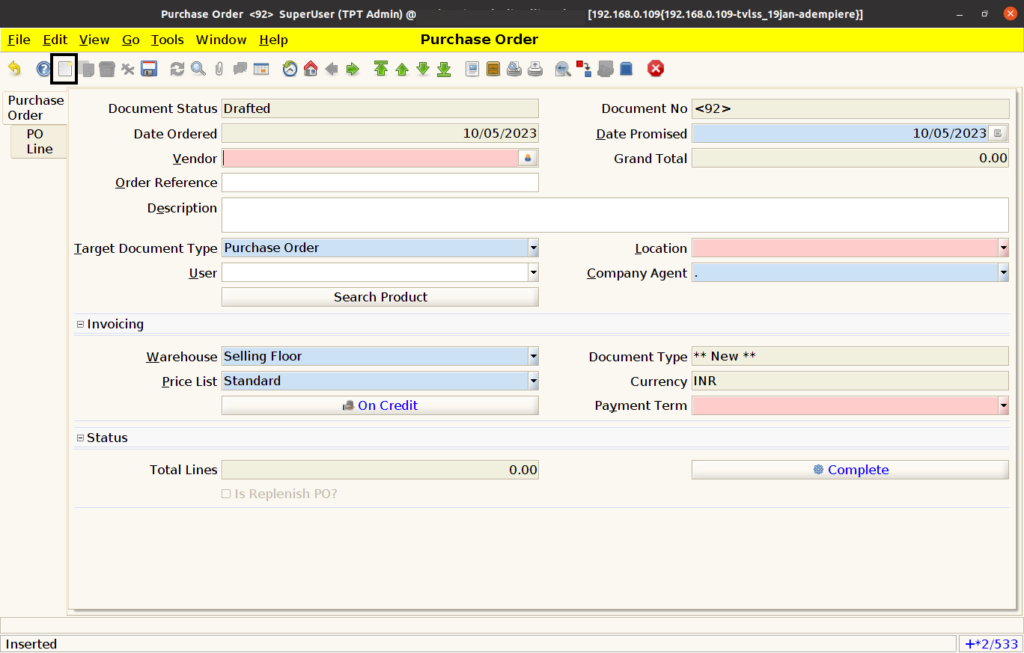
Step 3 : Enter Below Info
- Select vendor in the ‘Vendor’ field.
- Select vendor’s location int the ‘Location’ drop down field.
- Select company agent in the ‘Company Agent’ drop down field.
- Select payment term in the ‘Payment Term’ drop down field.

Step 4 : Fill the mandatory fields and Save the document, Document No will be generate.
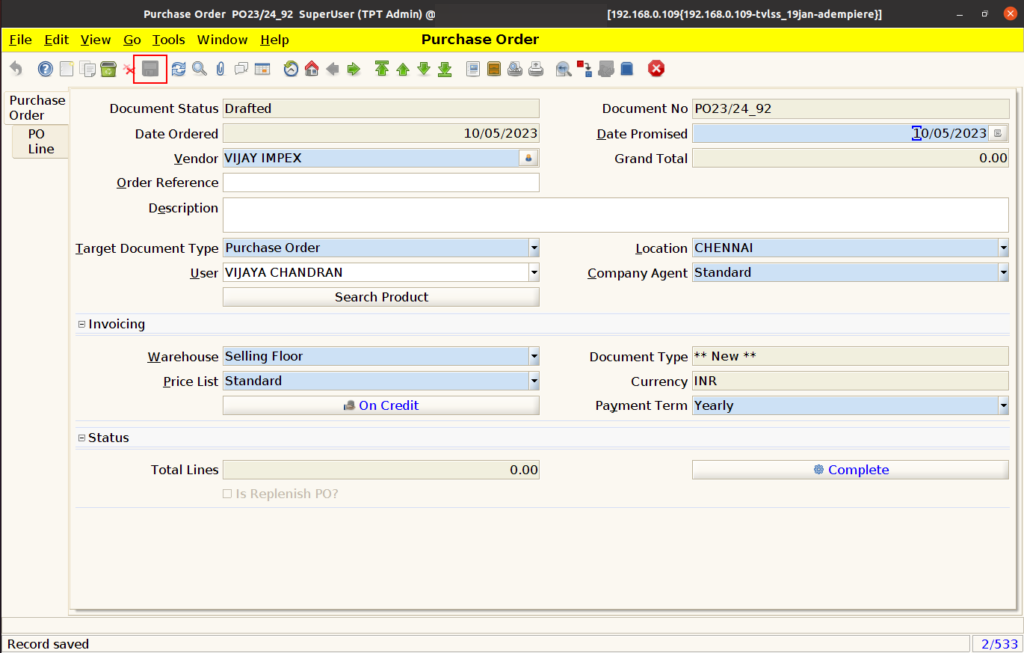
Step 5 : Click ‘Search Product’ button.

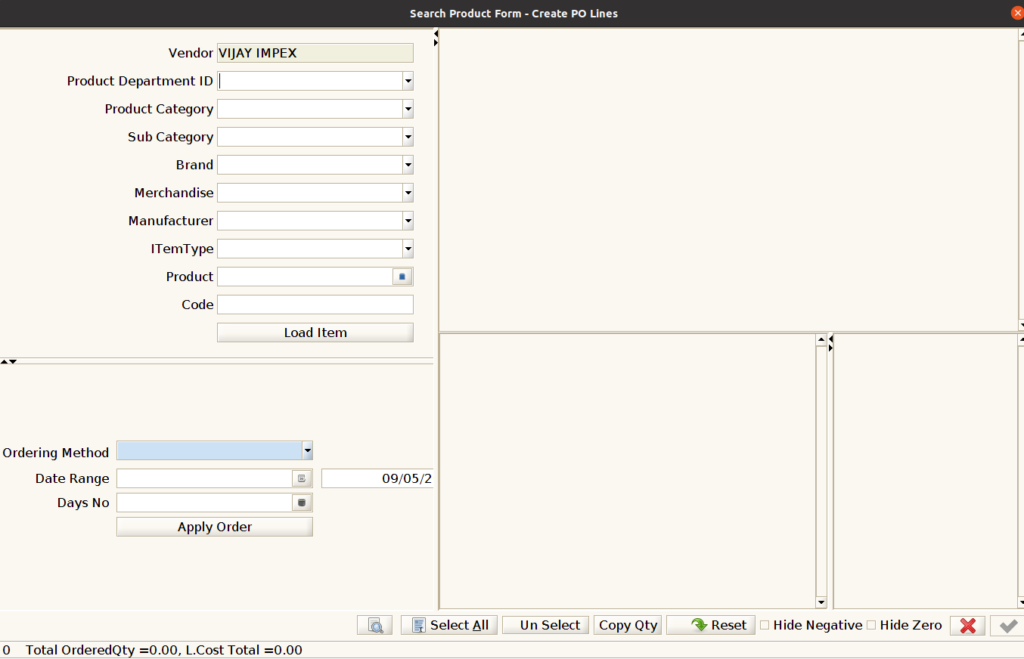
Step 6 : Click ‘Load Item’ button.

Step 7 : Select the product and assign the quantity in the ‘Order Qty’.

Step 8 : Check the selected product and then click ‘Ok’

Step 9 : The selected product details will appear in the ‘PO Line’ tab.
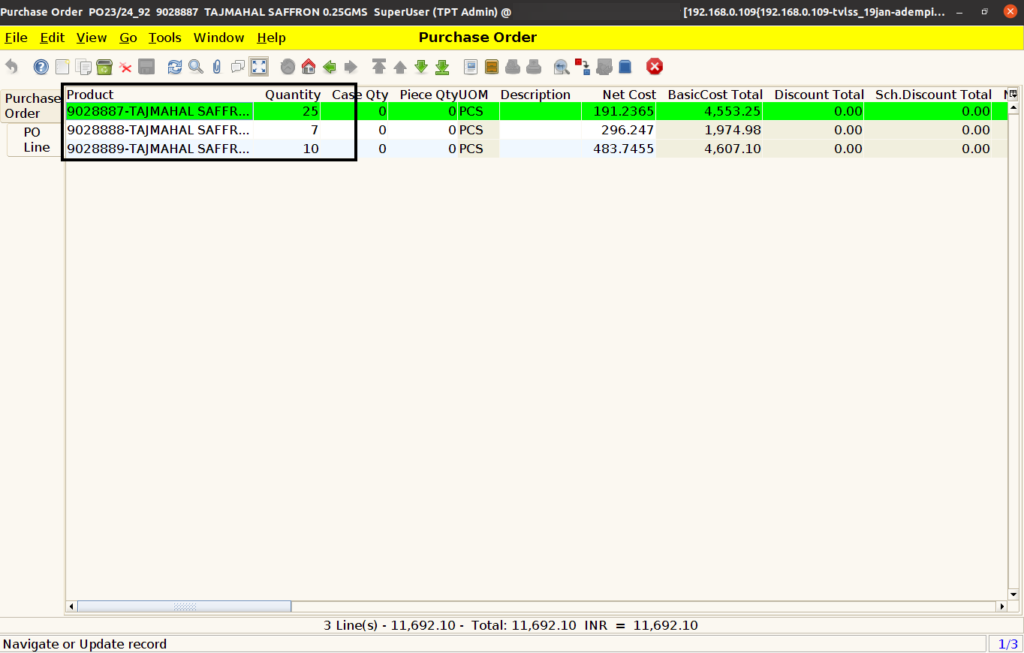
Step 10 : User can also select the product in ‘PO Line’ by creating the new record.
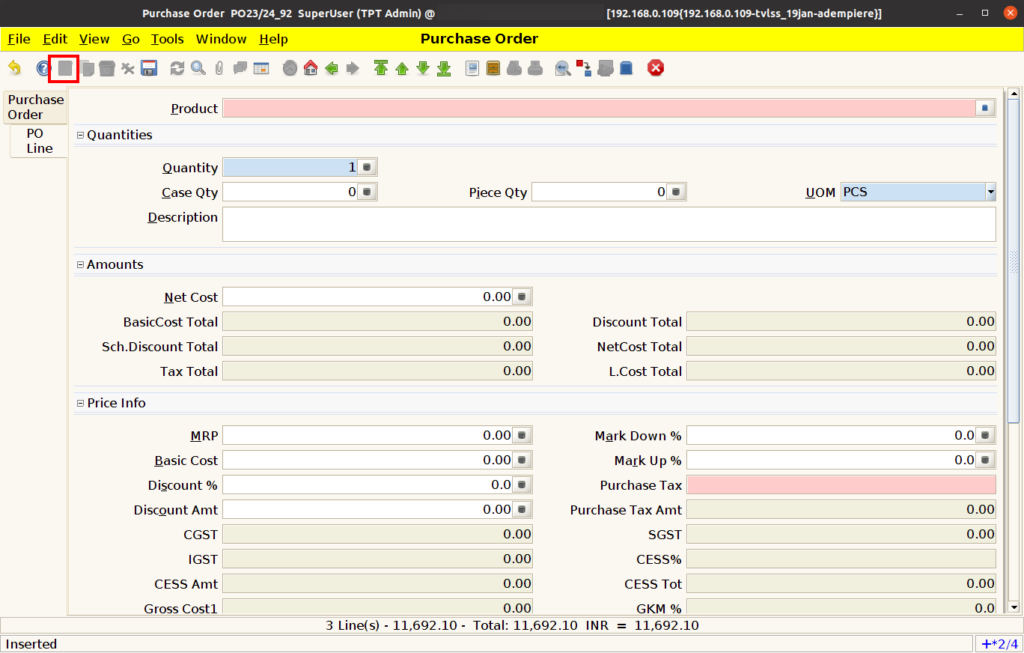
Step 11 : User can select the product in the ‘Product’ field by clicking the icon in the right side of the field or user can search the product based Product Code Using or user can search the product based Product Name Using @.

Step 12 : Select the product in the ‘Product Info’ window based on the selected vendor and click ‘Ok’.


Step 13 : Enter Below info after product select
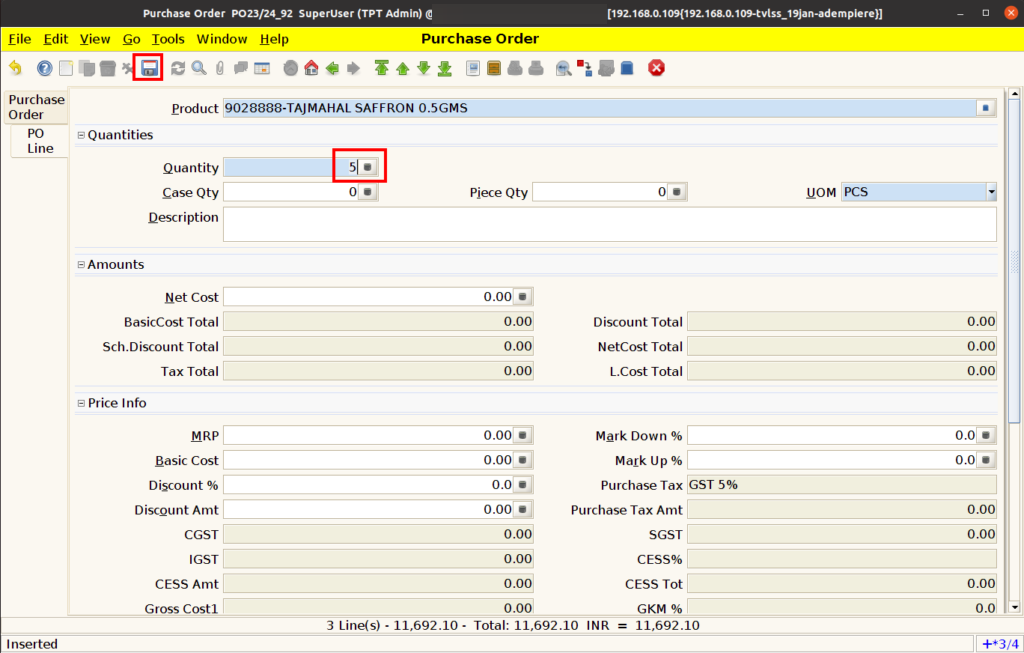
- Enter the product qty in the ‘Quantity’ field.
- Then click ‘Save’ button and the rest of the field will be auto-calculated.

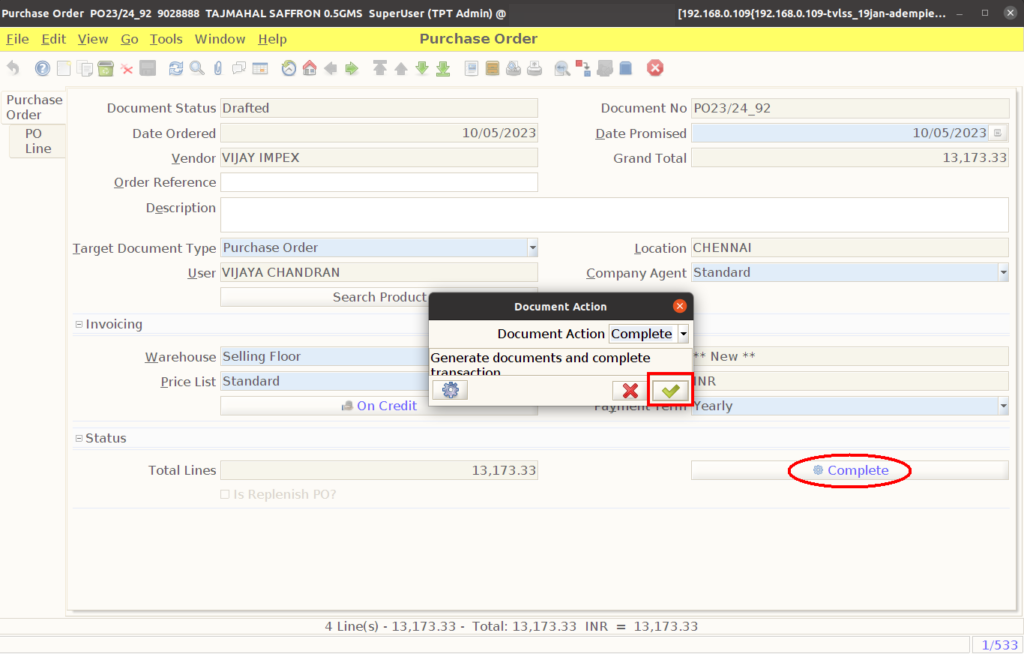
Step 14 : Switch to the ‘Purchase Order’ tab and the click the ‘Complete’ button to complete the document.
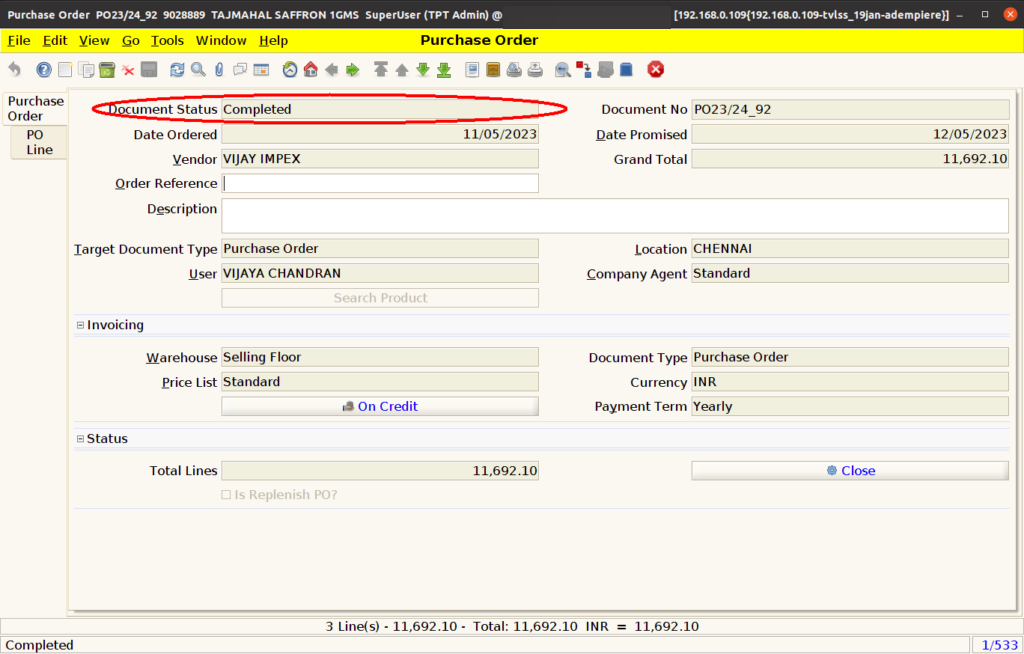
Step 15 : The ‘Document Status’ is changed into ‘Completed’ state.
Step 16 : Once the Document completed user can print Preview the PO by clicking the “Print Preview” Icon

Step 17 : User can print the document by clicking the “Print” Button
Step 18 : User can mail the document to vendor by clicking the “Send Mail” Button
Step 19 : Click ‘OK’ button to send PO mail