How to give Discount to a POS Bill in ADempiere Retail
POS Bill Discount (accessed with the shortcut ALT + D on the billing screen) lets the cashier apply a bill-level discount to the entire invoice—rather than to individual items. It’s typically used for customer goodwill, special campaigns, or manager-approved concessions.
User Access
Who can access
- Cashier
What User can do
- Open discount window (usually using ALT+D or a dedicated button)
- Select discount type:
- Flat Amount (e.g., ₹100 off)
- Percentage (e.g., 10% off the total)
- Enter the discount value
- Select or enter a discount reason (optional or mandatory as per policy)
- Apply and save the bill
Pre-Requisite Activities
- Define user access rights for discount permission
- Configure maximum discount limits per role (Cashier, Manager, Supervisor)
- Maintain master list of discount reasons
- Enable discount option in POS settings
- Make sure tax and rounding rules are configured properly
Business Rules
- Only authorized users can apply discounts
- Discounts should not exceed defined limits unless overridden by higher role
- Reason code must be selected before applying discount (if required)
- Tax must be recalculated on the discounted amount
- Full audit log should capture bill number, discount value, reason, user ID, and timestamp
- Items marked as Non-discountable are excluded (if configured)
- In case of return, discount should be proportionally reversed
User Interface
Step 1 : Scanned Product in POS Screen to create new Order

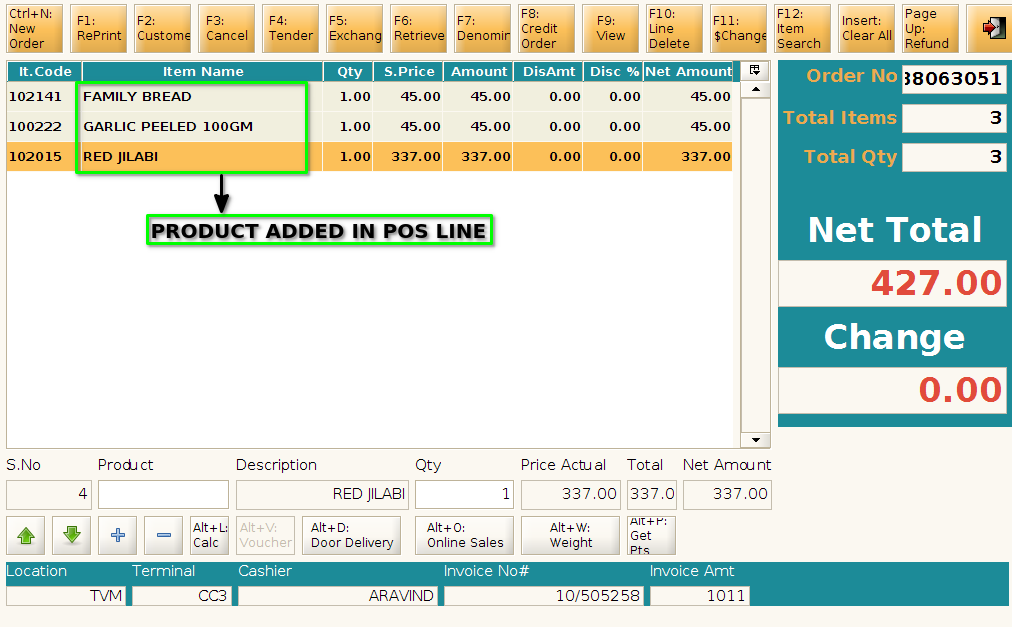
Step 2 : Choose Customer ,Click F2 to open Customer Screen

Step 3 : Enter Customer Details to search the Customer .(for example: customer mobile number)
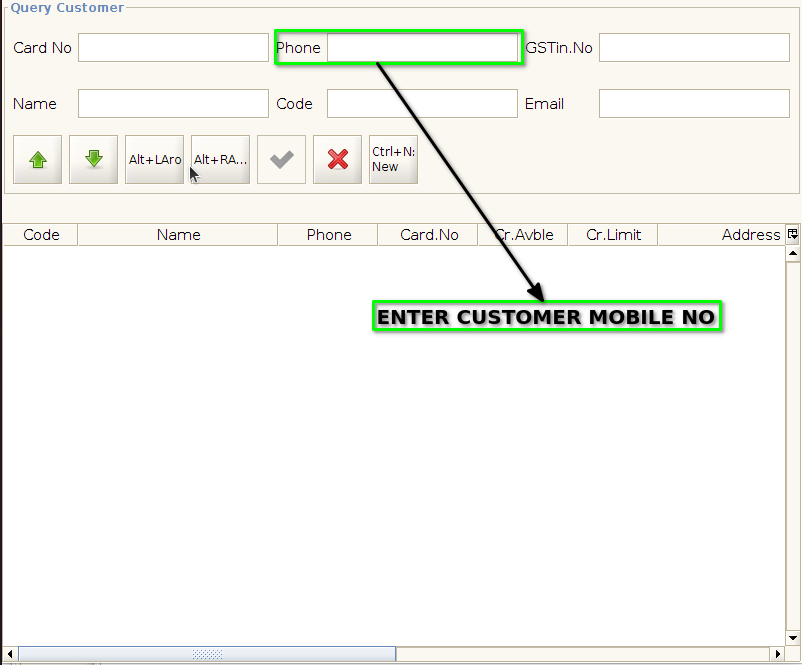
Step 4 : To Select the customer
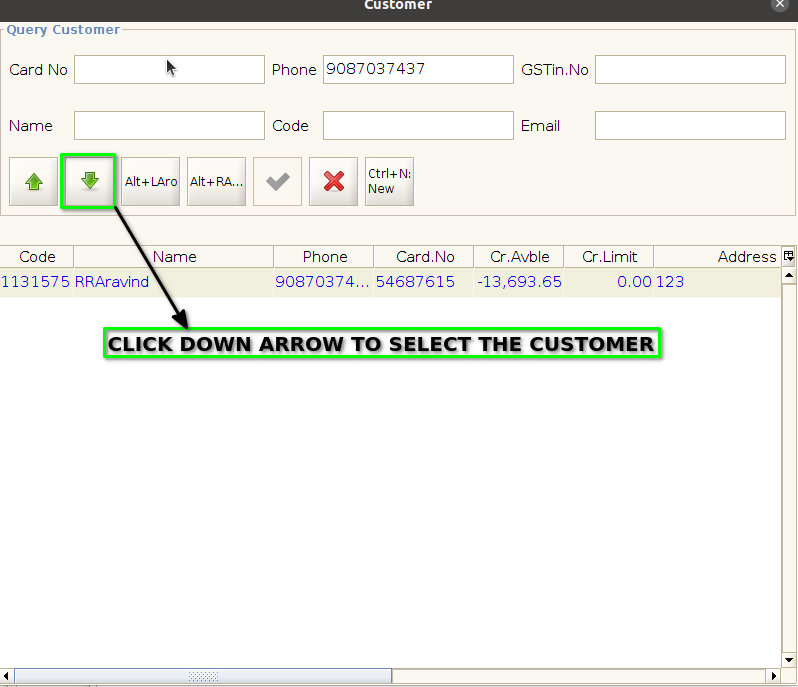
Step 5 : ALT + ENTER to Customer selected

Step 6 : Click F4 to Payment
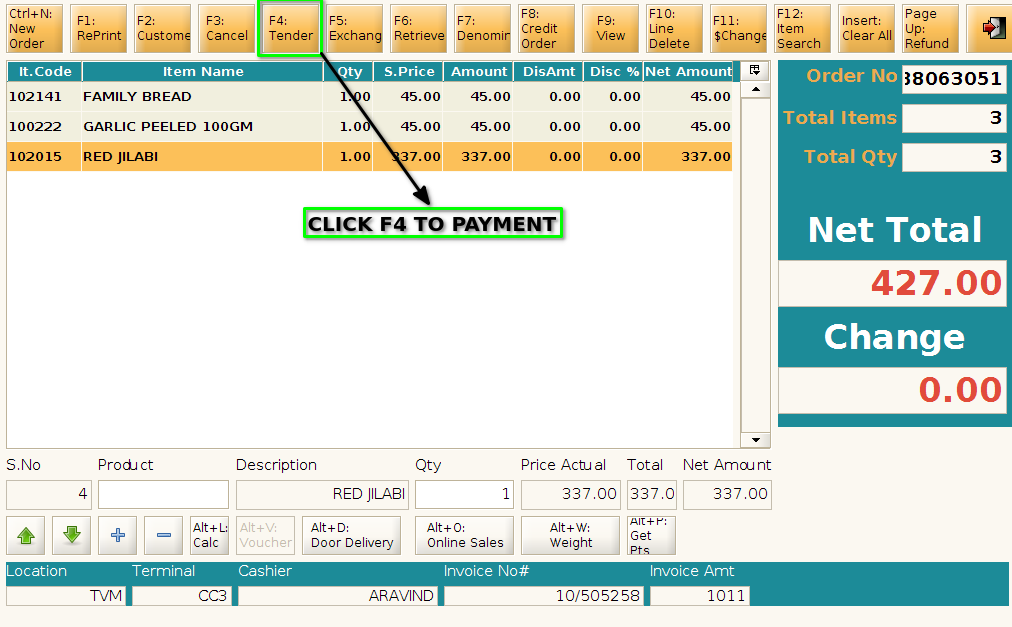
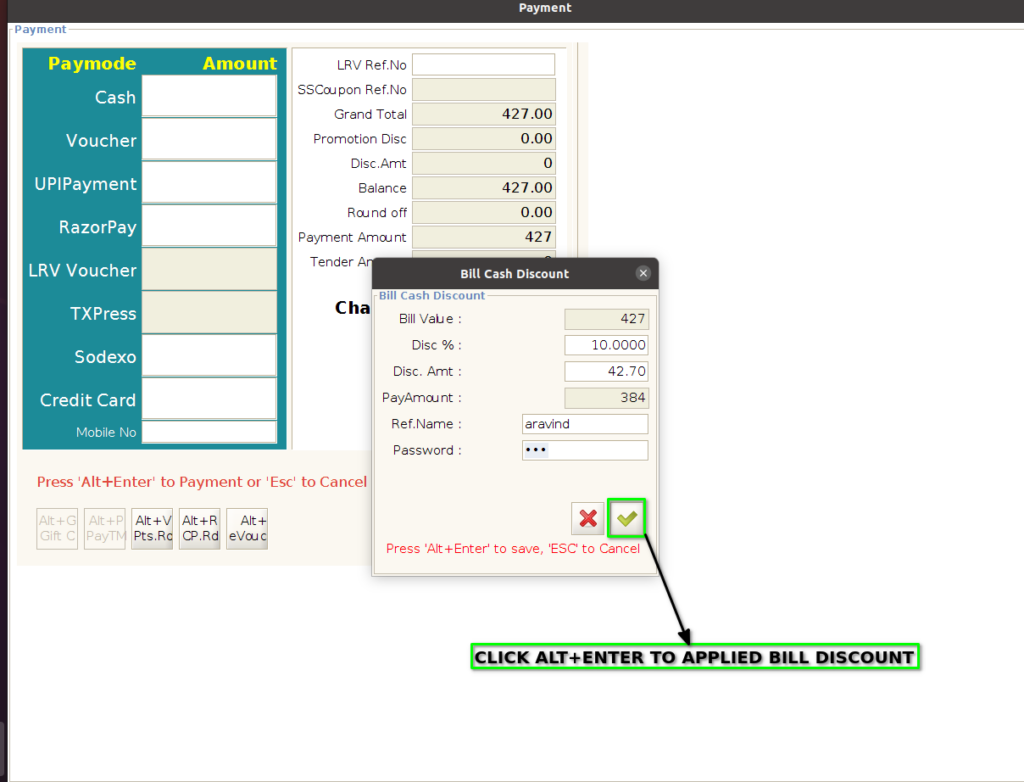
Step 7 : Click Alt+D apply discount

Step 8 : Apply the Bill Discount by following steps

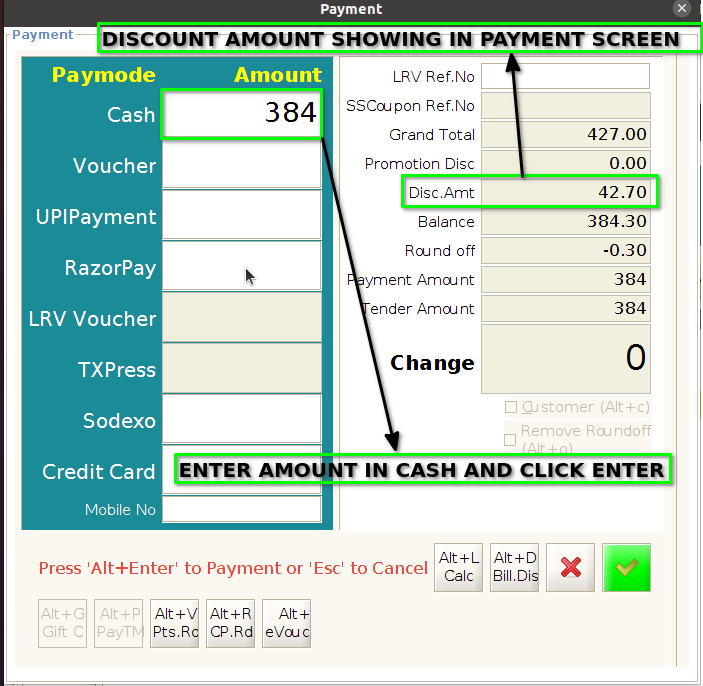
Step 9 : Discount amount showing in Payment screen and complete the payment
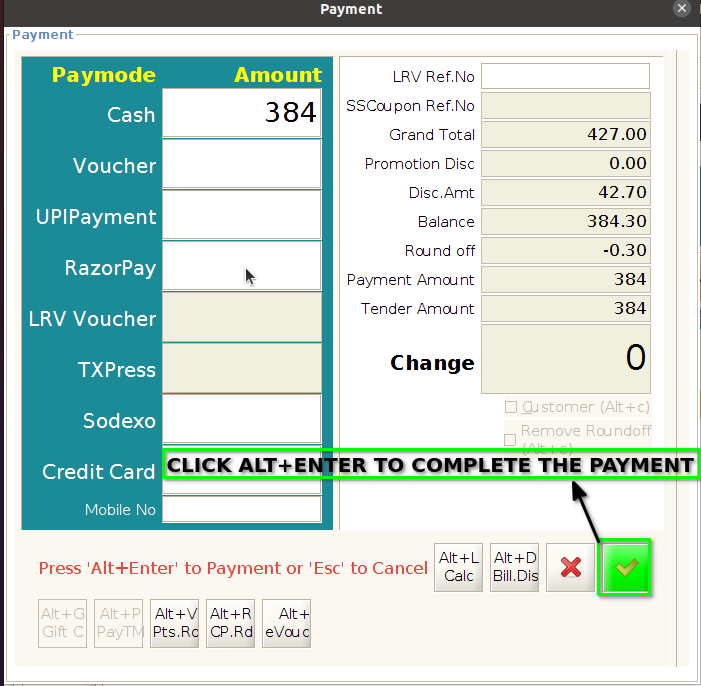
Step 10 : Print out the bill, showing bill discount in bill print