How to Create GRN With PO in ADempiere Retail
GRN with PO refers to the process of receiving goods from a vendor based on an existing Purchase Order. It helps verify that the delivered items match the order in terms of quantity, quality, and price, ensuring accurate stock and financial records.
User Access
Who Can Access
- Back Office
- Cashier
- Purchase Manager
- Manager
- Admin
What User Can Do
- Create GRN
- Edit GRN
- Approve GRN
Prerequisite
- Approved Purchase Order must be available
- Vendor, item, and tax master must be properly configured
- PO should not be fully received or closed
- GRN numbering series must be defined
- User must have GRN creation rights
Business Rules
- GRN must be linked to a valid and open PO
- Received quantity should not exceed PO quantity (unless over-receipt is allowed)
- PO cannot be edited after GRN is created
- Price and tax details should match PO unless overridden with approval
- GRN should be approved to make stock available
- Partial receipts must be tracked until full PO is received
User Interface
Select ‘GRN Entry’ in Menu -> Logistics Management -> GRN Entry or Search GRN Entry in Lookup.

GRN Entry Tab
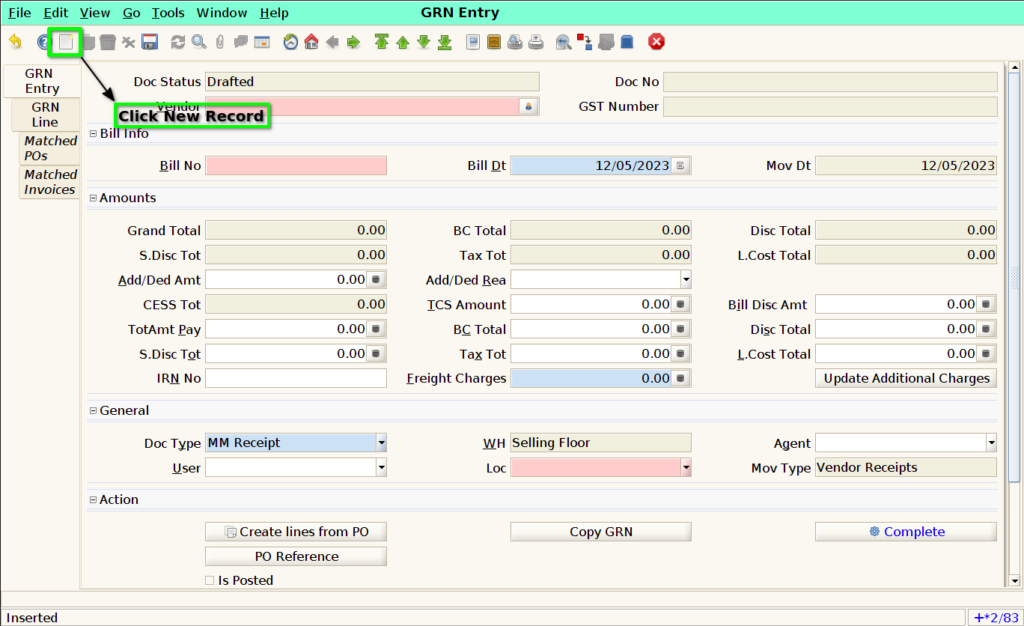
Click the ‘New Record’ button to create a new GRN Entry.
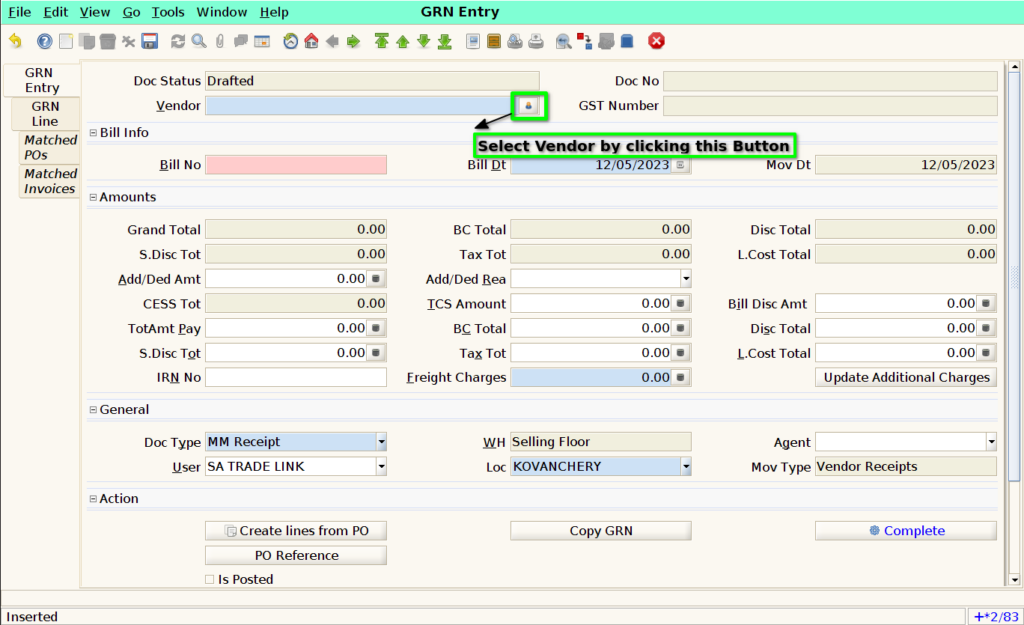
Select vendor in the ‘Vendor’ field.
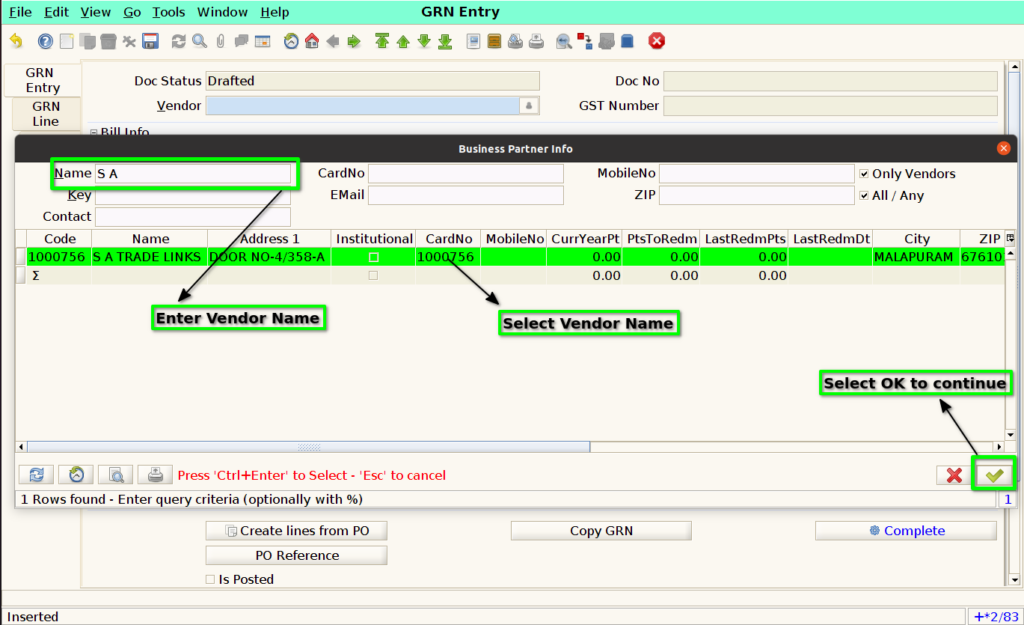
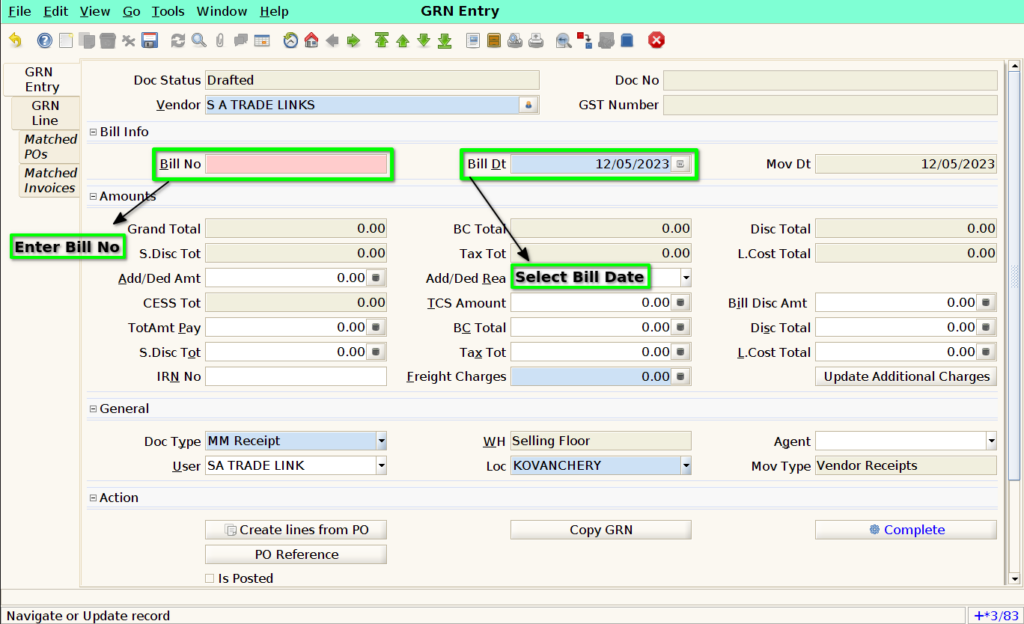
Enter ‘Bill No’ and ‘Bill Date’.
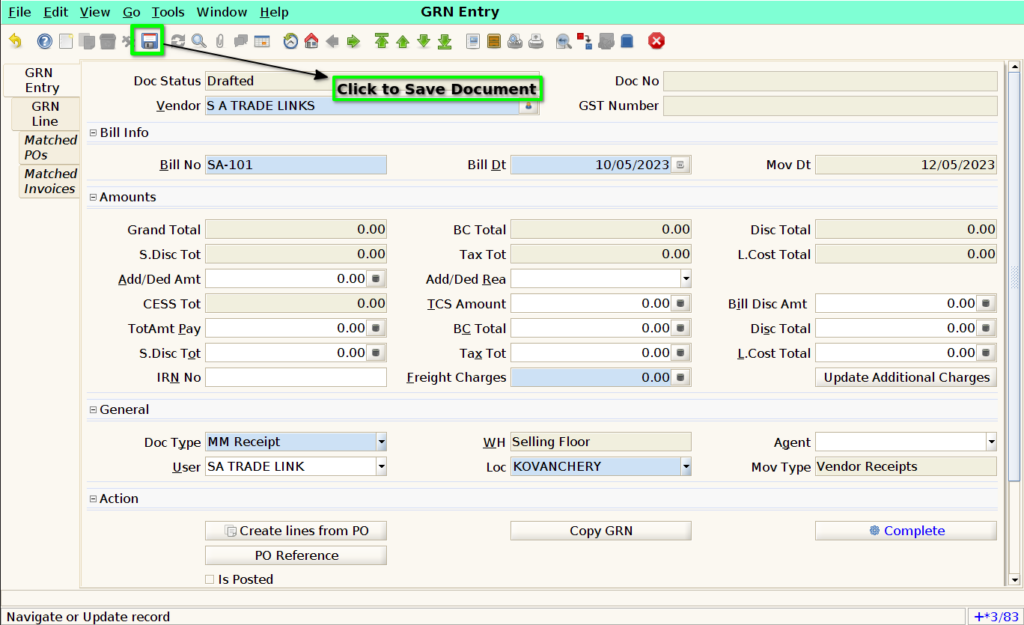
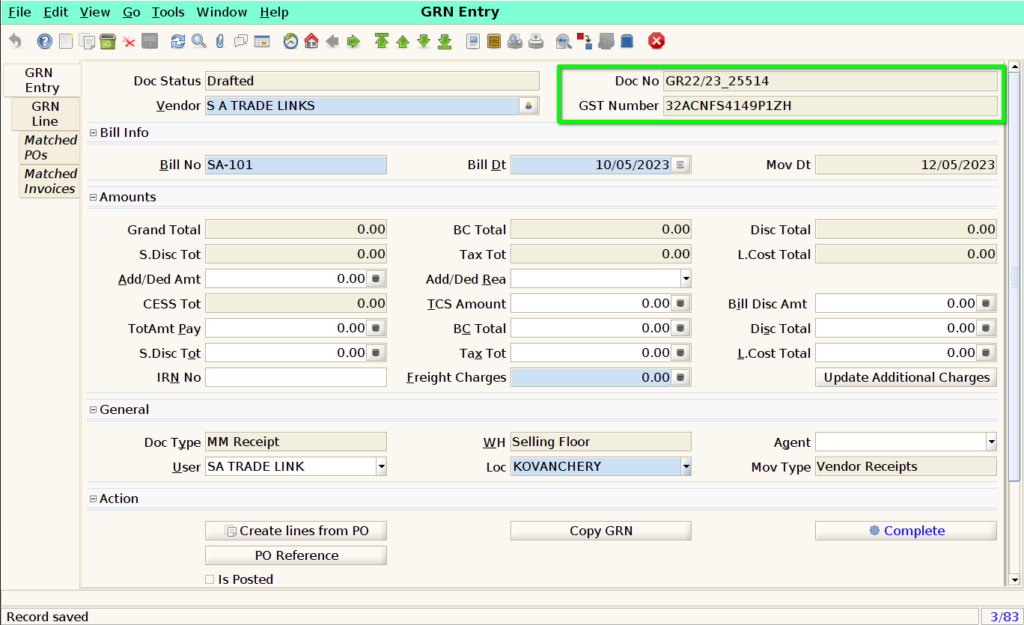
Once Save the document, Document No will be generate and GST Number will be appear in the respective field.
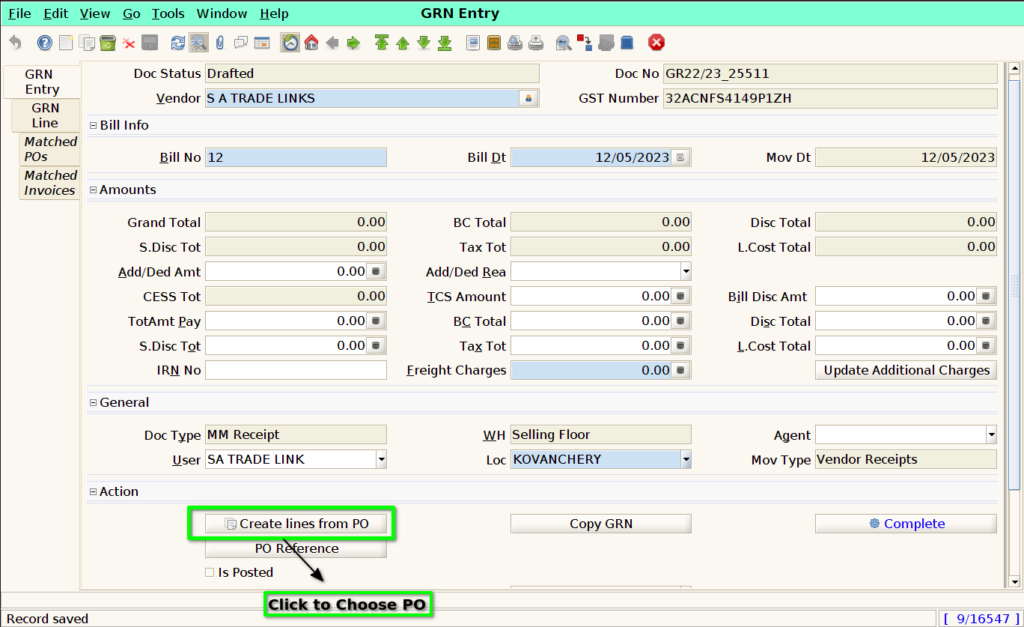
User can also create lines from ‘PO’ by clicking the button ‘Create line from PO’ in GRN Entry tab.
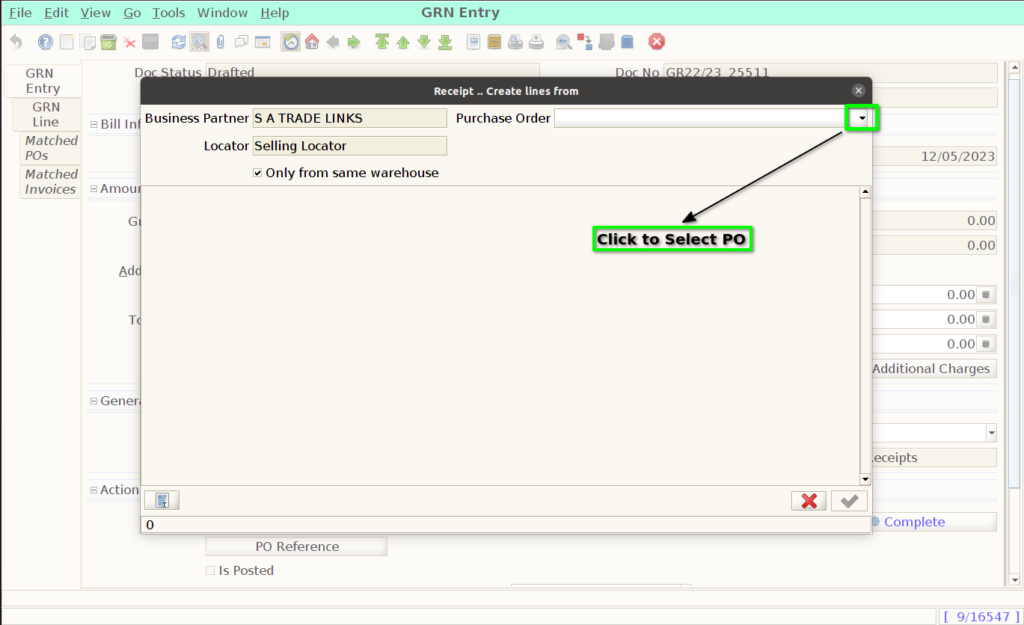
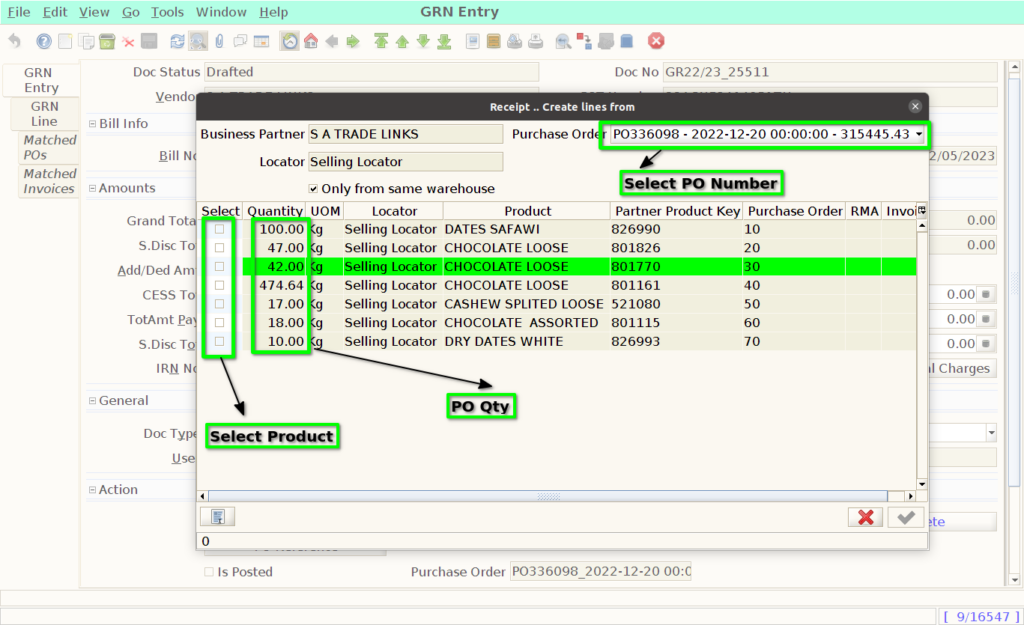
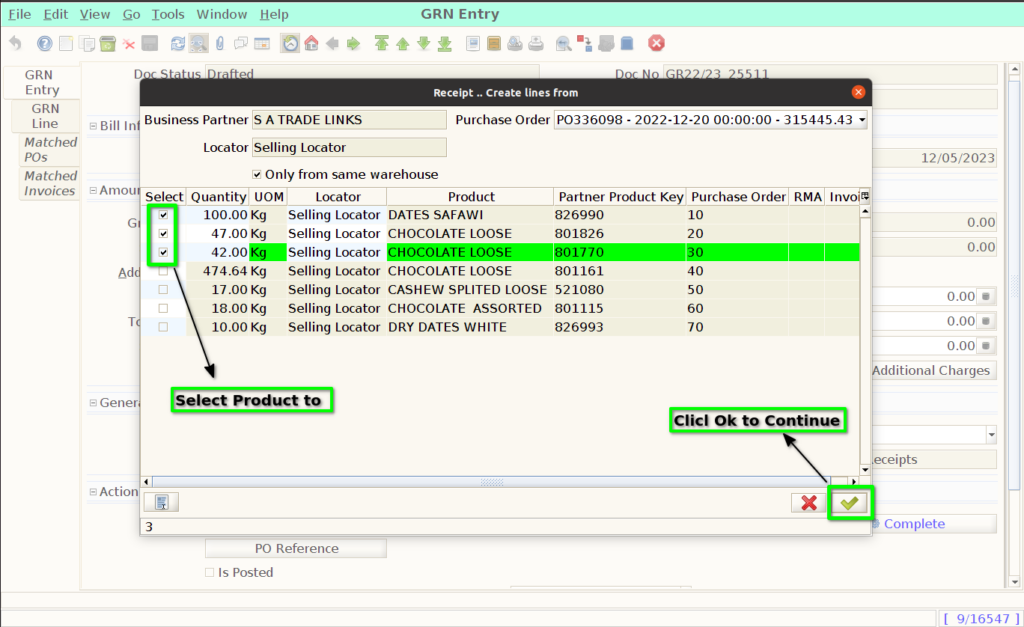
‘Purchase Order’ field with details of the selected PO will appear in the ‘GRN Entry’ tab.
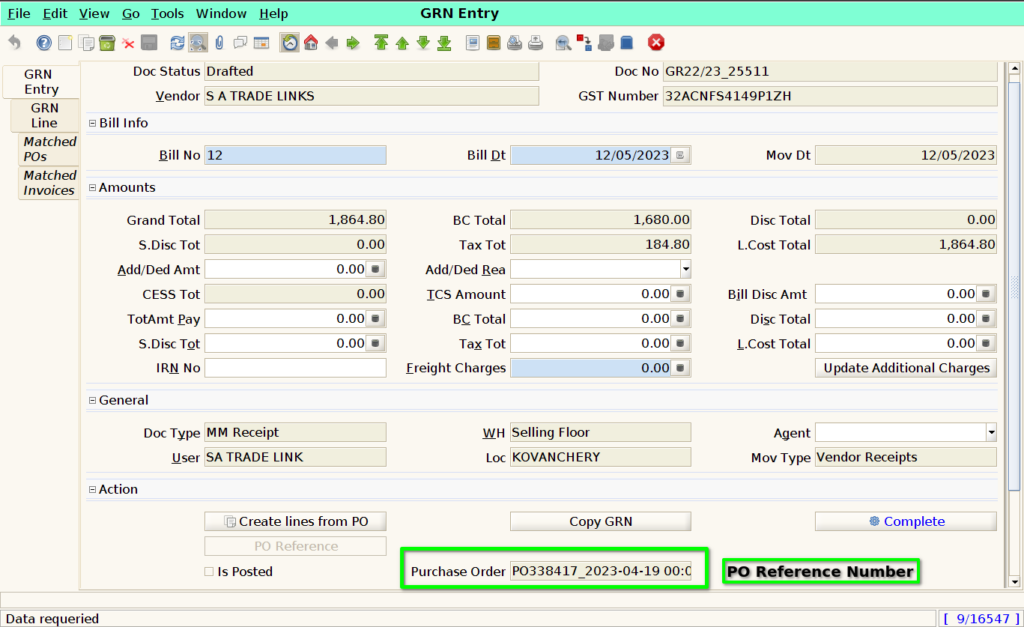
GRN Line Tab
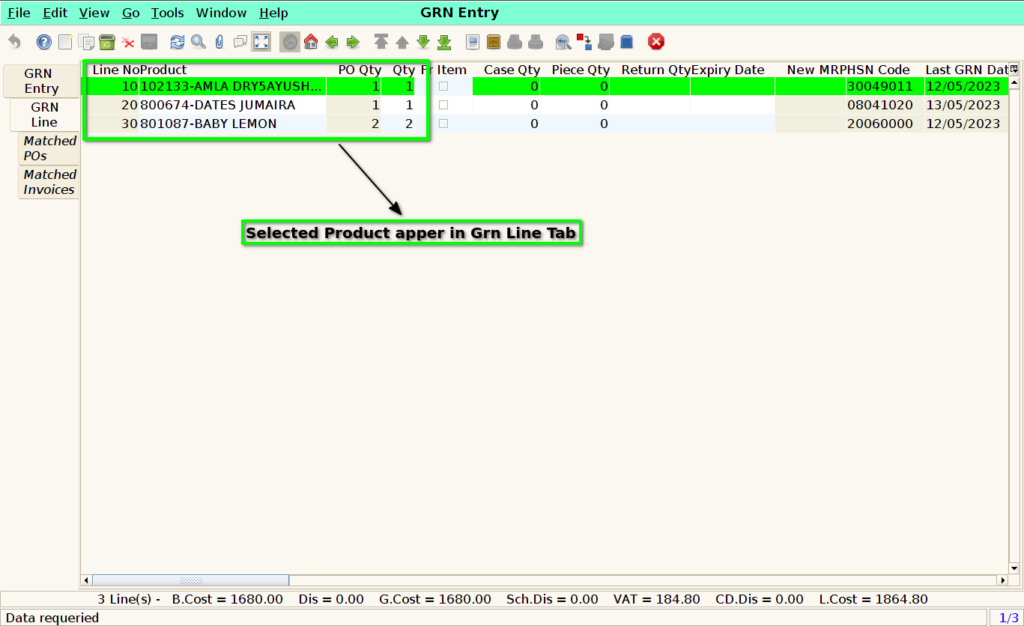
Switch to ‘GRN Line’ tab, the selected Product will will appear in GRN Line.
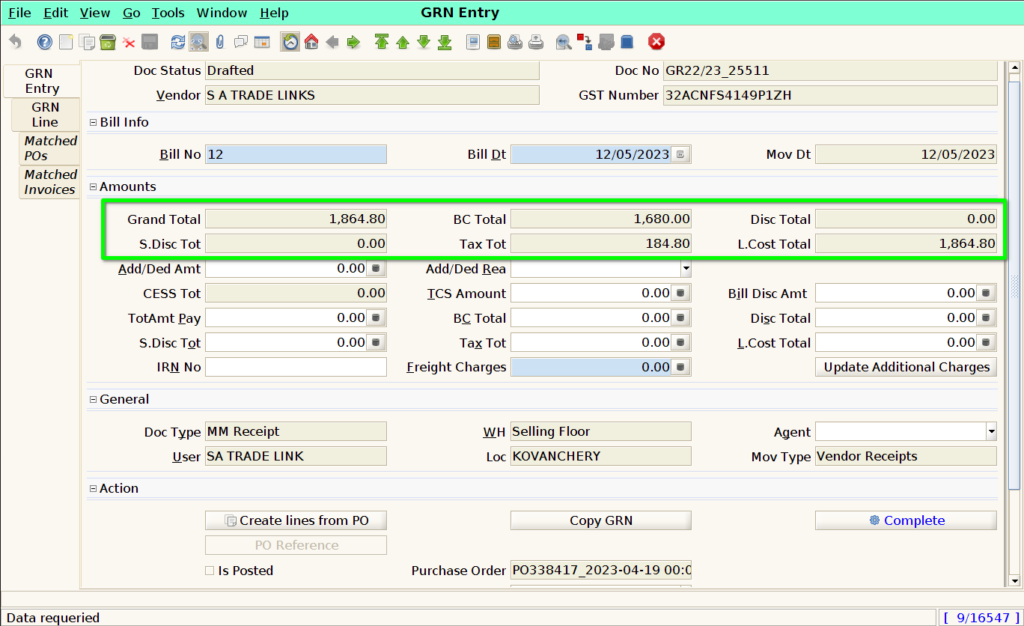
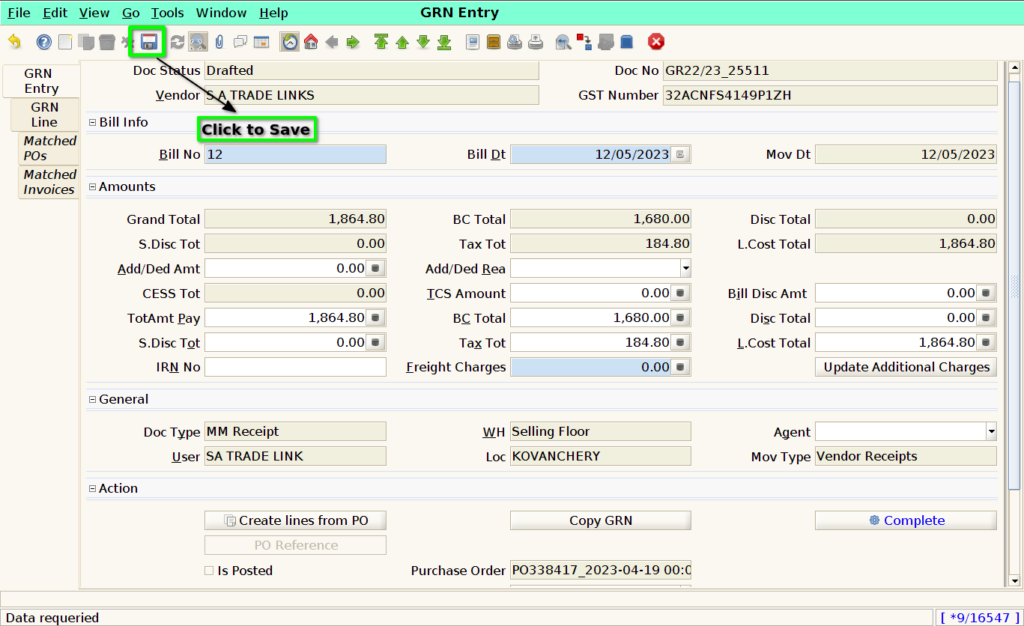
Switch to ‘GRN Entry’ tab and fill the ‘TotAmt Pay’ as ‘Grand Total’ value, ‘BC Total’ as above ‘BC Total’ value, ‘Tax Tot’ as above ‘Tax Tot’ value and ‘L.Cost Total’ as above ‘L.Cost Total’ value.
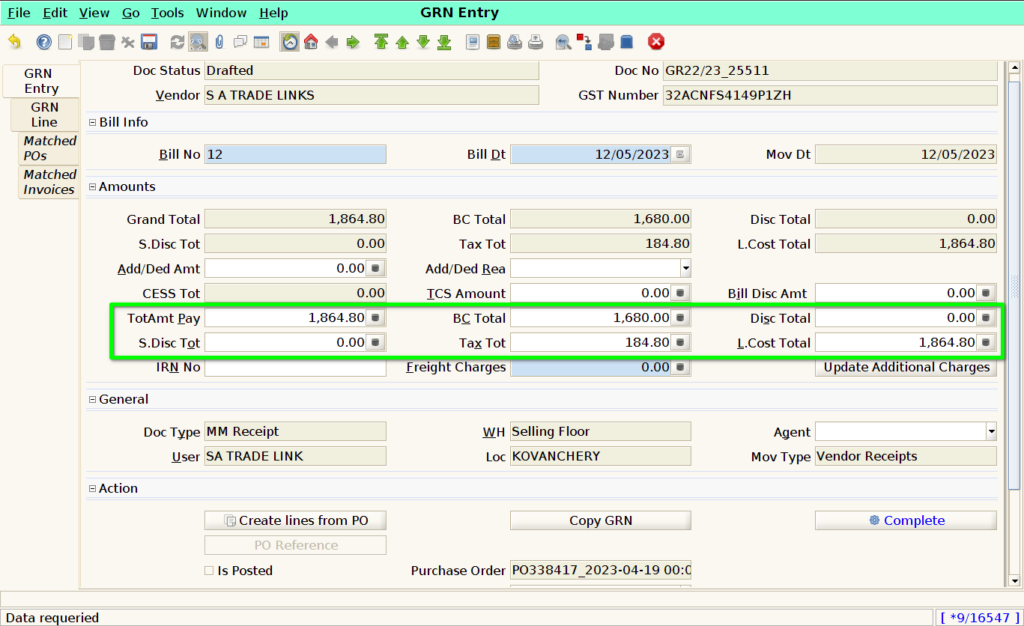
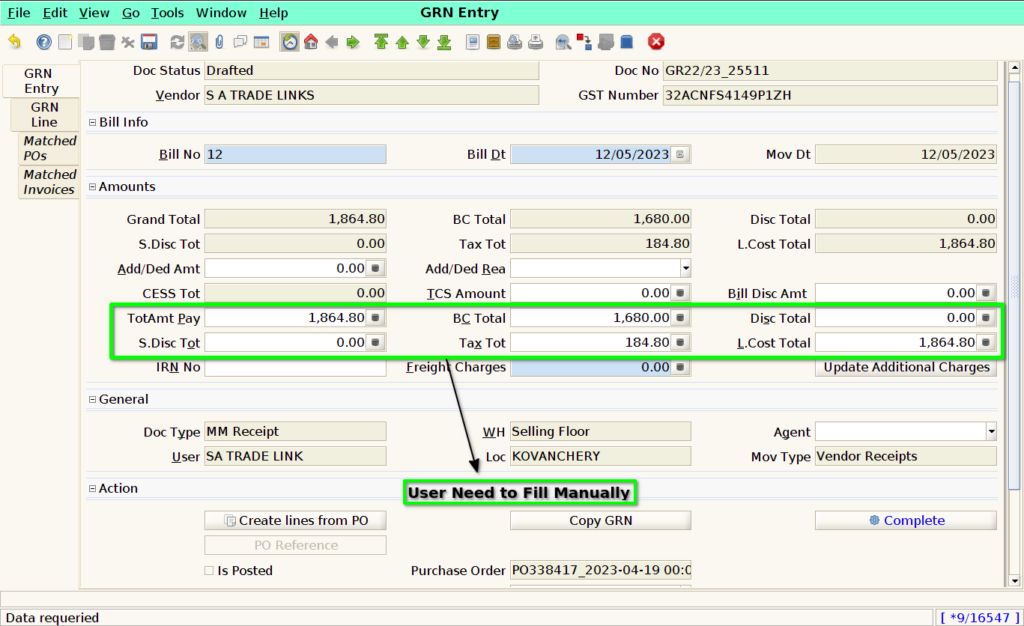
Then Click to “Save” Button.
Click ‘Complete’ button to complete the document.
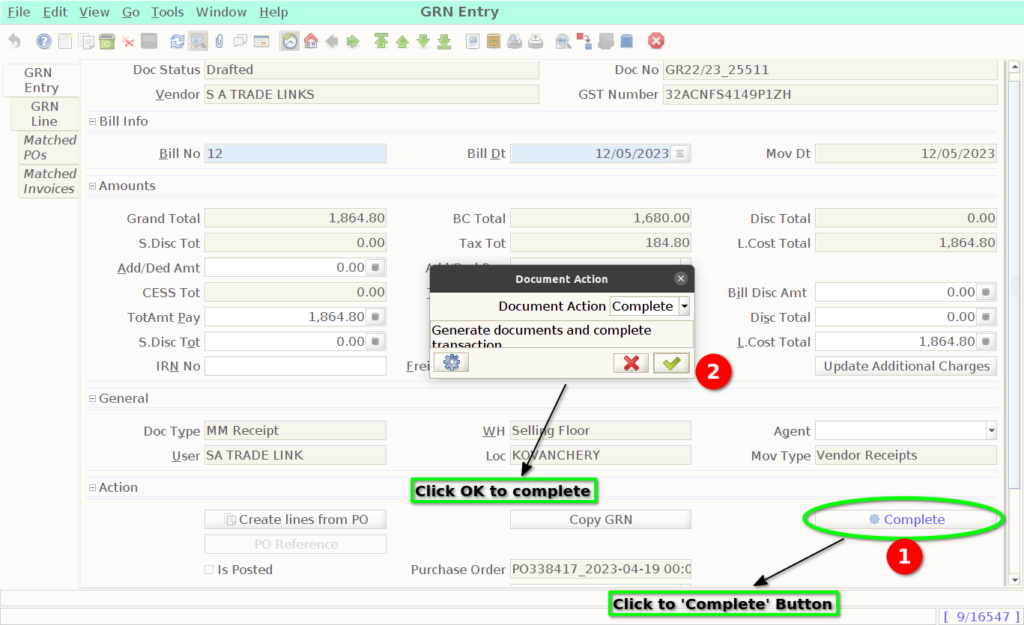
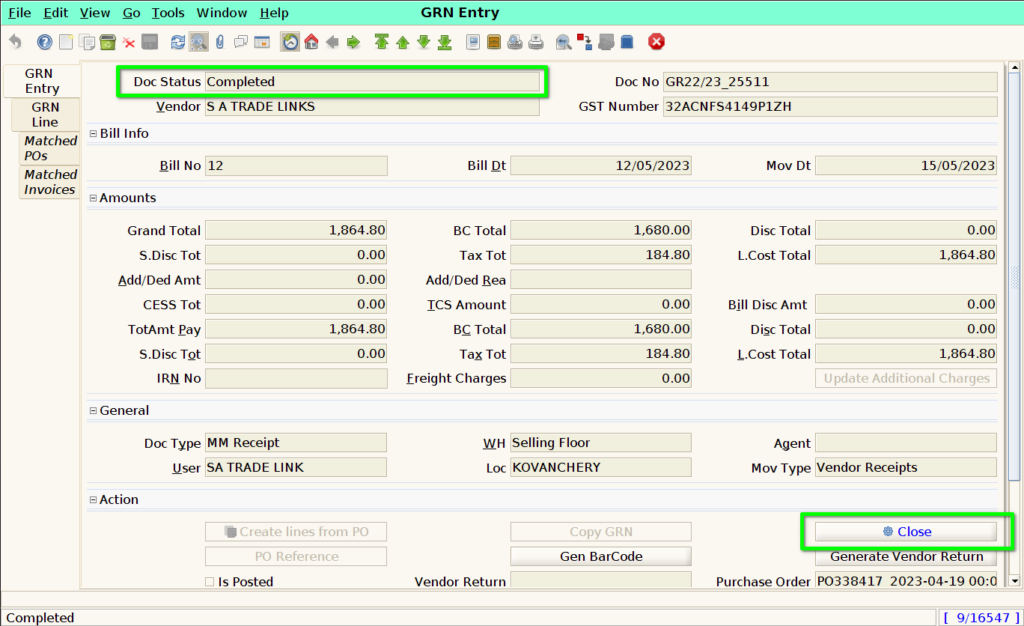
The ‘Document Status’ is change to ‘Completed’ state.