How to Create Goods Received Note(GRN) Without Purchase Order(PO) in ADempiere Retail
GRN Without PO refers to the process of receiving goods directly, without referring to a pre-created Purchase Order. This is usually used for unplanned purchases, emergency items, samples, or internal transfers.
User Access
Who Can Access
- Back Office
- Cashier
- Purchase Manager
- Manager
- Admin
What User Can Do
- Create GRN
- Edit GRN
- Approve GRN
Pre-Requisite Activities
- Vendor and item master should be set up
- GRN number series must be defined
- Users must have the rights to create GRN without PO
Business Rules
- Only authorized users can create GRNs without POs
- Such GRNs may require additional approval or tagging
- Items must be validated against the item master
- Duplicate GRNs for same vendor/date must be flagged
- GRN cannot be canceled after approval unless rejected
User Interface
Step 1 : Select ‘GRN Entry’ in Menu -> Logistics Management -> GRN Entry or Search GRN Entry in Lookup.

GRN Entry Tab
Step 2 : Click the ‘New Record’ button to create a new Grn Entry.
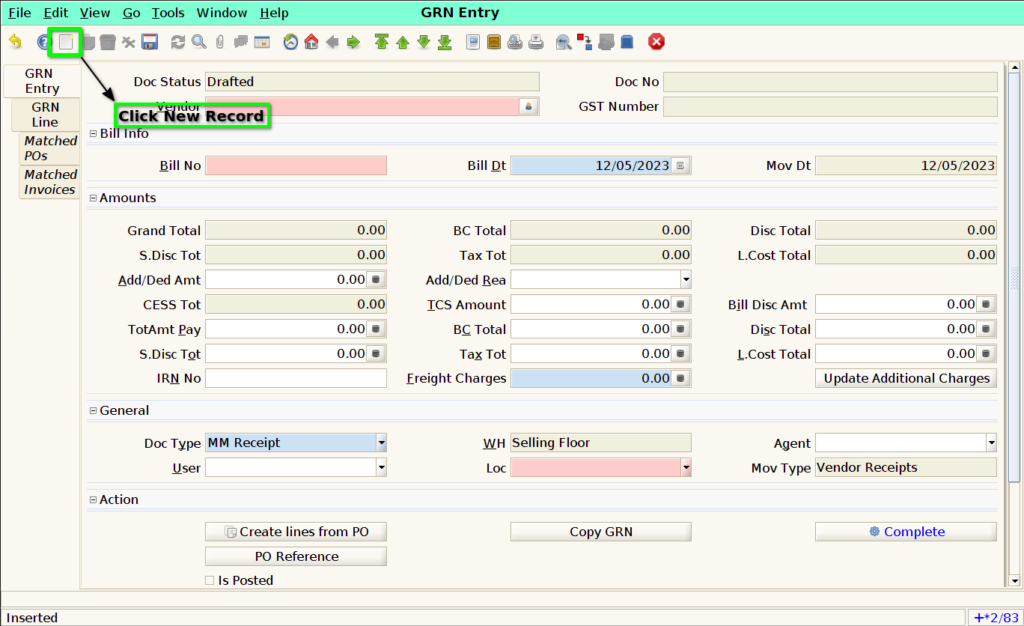
Step 3 : Select vendor in the ‘Vendor’ field.

Step 4 : In that “Business Partner Info” User need to select the Vendor Name and Click “OK”.

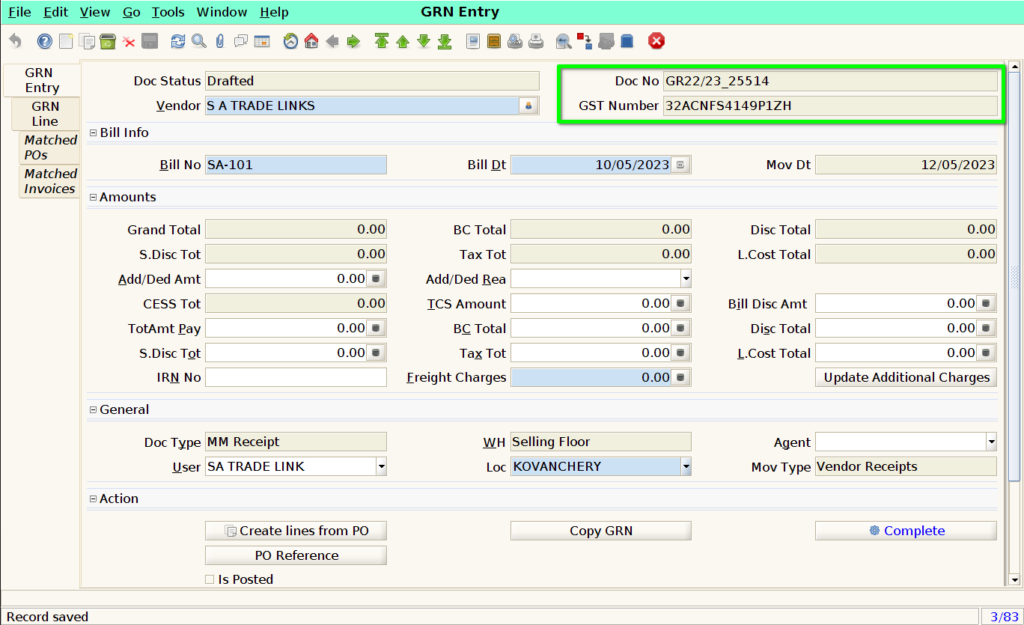
Step 5 : Once Vendor Name added in GRN Entry Tab, User Need to enter the ‘Bill No’ and ‘Bill Date’ for that particular Invoice.

Step 6 : Click the “Save” button to save the GRN Document.

Step 7 : Once Save the document, Document No will be generate and GST Number will be appear in the respective field.
GRN LINE TAB
Step 8 : User Need to click “New” Button for create New Record.

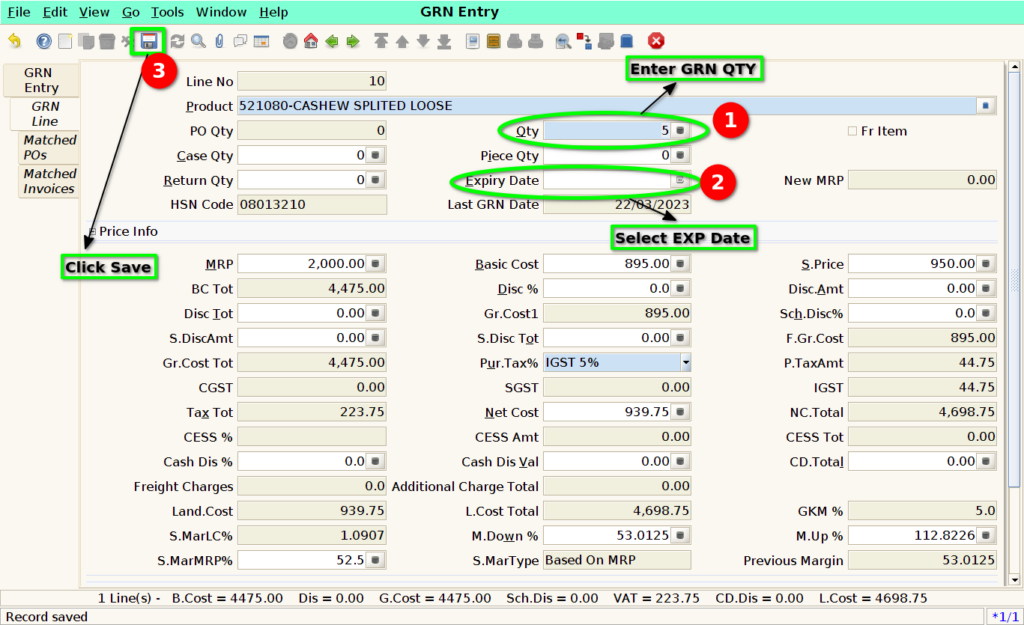
Step 9 : User can select the product in the ‘Product’ field by clicking the icon in the right side of the field.

Step 10 : User Need to select the Product in “Product Info” Tab. Products will be displayed based on the Vendor. Once user select the product, click OK to continue.

Step 11 : The selected Product will shown in the “Product” field.

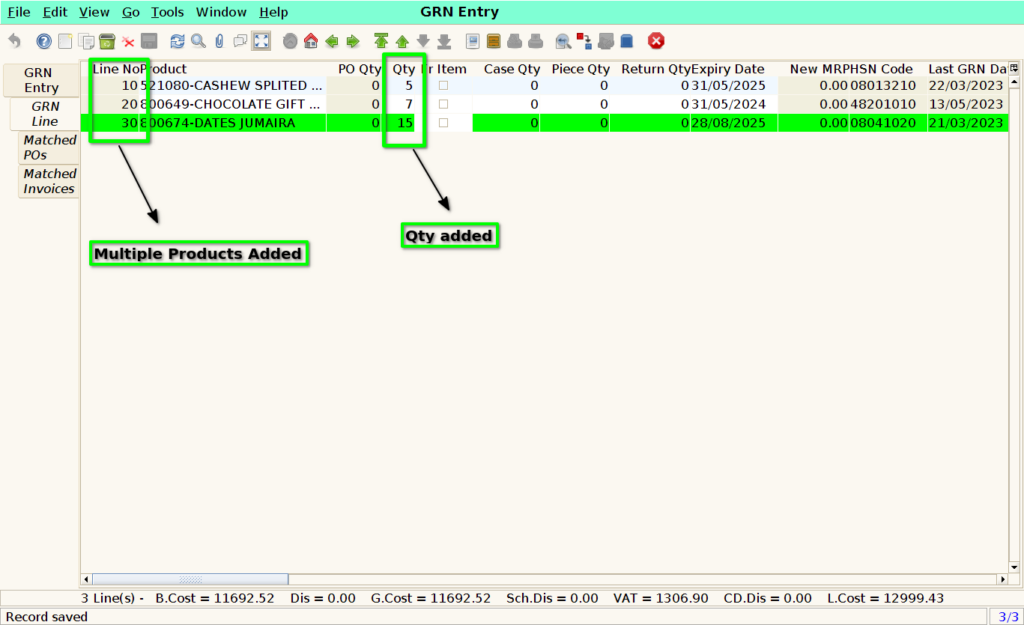
Step 12 : User need to enter the Qty and Expiry Date of the Product. Then click “save” button to save the line.
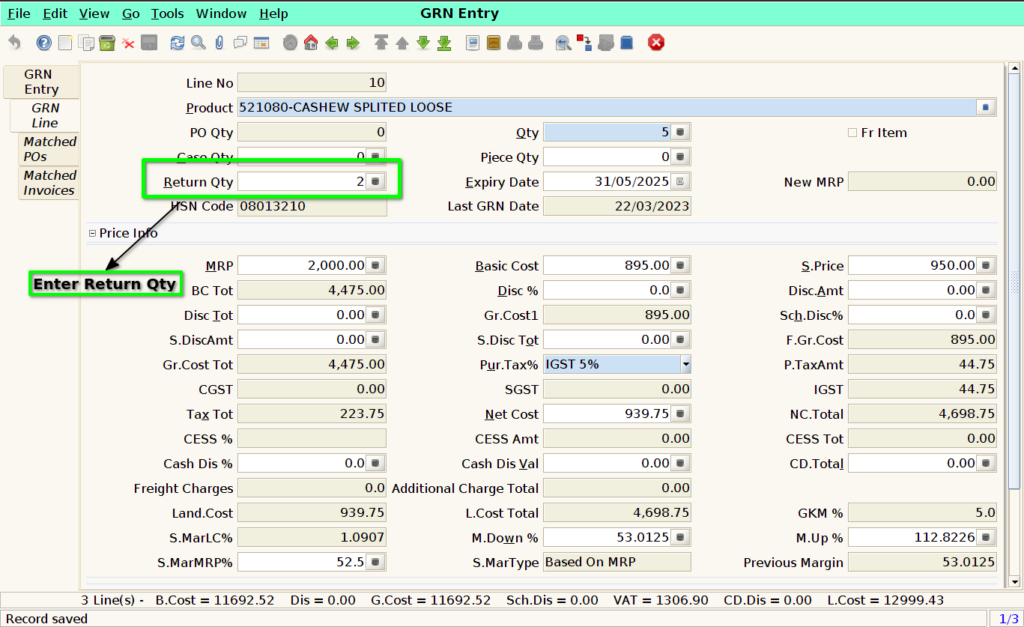
Step 13 : If user need to return the product means, Enter.
User can select multiple products based on above process.
Click GRN Entry Tab to next process.

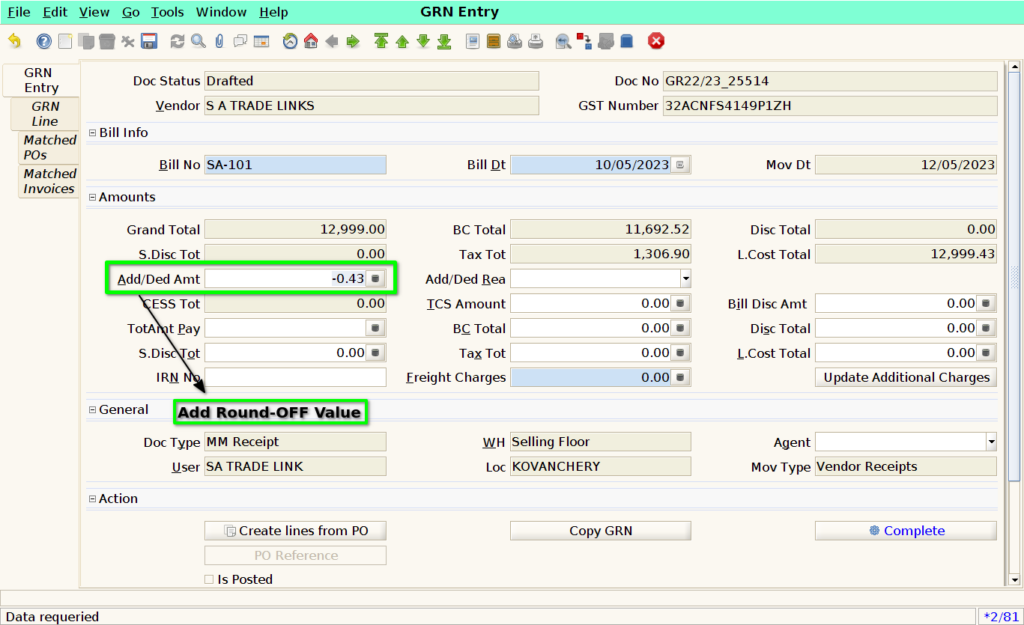
- User Can add the TCS Amount
- User can add the Bill Disc Amount
- User Can add the Freight Charges
- Once the Freight Charges enter Need click “Update Additional Charges” button to apply product wise.

User need to fill the ‘TotAmt Pay’ as ‘Grand Total’ value, ‘BC Total’ as above ‘BC Total’ value, ‘Tax Tot’ as above ‘Tax Tot’ value and ‘L.Cost Total’ as above ‘L.Cost Total’ value.
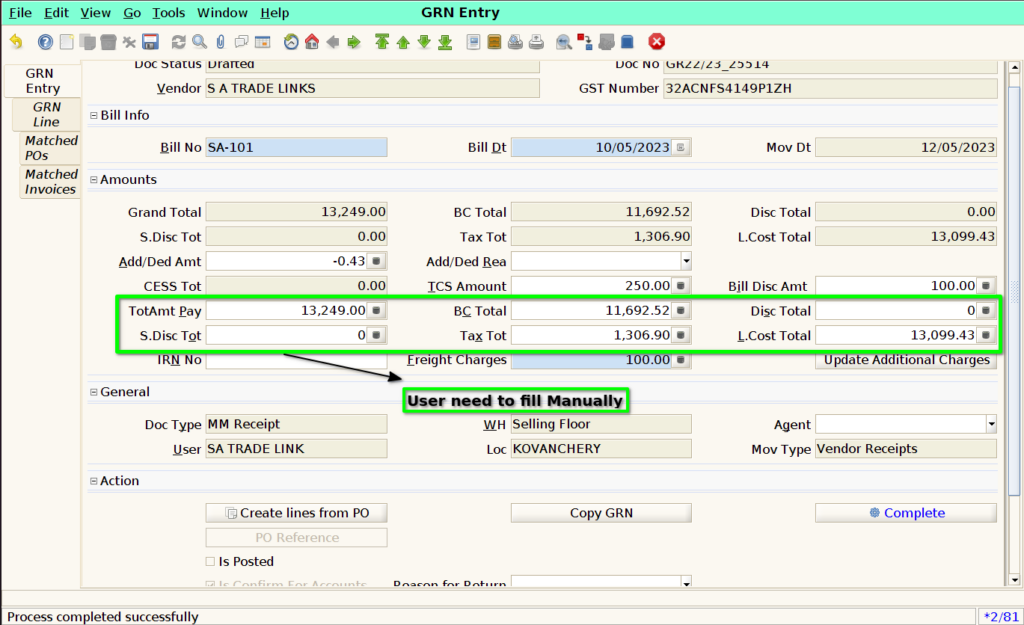
Then click ‘Save’ button.

Click ‘Complete’ button to complete the document.
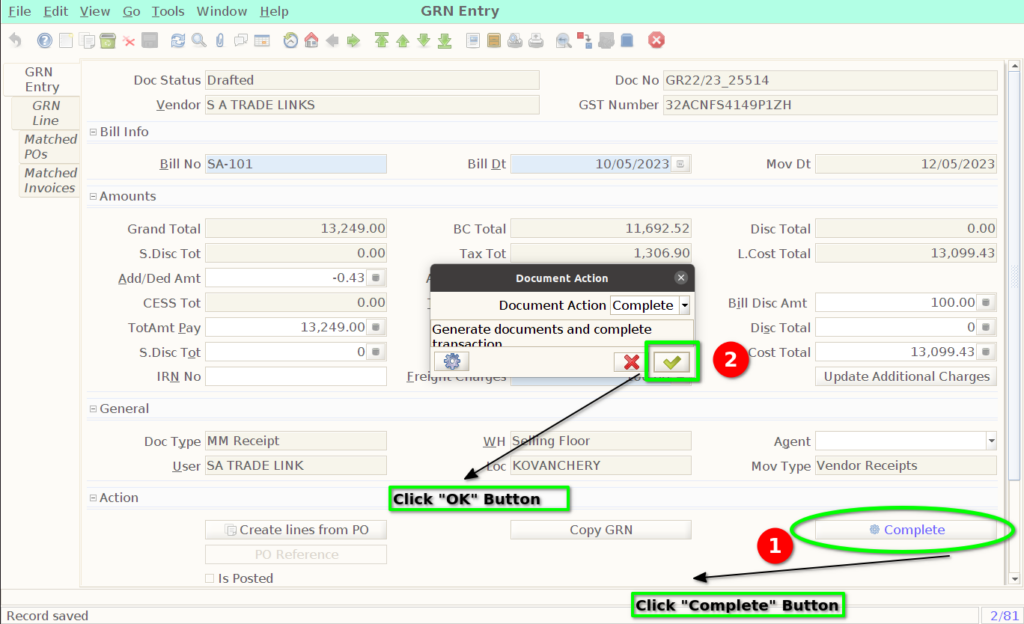
The ‘Document Status’ is change to ‘Completed’ state.

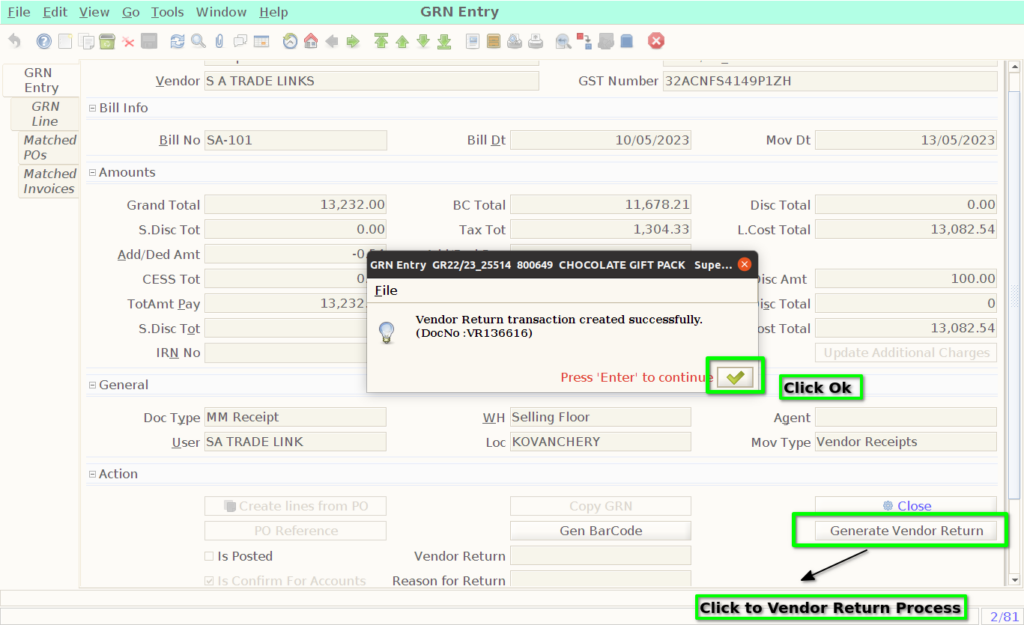
Click “Generate Vendor Return” for Return Process.

FAQ
1. How to give a discount on a product?
The line level screen allows you to give discounts per product, or the header screen allows you to give discounts based on the total value of all products
2. Can I add a free item?
The free item check box needs to be enabled in the line where the product is entered
3. Is it possible to change the values or the product while GRN?
The free item check box needs to be enabled in the line where the product is entered
4. Is it possible to add the additional charges?
Yes, you can add the additional charges. (For Ex. Freight Charges).
SOP
- Bill Number Should be Unique for particular vendor in Calendar