How to create a Product in ADempiere Retail
Product Master is the central repository of all product-related information in the system. It stores key details such as product code, name, pricing, tax, unit of measure, and classification. This master setup ensures standardised, accurate, and reusable product data across all modules like sales, purchase, inventory, etc.
User Access
Who Can Access
- Back Office
- Purchase
- Admin
- Cashier
What User Can Do
- Create, update, activate, or deactivate a product
- Define product attributes (name, brand, category, design, color, size, etc.)
- Set selling and purchase price
- Assign tax category, HSN code, and unit of measure
- Link to barcode, images, and product description
Pre-Requisite Activities
- Create related masters: Brand, Category, UOM, Tax, Vendor
- Define product code format or barcode series
- Determine pricing strategy and tax structure
- Configure department and product classification rules
Business Rules
- Product code must be unique
- Mandatory fields: name, category, tax, UOM, etc.
- Deactivated products should not be used in new transactions
- Changes to tax or price must follow approval (if required)
- Barcode must be unique per product variant
- Product should be classified for analytics (fast/slow/average)
User Interface
Step 1: Select ‘Branch Product Master’ in Menu -> Product Management -> Branch Product Master or Search Branch Product Master in Lookup.

Step 2 : Click the ‘New Record’ button to create a new Product.

Step 3 : Enter Product Name, Category, HSN Code, Pur.Tax %.

Step 4 : Click the “Save” button to save the Product.

Step 5 : Click Purchasing tab to to set Vendor for the Product.
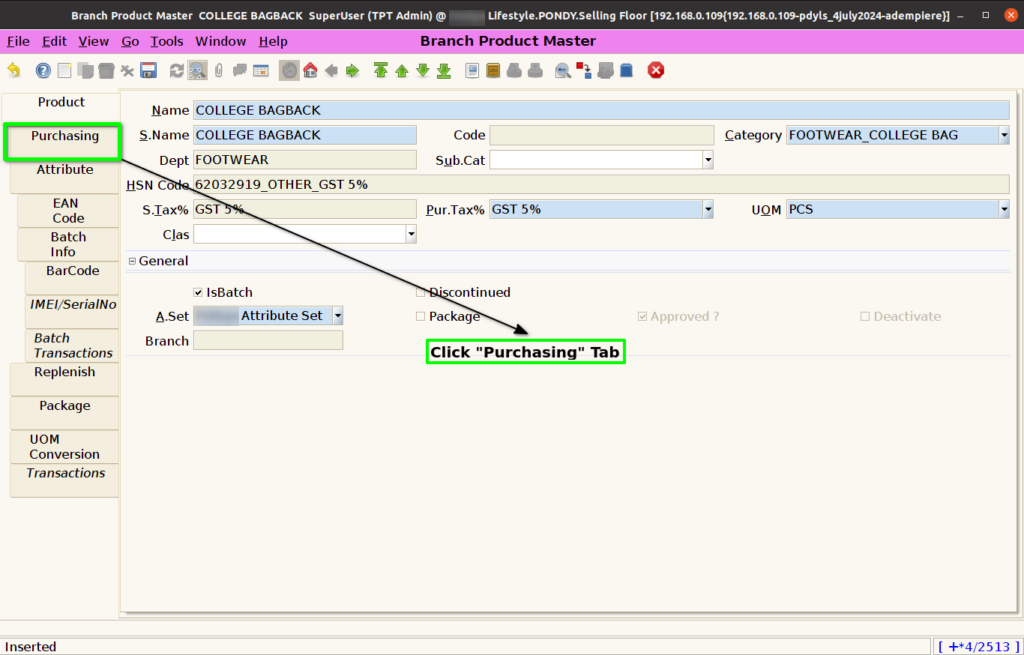
Step 6 : Select Vendor Name for product.

Step 7 : Click the “Save” button to save the Vendor.

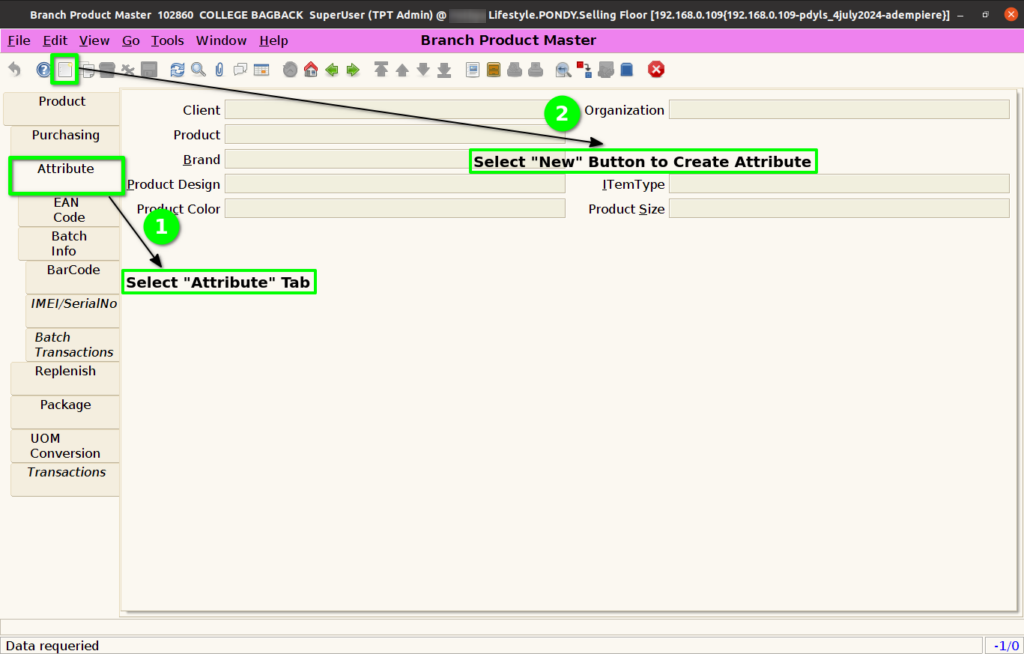
Step 8 : Select “Attribute” tab to create Product Attributes and Click “New” Button to Create Product Attribute.
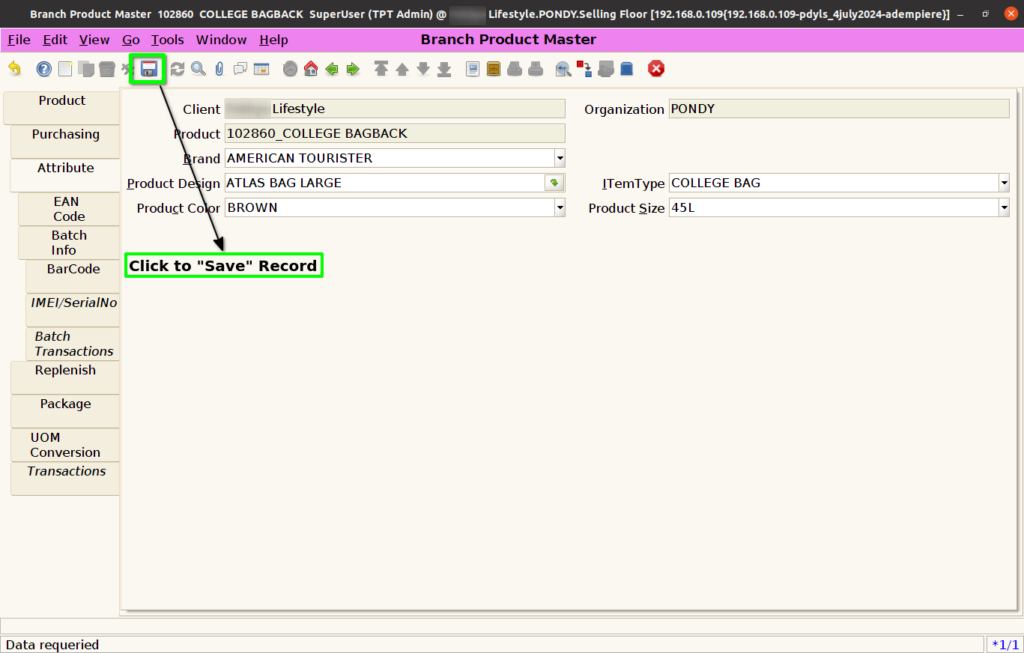
Step 9 : Select Product Attribute Like Brand, Design No, Item Type, Product Color, Product Size.

Step 10 : Click “Save” button to save the Product Attribute.
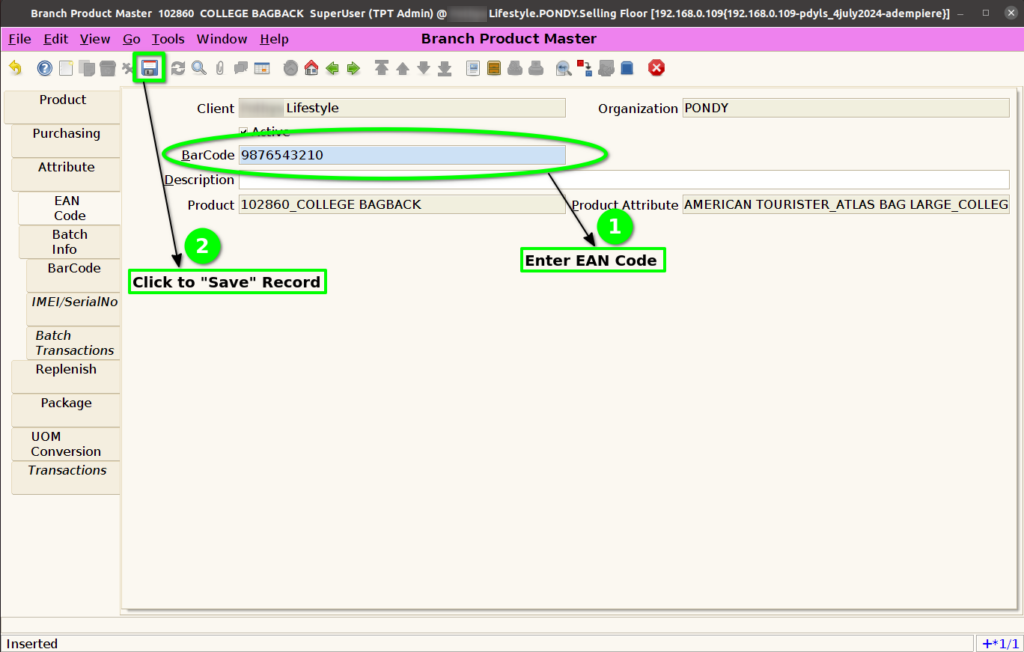
Step 11 : Click EAN Code Tab to Create EAN code for Attribute.

Step 12 : Click “New Record” Button.

Step 13 : Enter EAN code in barcode field and Press “Save” Button.
Step 14 : Click “Batch Info” for selected Attribute. The Batch info will create based on GRN or we can Create manually. Now we create batch manually.
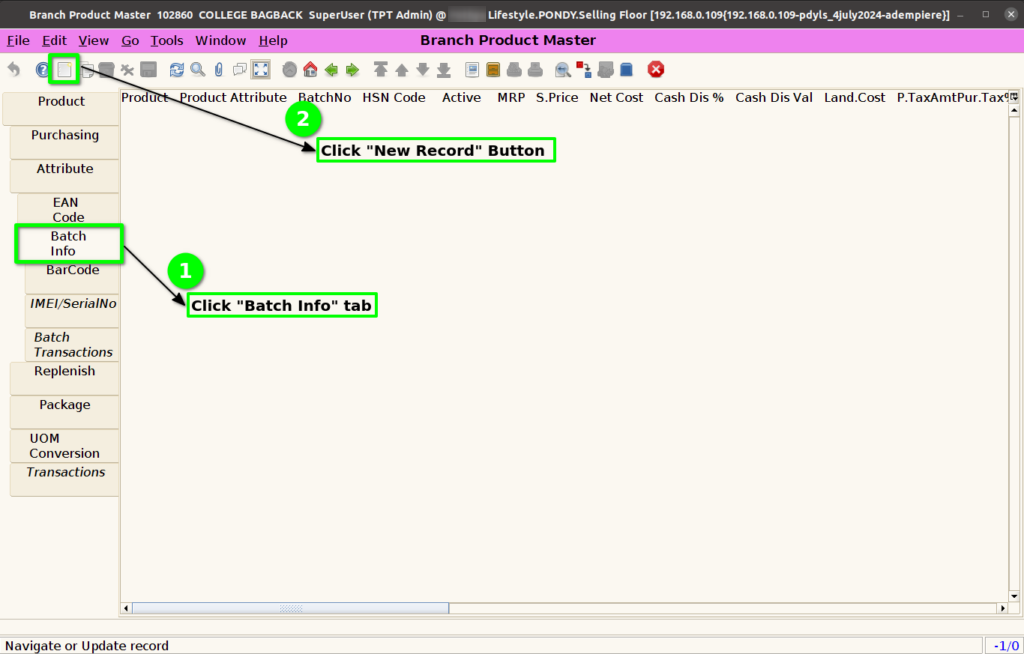
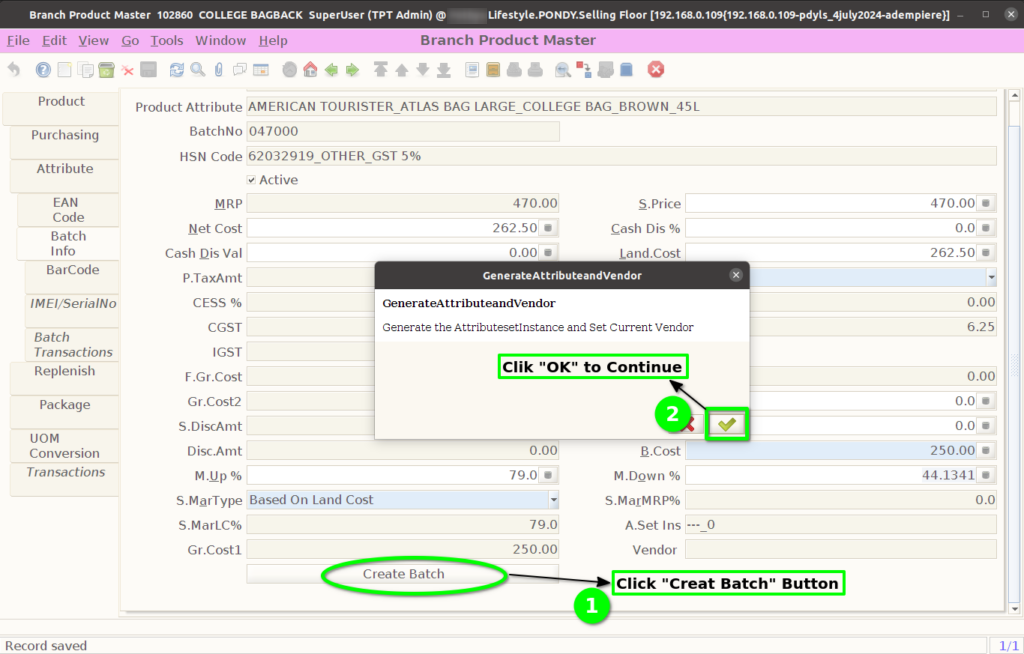
Step 15 : Enter Basic Cost and M.Up% for Selected Attribute.

Step 16 : Click to “Create Batch” Button.
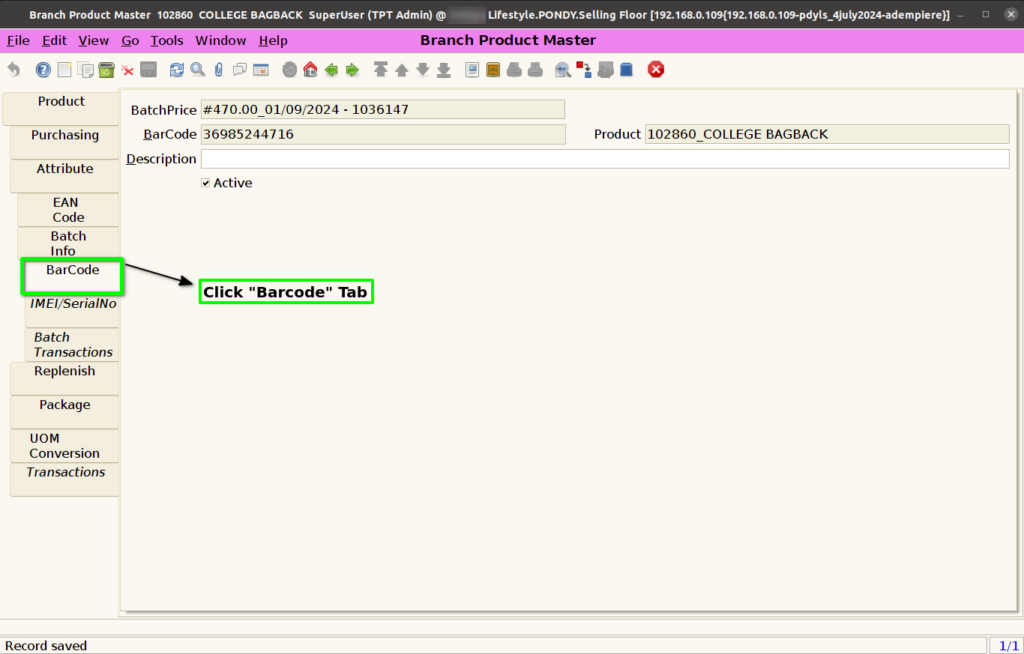
Step 17 : In Barcode tab, Inter Branch Transfer Received Product Barcode will show.
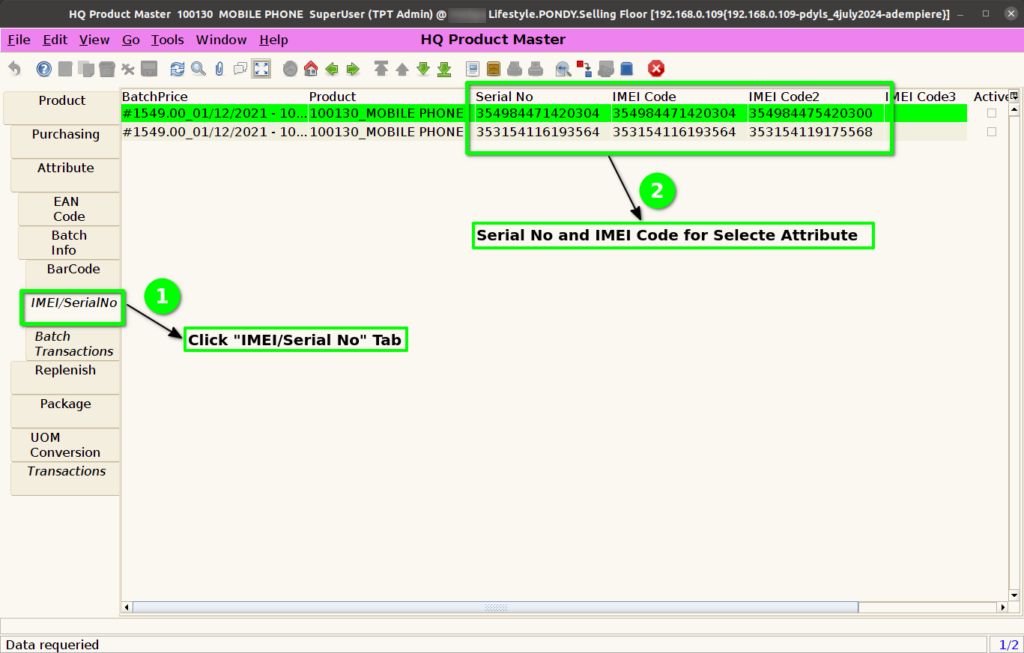
Step 18 : Click IMEI/Serial No tab. This will create automatically through GRN Entry.