How to capture Goods Received Note (GRN) without Purchase Order, with Additional Charges in Adempiere Retail
Goods received note (GRN), is a two-way document that acknowledges the delivery of goods by a supplier and their receipt by the customer.Goods received note confirms that an order has been delivered and received and it’s satisfactory to all the parties involved.
User Access
Who Can Access
- Back Office
- Cashier
- Purchase Manager
- Manager
- Admin
What User Can Do
- Create GRN
- Edit GRN
- Approve GRN
Pre-Requisite Activities
- Vendor and Item Masters should be created
- Define charge types (transport, handling, etc.) in charge master
- Set up tax categories
- Enable permission for non-PO GRN in system settings
- Assign user roles for GRN creation
Business Rules
- In GRN entry ,product isn’t selected in purchase order based.
- Allow to complete, GRN without PO
- Allow to complete, without additional charges
User Interface
Step 1 : Select ‘GRN Entry’ in Menu -> Logistics Management -> GRN Entry or Search GRN Entry in Lookup.
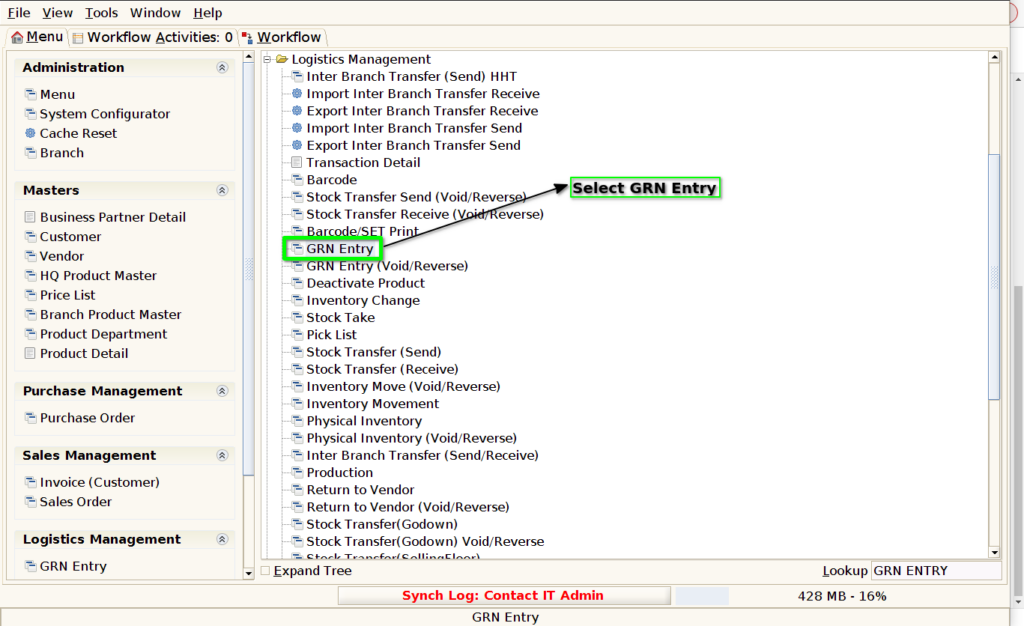
GRN Entry Tab
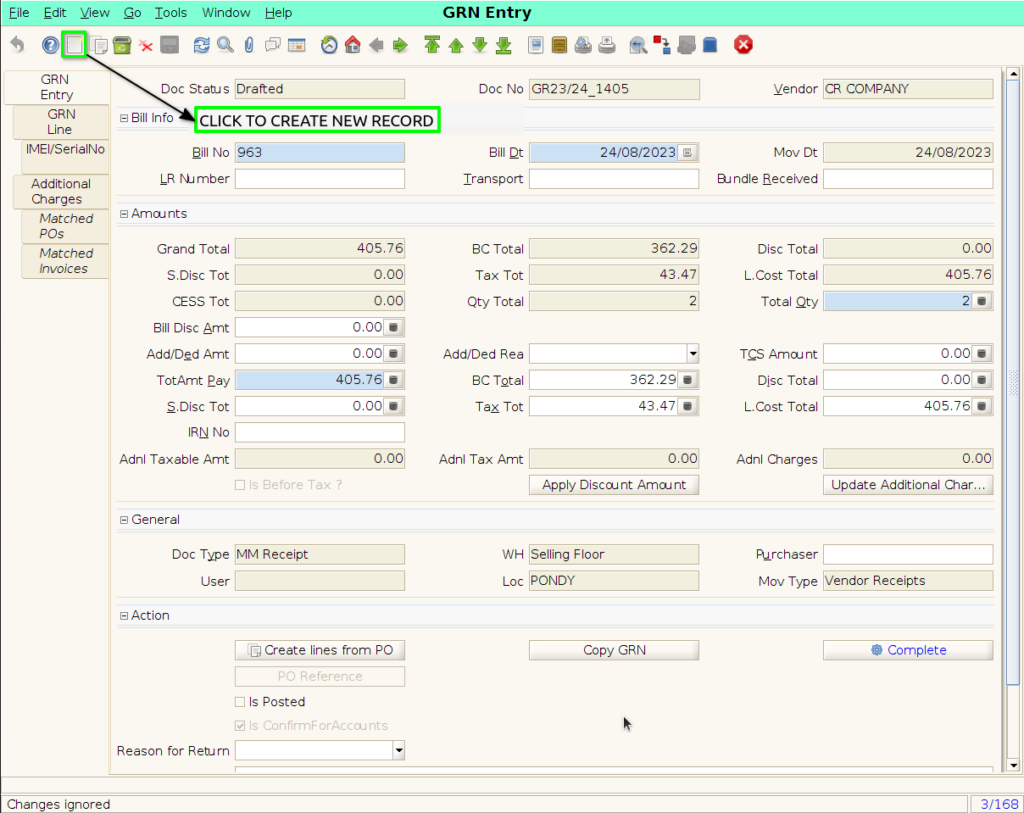
Step 2 : Click the ‘New Record’ button to create a new GRN Entry.
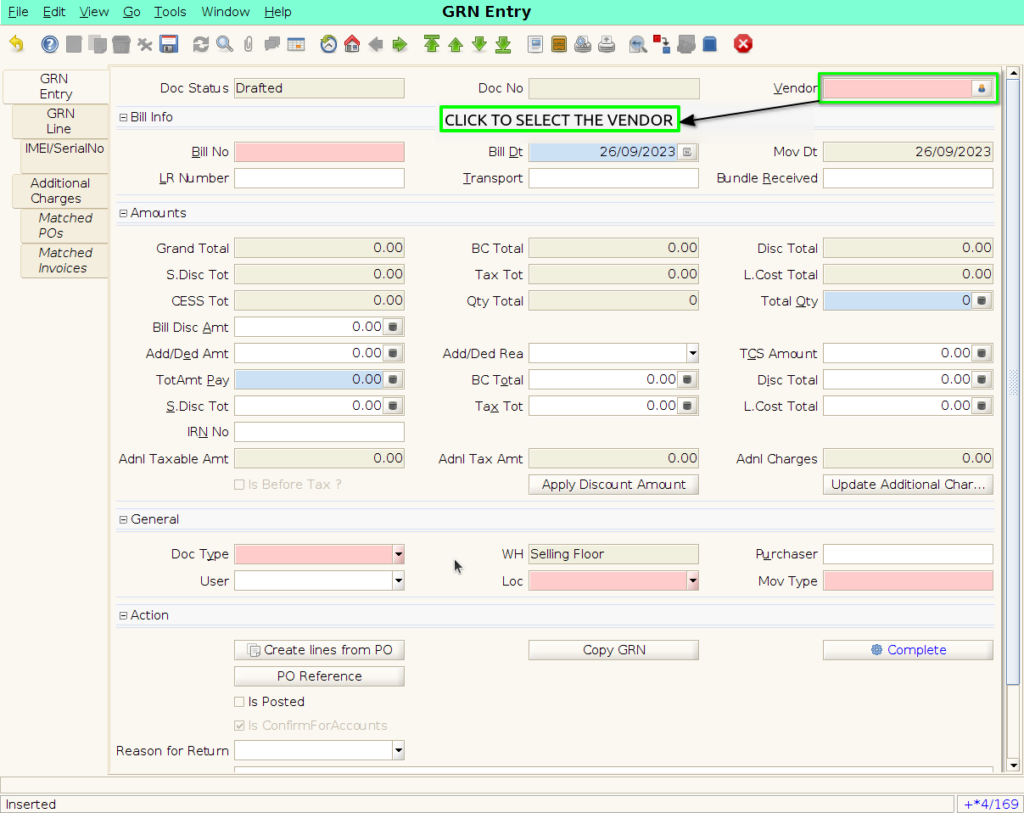
Step 3 : Select vendor in the ‘Vendor’ field.
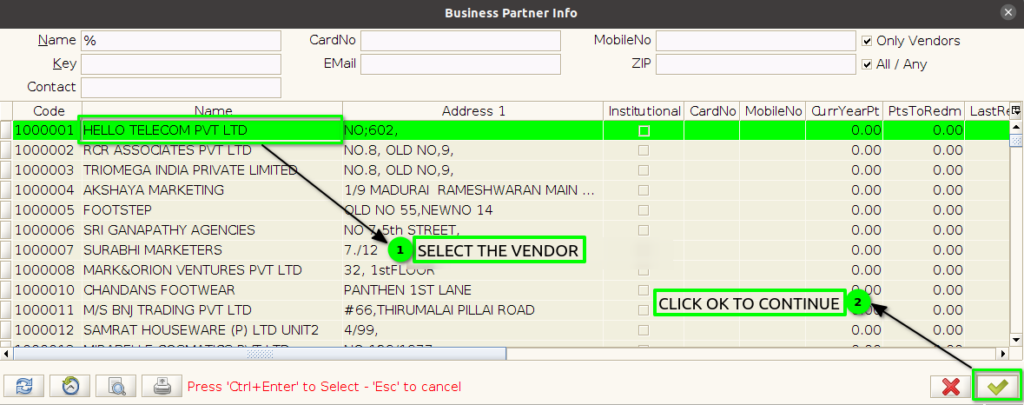
Step 4 : In that “Business Partner Info” User need to select the Vendor Name and Click “OK”.
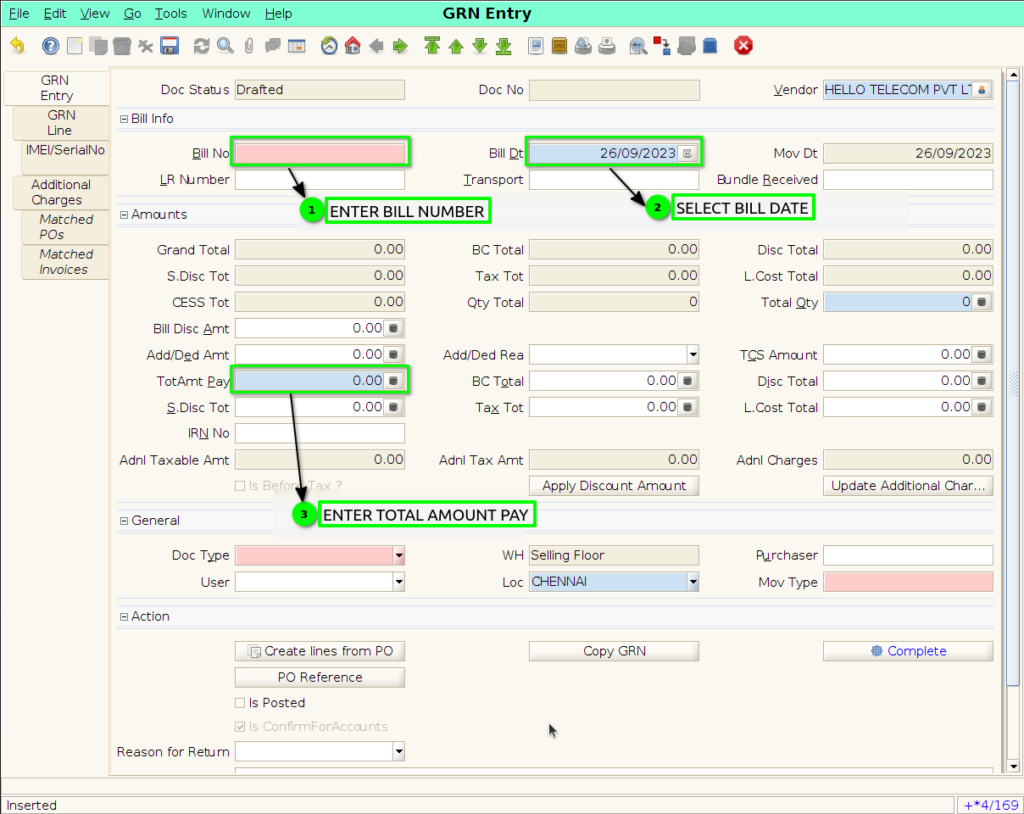
Step 5 : Once Vendor Name added in GRN Entry Tab, User Need to enter the ‘Bill No’ and ‘Bill Date’ for that particular Invoice
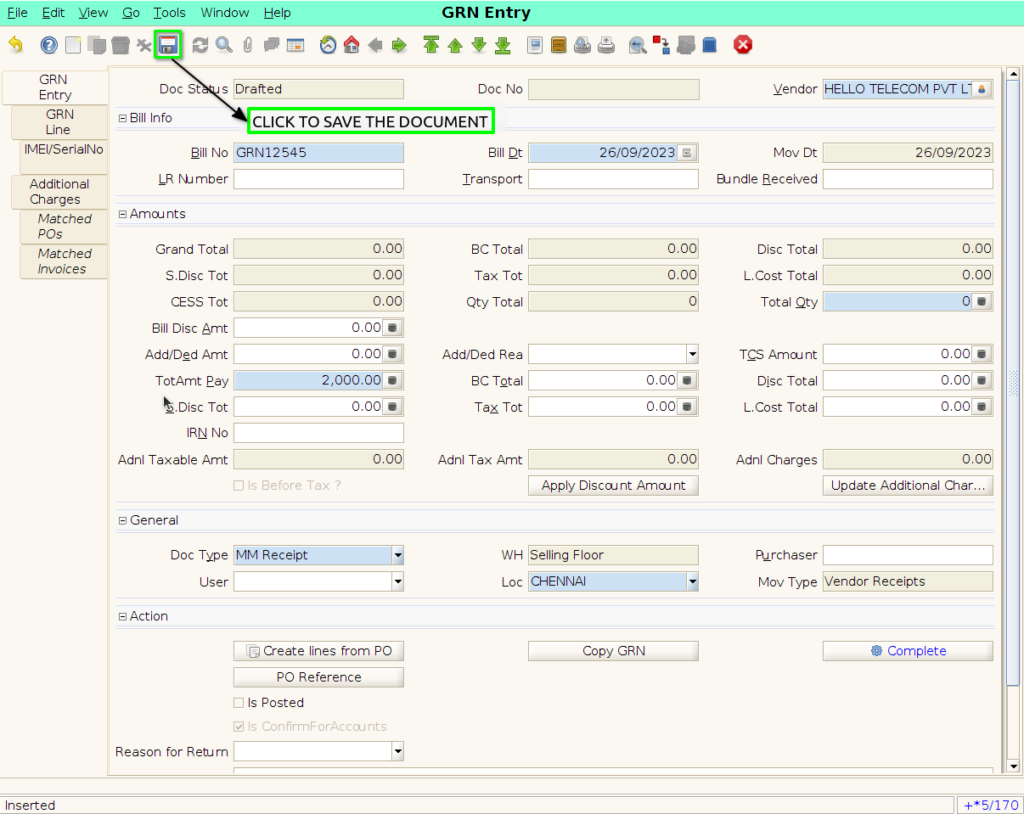
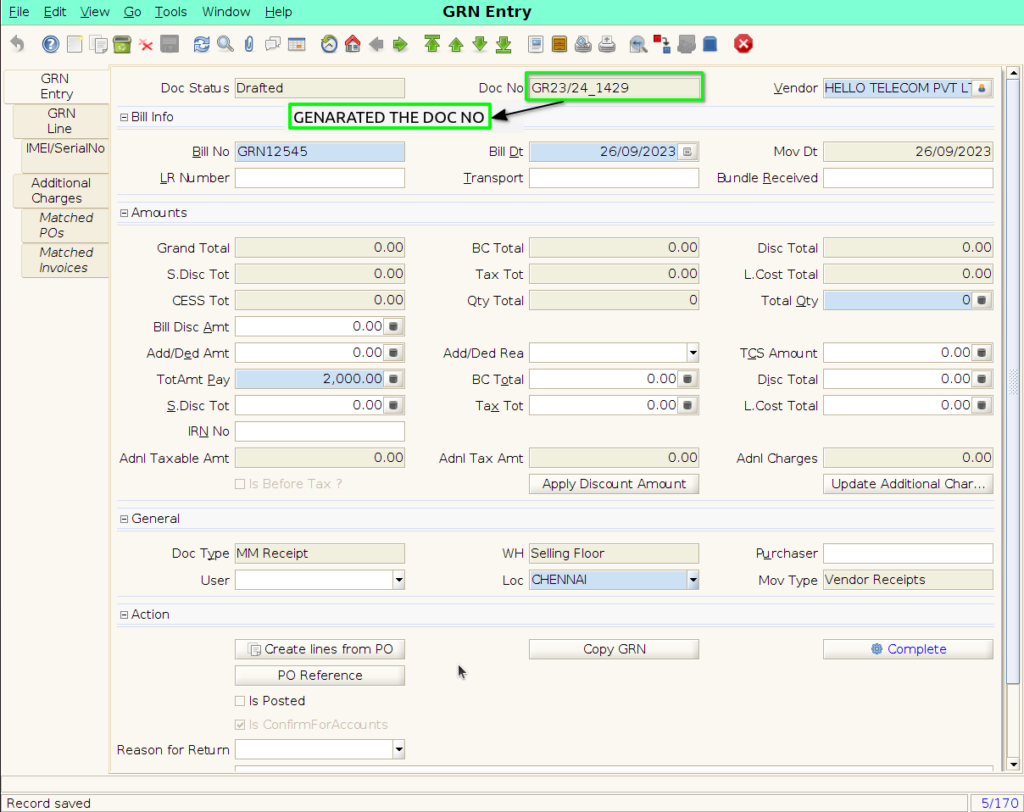
Step 6 : Click the “Save” button to save the GRN Document and Generated Doc No.
GRN LINE TAB
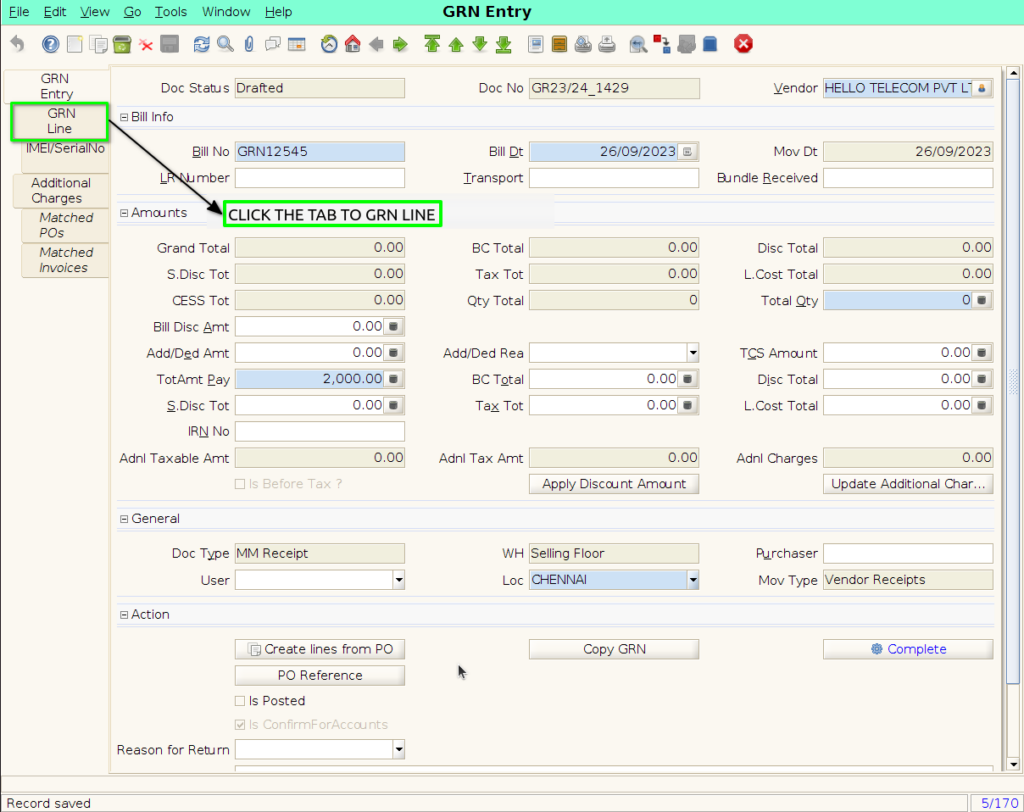
Step 7 : Click line tab to GRN line page.
Step 8 : User Need to click “New” Button for create New Record.
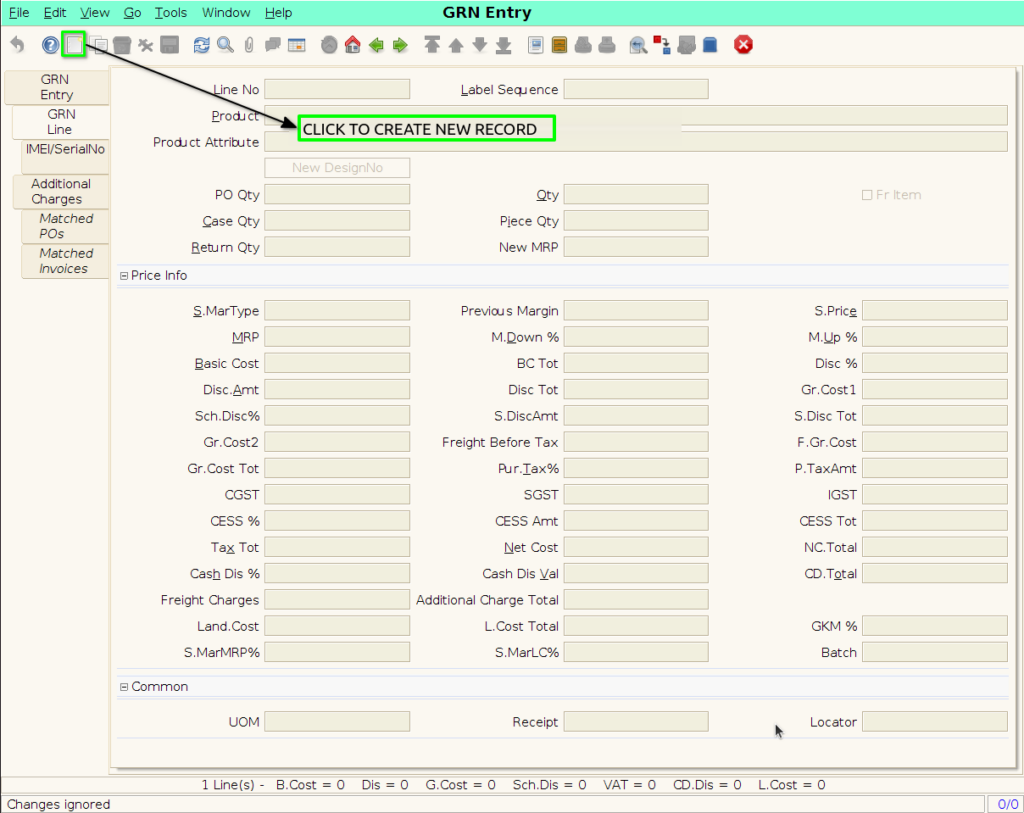
Step 9 : User can select the product in the ‘Product’ field by clicking the icon in the right side of the field.
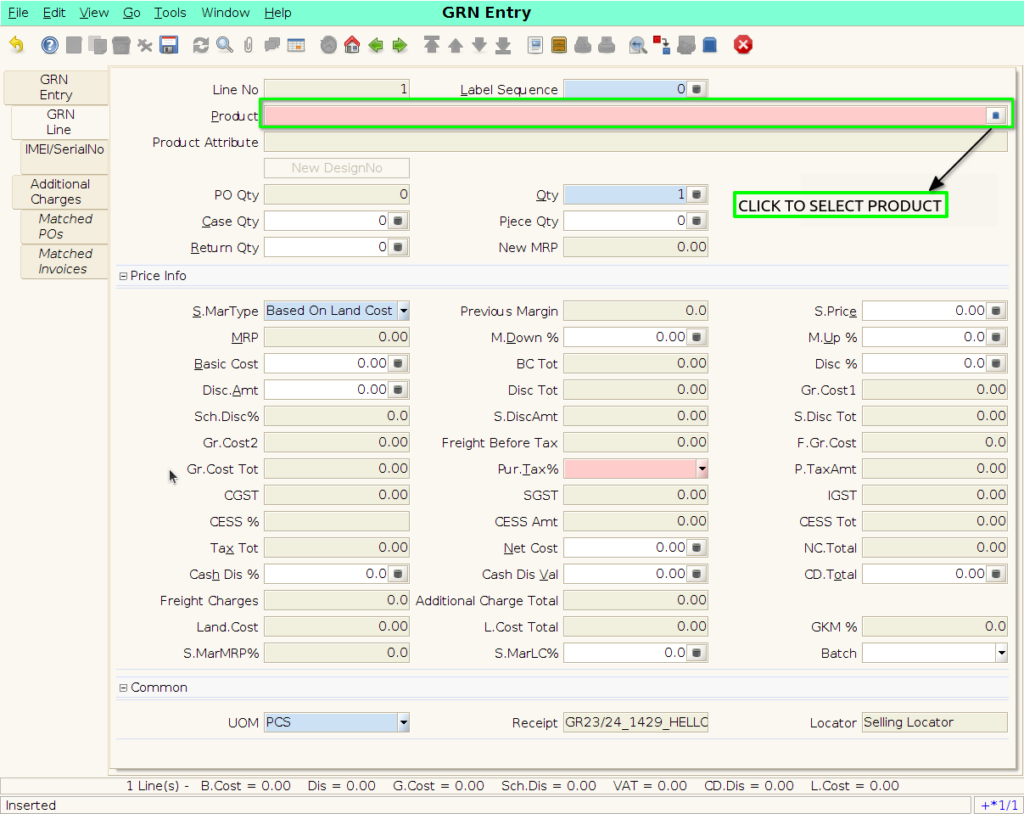
Step 10 : User Need to select the Product in “Product Info” Tab. Products will be displayed based on the Vendor. Once user select the product, click OK to continue.

Step 11 : The selected Product will shown in the “Product” field.
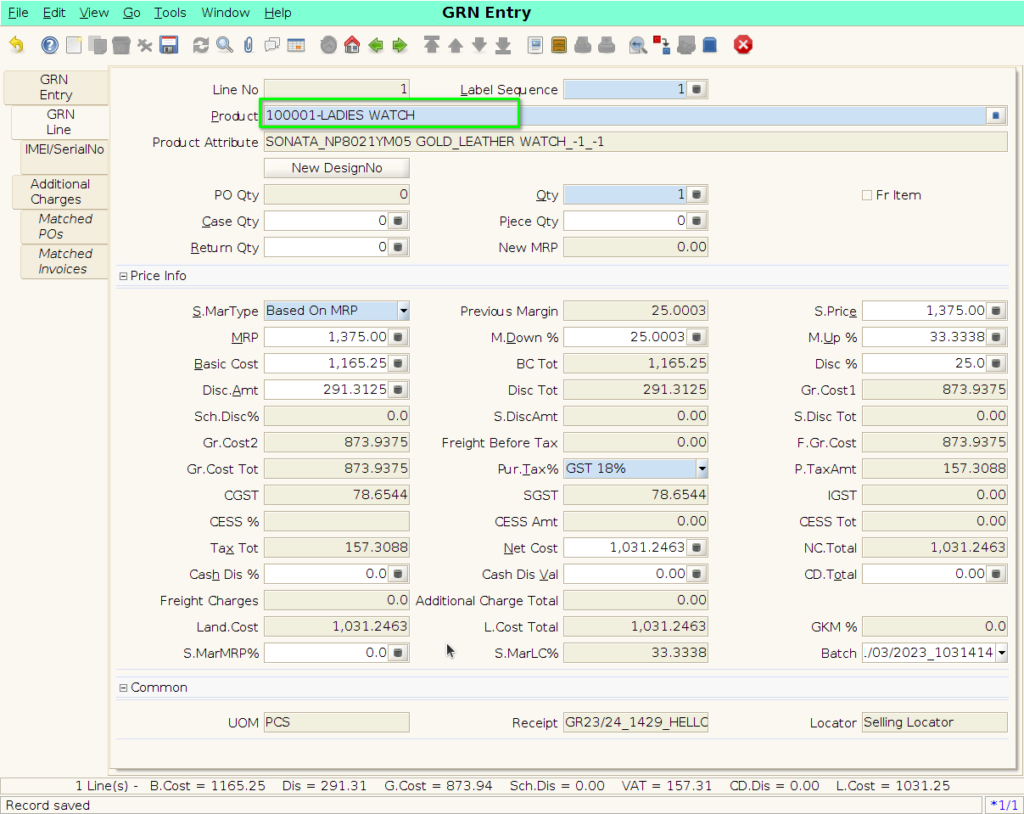
Step 12 : If user need to return the product means, Enter.

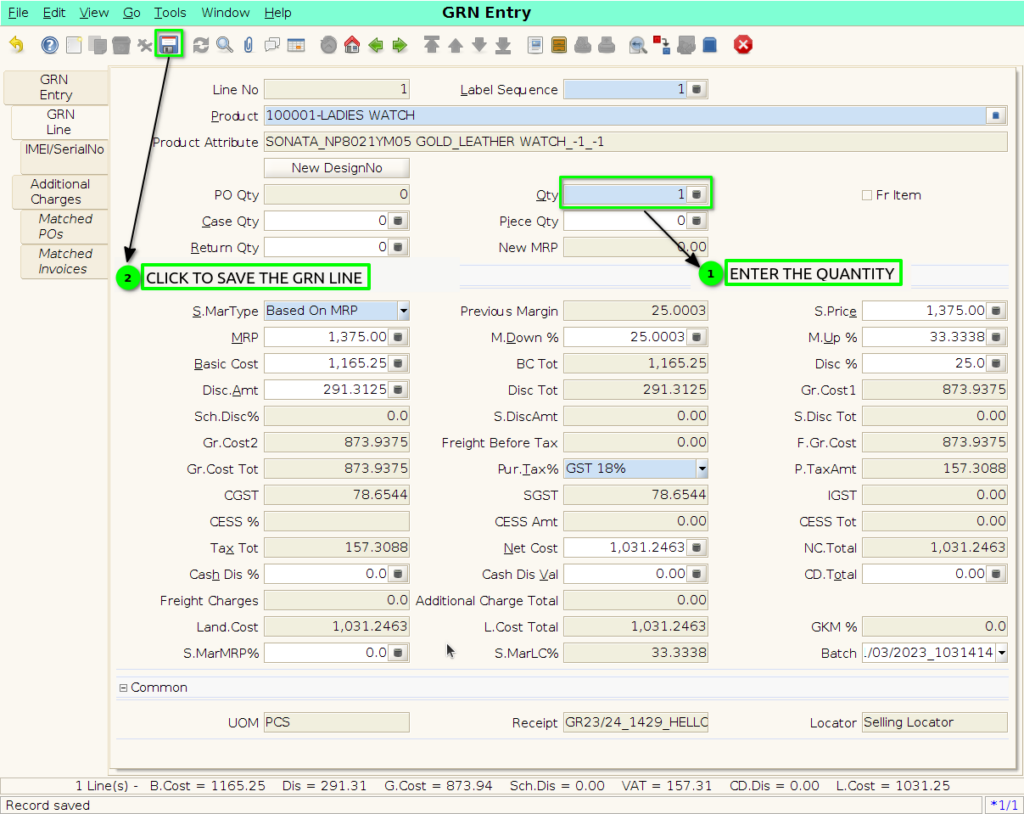
Step 13 : User need to enter the Qty . Then click “save” button to save the line.
Step 14 : Click additional charge tab to update additional charges.
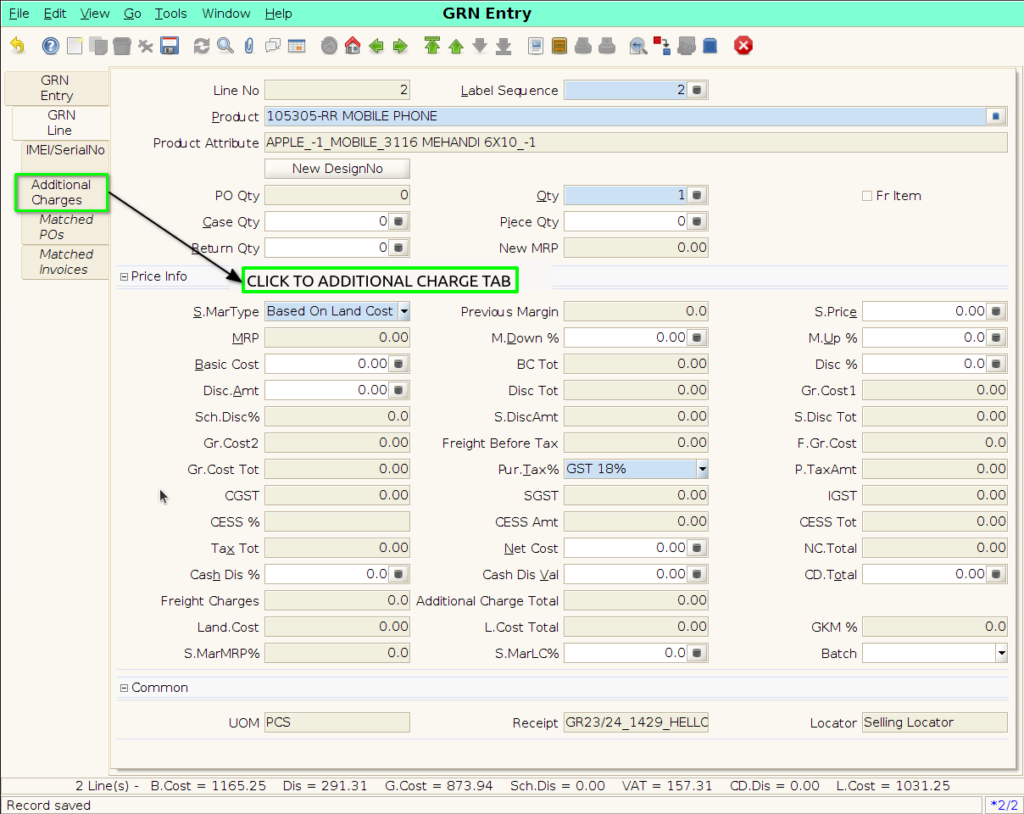
Step 15 : In GRN Entry ,update additional charge by following steps

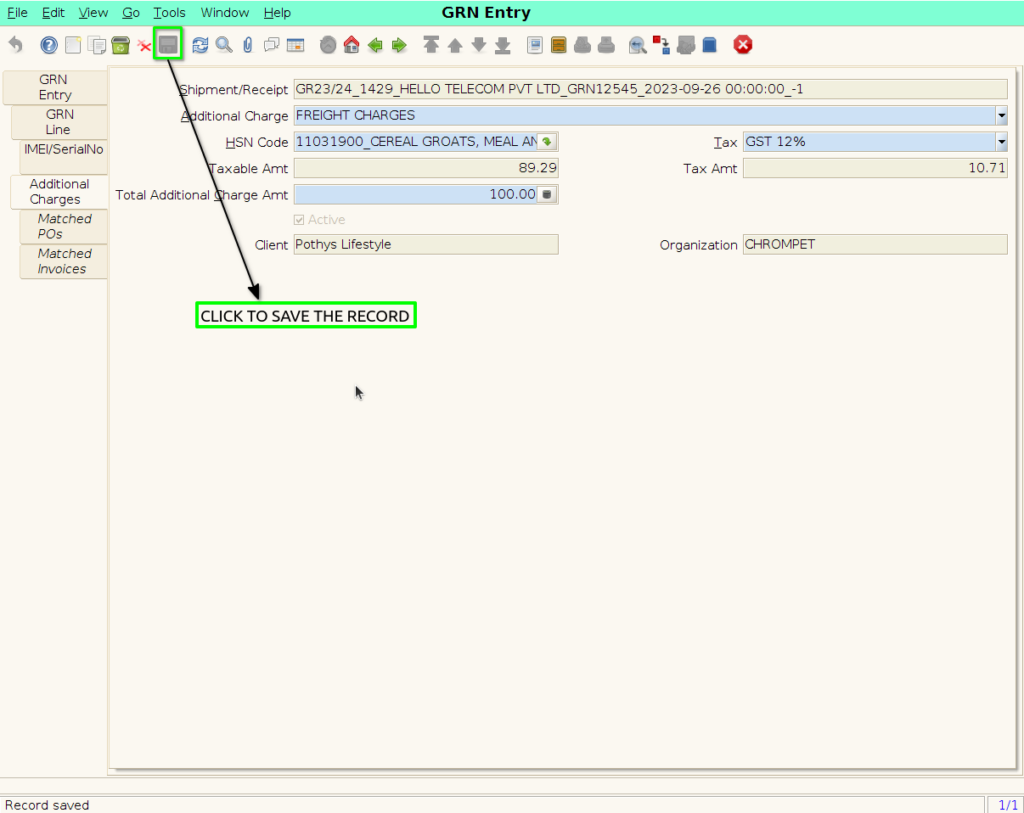
Step 16 : Click to save the record.
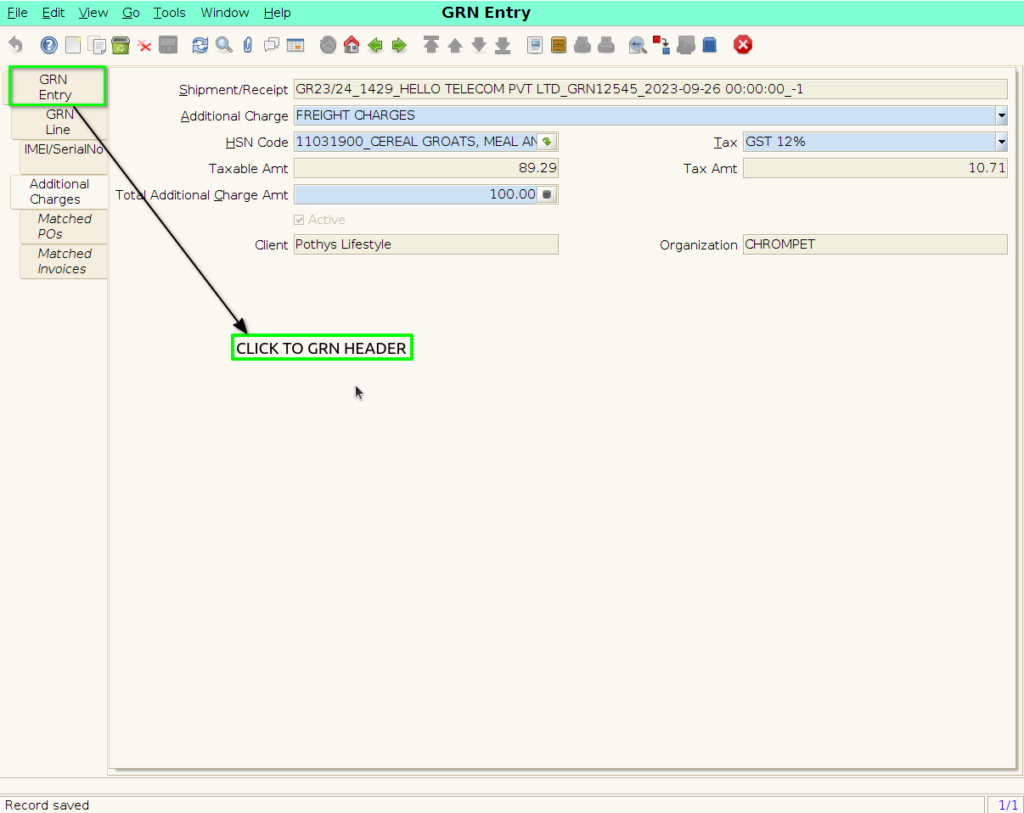
Step 17 : Click GRN Entry to GRN Header screen.
Step 18 : To check header total value added based on GRN line.
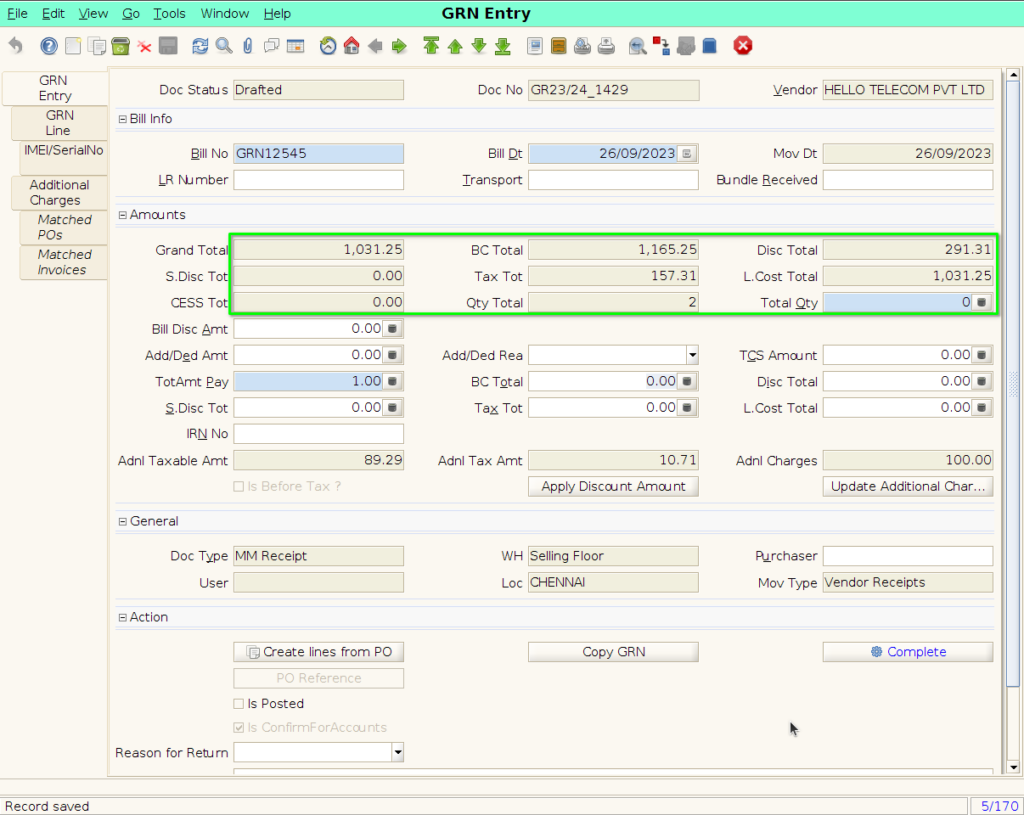
Step 19 :
- User Can add the TCS Amount
- User can add the Bill Disc Amount
- User Can add the addition/deduction amount
- User can add the addition/deduction reason
- Apply the discount amount
- Update the additional charge in line level
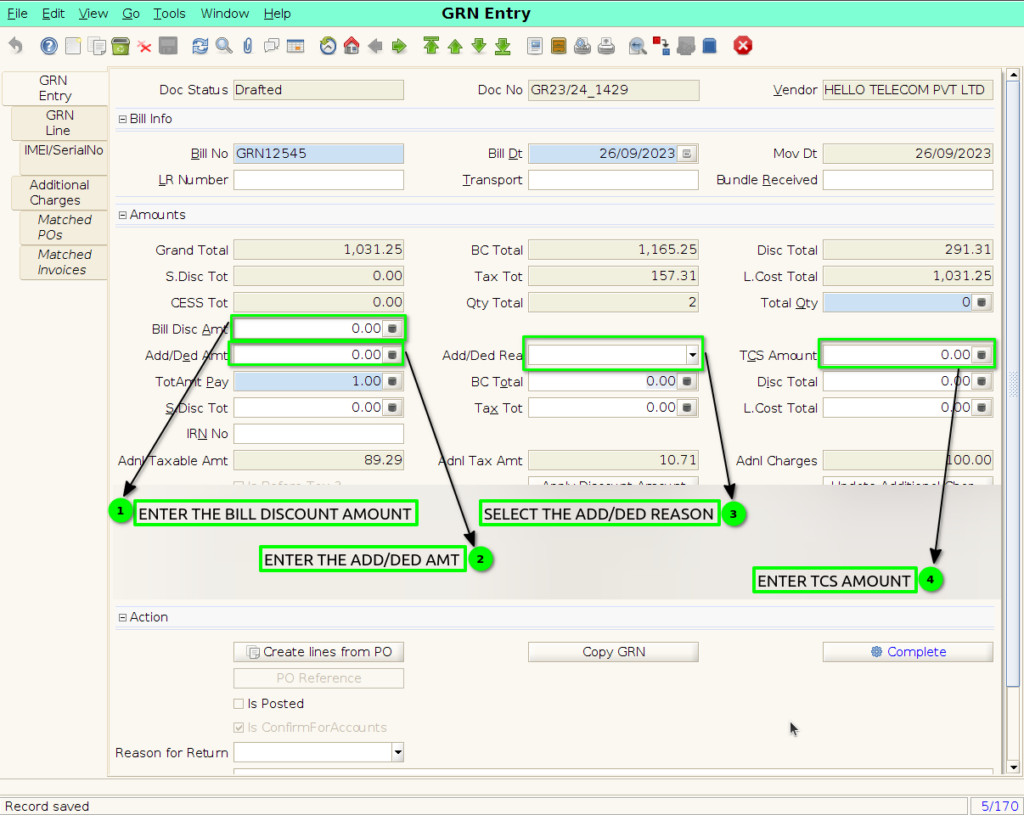
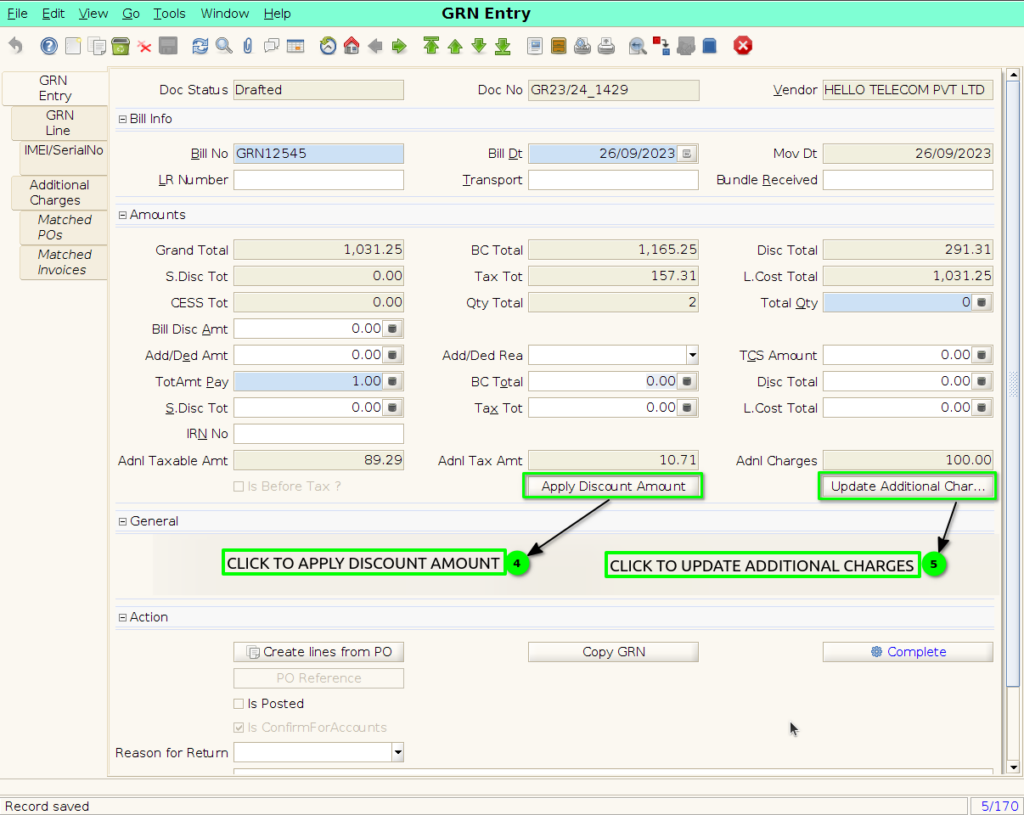
Step 20:
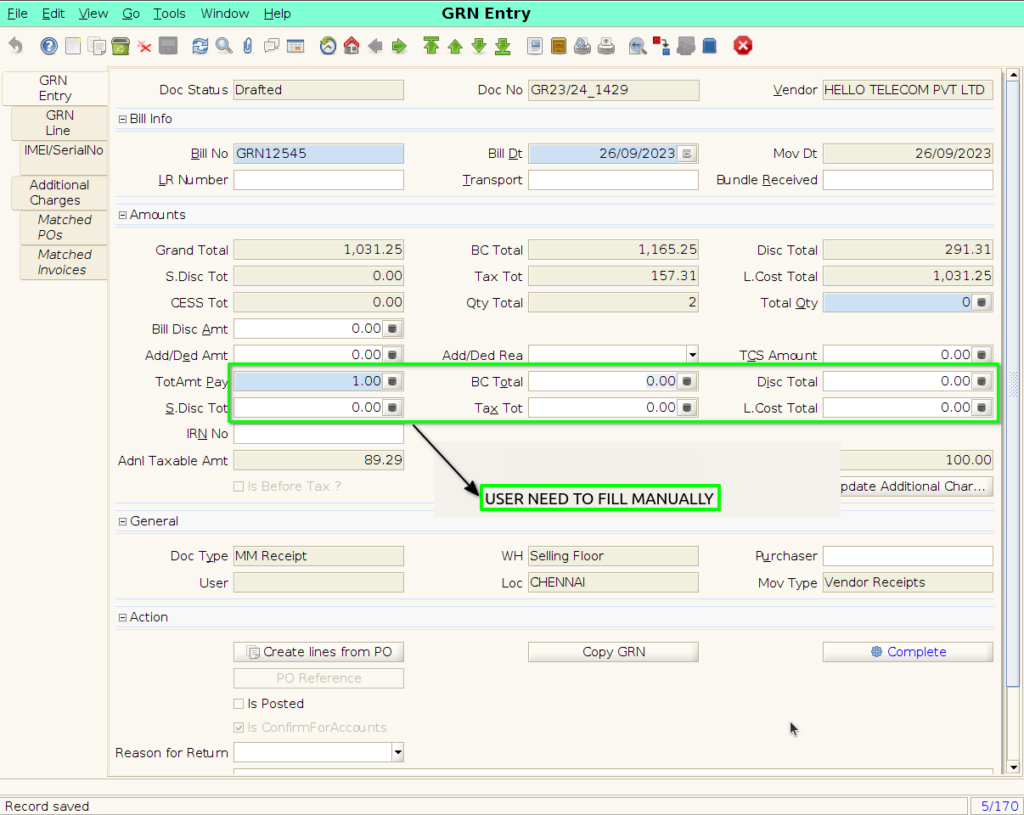
User need to fill the ‘TotAmt Pay’ as ‘Grand Total’ value, ‘BC Total’ as above ‘BC Total’ value, ‘Tax Tot’ as above ‘Tax Tot’ value and ‘L.Cost Total’ as above ‘L.Cost Total’ value.
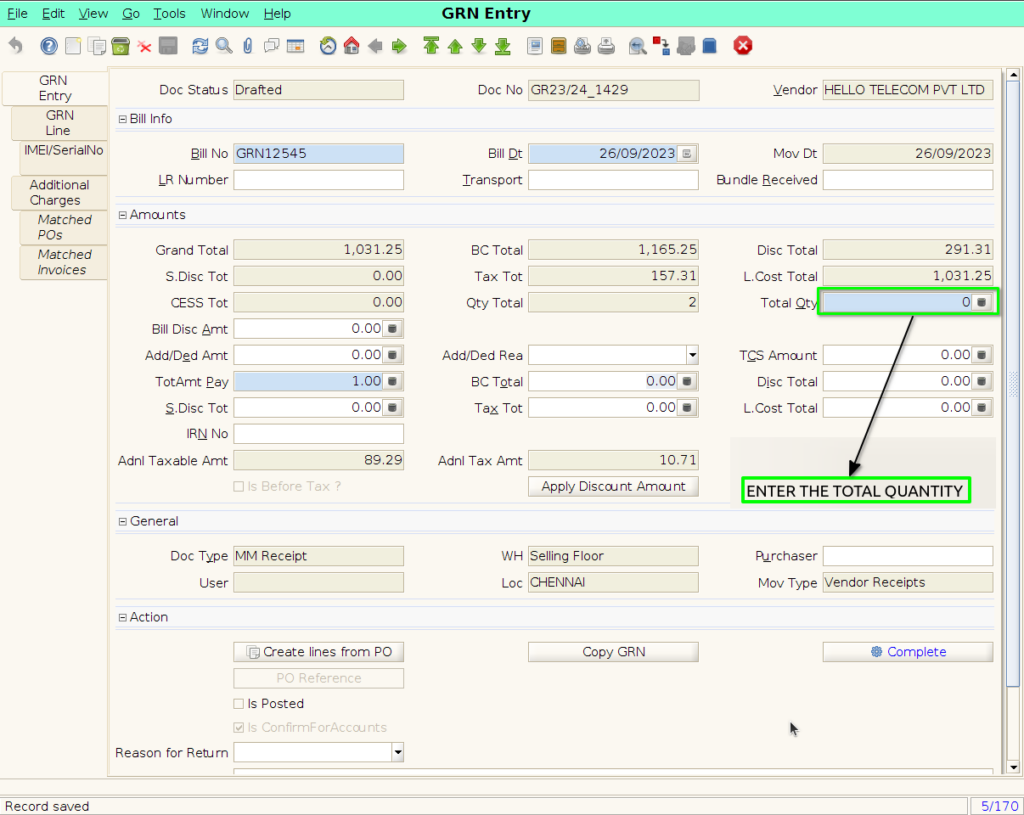
Enter total Quantity same in quantity total.
Step 21: Then click ‘Save’ GRN Document.

Step 22: Click ‘Complete’ button to complete the document pop up.
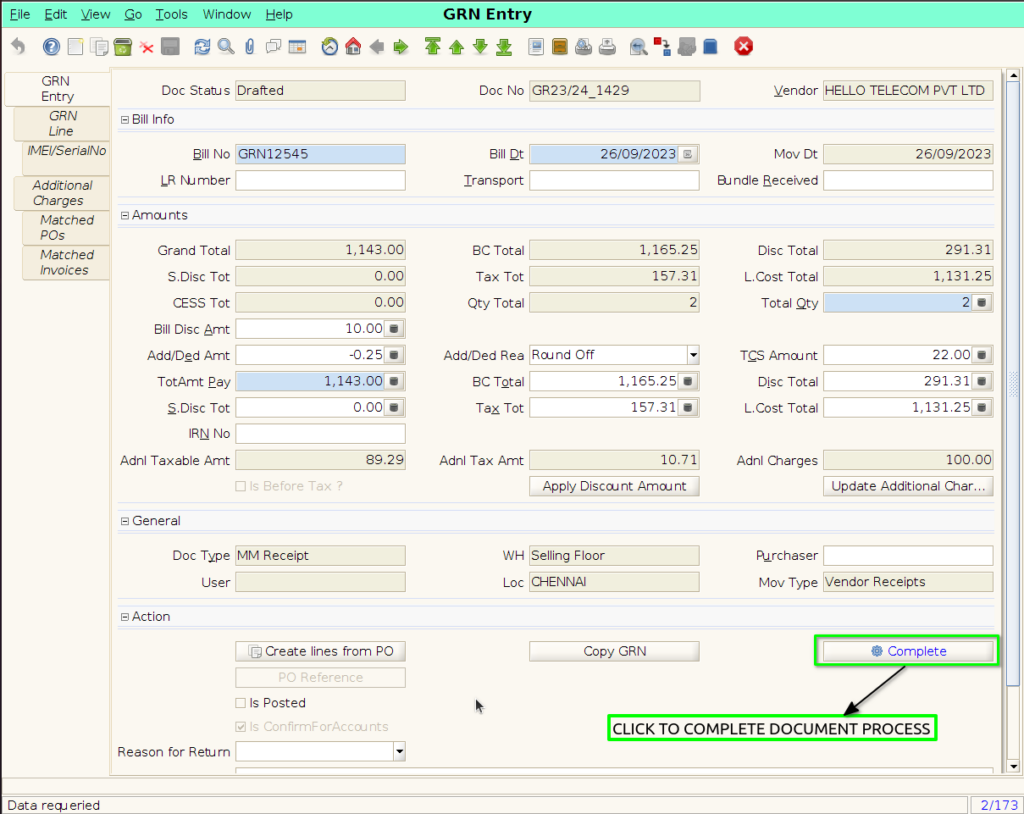
Step 23: Select the document action to complete the GRN Entry.

Step 24: The ‘Document Status’ is change to ‘Completed’ and showing generate Buttons.

Step 25: Click Generate barcode button ,get the product barcode sticker.

Step 26: Select the product to get barcode sticker print by following steps,
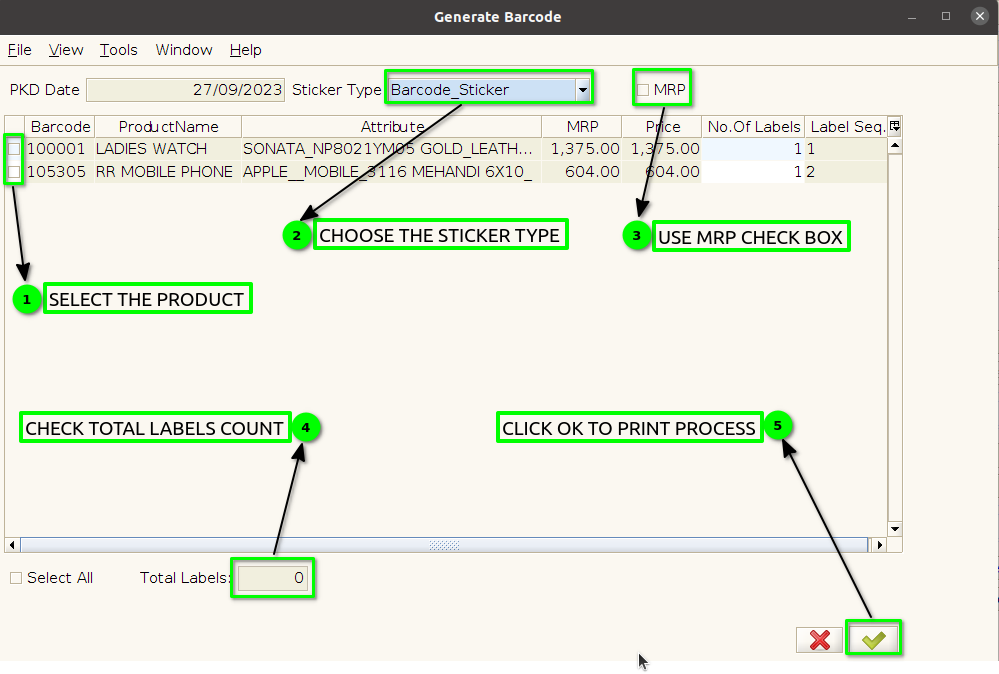
Step 27: Click “Generate Vendor Return” for Return Process.

Step 28: In return to vendor Document has been created.

Step 29: Showing return to vendor document no in GRN entry screen,
