How to Configure Business Partner Group in iDempiere
The Business Partner Group window in iDempiere for Distribution helps categorize customers, suppliers, carriers, and employees, enabling consistent accounting defaults, transaction processing, reporting, and operational control across distribution activities.
Introduction
The Business Partner Group window in iDempiere for Distribution is used to classify business partners into categories that support efficient distribution operations and financial management. Distribution organizations commonly create groups for retail customers, wholesale customers, suppliers, logistics providers, and internal staff. By assigning a business partner to the appropriate group, the system automatically applies predefined accounting settings, payment terms, credit controls, and transaction rules. This standardization reduces manual setup, improves data accuracy, and ensures consistent processing throughout the distribution supply chain.
Prerequisites
Before starting, ensure the following configuration steps have been completed:
- Initial Tenant Setup completed successfully
- Accounting Schema configured with a valid Chart of Accounts
- Account Elements (Receivables and Payables GL accounts) are defined
- Organization structure is set up with at least one active organization
Note: Ensure the Chart of Accounts is fully created before creating Business Partner Groups, as each group requires valid GL account assignments for Receivables, Payables, and Write-Off accounts.
Navigation
To locate the Business Partner Group window in iDempiere, follow the menu path below:
Menu → Partner Relation → Business Partner Rules → Business Partner Group
The window displays all existing Business Partner Group records in a grid view. From this view you can create new records, search existing ones, and review associated accounting configurations.
Step-by-Step Configuration
Step 1: Open the Business Partner Group Window
Navigate to the Business Partner Group window using the menu path
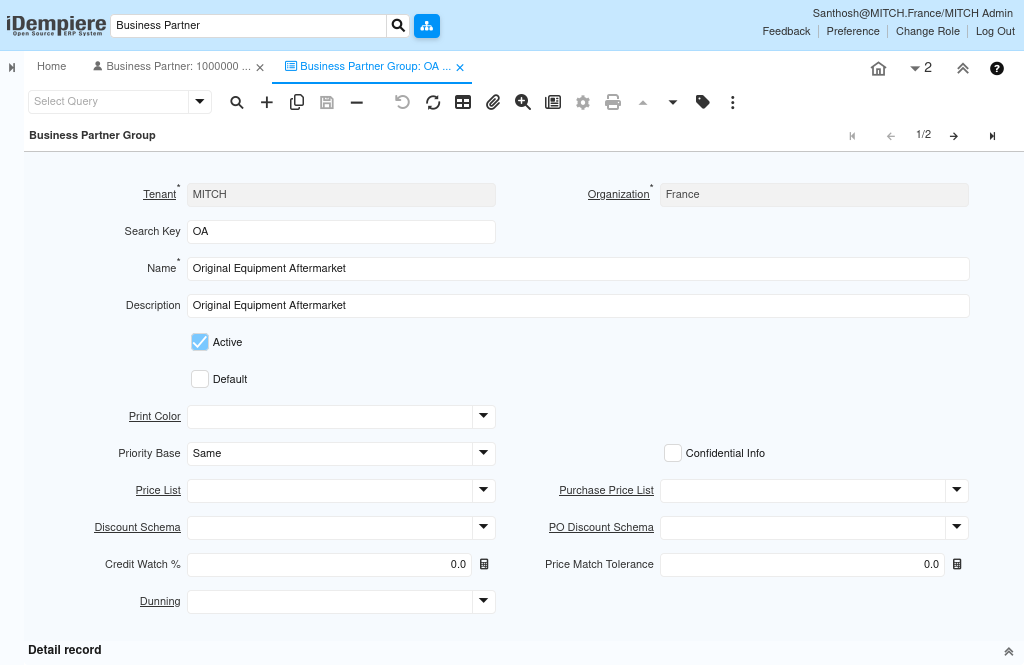
Step 2: Create a New Record
To create a new Business Partner Group, click the New Record button in the toolbar: New Record (+)
The form will clear and present empty fields ready for data entry.
Field Purpose Reference
- Search Key / Value — Short, unique code used to identify the group in lookups and reports
- Name — Descriptive name displayed when assigning a Business Partner to this group
- Description — Optional longer description providing business context for the group
- Organization — Defines whether the record is shared across all organizations (*) or restricted
- Active — Controls whether the group is available for selection in transactions
Step 3: Configure Distribution Customer Group
This group is used for all walk-in Distribution customers and point-of-sale transactions. Enter the following values:
| Field | Value |
| Organization | * |
| Search Key | Distribution-CUST |
| Name | Distribution Customer |
| Description | Walk-in customers and POS counter sales |
| Active | Yes |
Purpose
The Distribution Customer group drives the posting of all counter sales invoices to the correct receivables sub-ledger. Assigning all walk-in partners to this group ensures that sales tax, payment term defaults (typically immediate / cash), and dunning rules are applied uniformly across POS transactions.
Step 4: Configure Wholesale Customer Group
This group is used for registered wholesale buyers and corporate accounts that purchase on credit terms. Enter the following values:
| Field | Value |
| Organization | * |
| Search Key | WHOLE-CUST |
| Name | Wholesale Customer |
| Description | Registered wholesale buyers on credit terms |
| Active | Yes |
Purpose
The Wholesale Customer group enables a separate receivables stream for credit account buyers. This allows Finance to produce aged debtor reports segmented by retail versus wholesale exposure and apply differentiated credit limits and payment terms (for example, Net 30 or Net 60) at group level.
Step 5: Configure Vendor Group
This group is used for all product suppliers and merchandise vendors. Enter the following values:
| Field | Value |
| Organization | * |
| Search Key | VENDOR |
| Name | Merchandise Vendor |
| Description | Product suppliers and merchandise vendors |
| Active | Yes |
Purpose
The Merchandise Vendor group centralises all trade payables for goods purchased for resale. Separating merchandise vendors from service vendors and freight carriers allows Procurement to track outstanding purchase orders and goods receipt notes against the correct payables account and generate accurate creditor aging reports.
Step 8: Save Record
After entering all required field values, click the Save button in the toolbar to persist the record:
A confirmation message will appear in the status bar indicating that the record has been saved successfully. The record will now be available for selection when creating or editing a Business Partner.
Note: The Business Partner Group record has been created successfully and is now available for assignment to Business Partners in the Relation Management module.
Business Flow Overview
Business Partner Groups are foundational master data that influence the entire order-to-cash and procure-to-pay cycles in iDempiere. The flow below illustrates where the group assignment takes effect:
At each posting stage, iDempiere resolves the GL accounts to debit and credit by reading the accounting configuration attached to the Business Partner Group. This means that all partners in the same group consistently post to the same sub-ledger accounts, ensuring accurate financial reporting without manual account selection at transaction time.
Validation
After creating Business Partner Groups, perform the following validation checks to confirm correct configuration:
- Open Business Partner Group window and verify all five groups appear in the Field
- Verify each group has the correct Default Receivable or Payable Account assigned
- Create a test Business Partner and assign the Distribution Customer group; confirm the receivables account defaults correctly on the Accounting tab
- Confirm the Active flag is set to Yes for all groups intended for live use
Note: After validation, run a Cache Reset from System Admin → General Rules → Cache Reset to ensure the new group records are available to all active sessions without requiring a system restart.
Common Issues
| Issue | Resolution |
| Mandatory field validation error on save | Ensure Name and Search Key fields are populated. Both are required fields. |
| Business Partner Group not visible in BP form | Confirm the Active flag is set to Yes and perform a Cache Reset. |
| Duplicate Search Key error | Each Search Key must be unique within the tenant. Rename the duplicate record before saving. |
Best Practices
- Define Business Partner Groups before creating any Business Partners to avoid the need for mass updates later
- Use Organization = * for all groups to ensure availability across all organization units in a multi-org setup
- Maintain a one-to-one mapping between each Business Partner Group and a dedicated GL sub-account to support granular financial reporting
- Document the intended Write-Off Account for each group in your Chart of Accounts reference guide to ensure consistency during period-end processing
- Periodically review inactive groups and archive or delete records that are no longer in use to keep the lookup list clean
Next Steps
After completing the Business Partner Group setup, continue with the following configuration topics:
- Business Partner in iDempiere for Distribution
- Payment Terms in iDempiere for Distribution
- Price List in iDempiere for Distribution