How to Configure Calendar Year and Period in iDempiere
The Calendar Year and Period window in iDempiere for Distribution defines fiscal years and accounting periods, ensuring accurate financial postings, period control, and compliance across distribution operations.
Introduction
The Calendar Year and Period window in iDempiere for Distribution is used to establish the fiscal calendar structure and manage accounting periods for financial transactions. Distribution organizations rely on calendars and periods to control when sales orders, purchase invoices, inventory transactions, payments, and journal entries can be processed and posted.
Each accounting document is validated against an open accounting period, helping maintain financial accuracy and preventing postings to closed periods. Proper calendar and period configuration ensures consistent financial reporting, supports period-end closing activities, and strengthens accounting control throughout the distribution business.
Note: A Calendar in iDempiere is a container for fiscal years. Each Year holds Periods. Periods are opened or closed to control when transactions can be posted.
Business Rules
- Every transaction in iDempiere must fall within an open accounting period. If no matching open period exists, the document cannot be posted.
- A Calendar must be linked to the Accounting Schema for period validation to function on transactions.
- Period Control is managed per Document Base Type — AP Invoice, AR Invoice, GL Journal, and others can be opened or closed independently within the same period.
- A period in “Never Opened” status does not allow any postings. It must be explicitly opened before transactions can be processed.
- A “Permanently Closed” period cannot be reopened. Use this status only after audits and statutory filings are complete.
Understanding Calendar Structure in iDempiere
iDempiere uses a three-level hierarchy for fiscal time management:
| Level | Window / Tab | Purpose |
| 1 – Calendar | Calendar (Header) | Top-level container. Defines the calendar name. |
| 2 – Year | Year (Child Tab) | Fiscal year record. One row per fiscal year (e.g., FY 2025–26). |
| 3 – Period | Period (Child Tab under Year) | Individual accounting periods — typically 12 monthly periods per year. Can be opened or closed independently. |
Step-by-Step Configuration
Step 1 – Open the Calendar Window
Navigate to the Calendar window using the menu path below:
Alternatively, use the Application Search and type Calendar to locate the window directly. The window displays all existing Calendar records. In a fresh tenant setup this list will be empty.
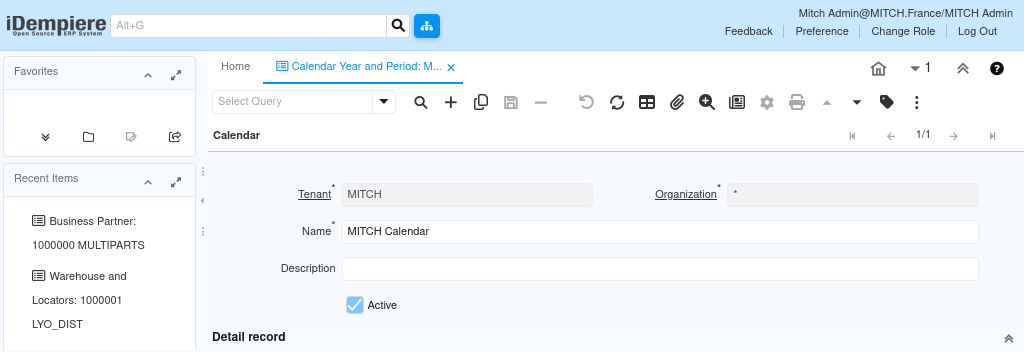
Step 2 – Create a New Calendar Record
Click the New Record button (+) in the toolbar to create a new Calendar header, then enter the following values:
| Field | Value | Notes |
| Client | Your Client Name | Auto-populated. Identifies the tenant. |
| Organisation | * | Use * to make the calendar available across all organisations. |
| Name | Retail Fiscal Calendar | Descriptive name for the calendar. |
| Description | April to March fiscal calendar for retail operations | Optional but recommended. |
| Active | Checked | Must be active for use in transactions. |
Note: Name the calendar to reflect the fiscal year type — e.g., ‘Retail Fiscal Calendar (Apr-Mar)’. This helps when multiple calendars are configured for different entities.
Step 3 – Save the Calendar Record
Click Save in the toolbar after entering the Calendar header details. The child tabs Year and Period will become active after saving.
Toolbar → Save
Step 4 – Open the Year Tab and Create a Fiscal Year
Navigate to the Year child tab at the bottom of the Calendar window. Click New Record (+) within the Year tab to create a fiscal year entry.
Calendar Window → Year Tab (Child Tab) → New Record (+)

Example A – Indian Fiscal Year (April–March)
| Field | Value |
| Organisation | * |
| Calendar | Retail Fiscal Calendar |
| Year | 2025-26 |
| Description | Financial Year April 2025 to March 2026 |
| Active | Checked |
Example B – Calendar Year (January–December)
| Field | Value |
| Organisation | * |
| Calendar | Retail Fiscal Calendar |
| Year | 2025 |
| Description | Financial Year January 2025 to December 2025 |
| Active | Checked |
Click Save after entering the Year record.
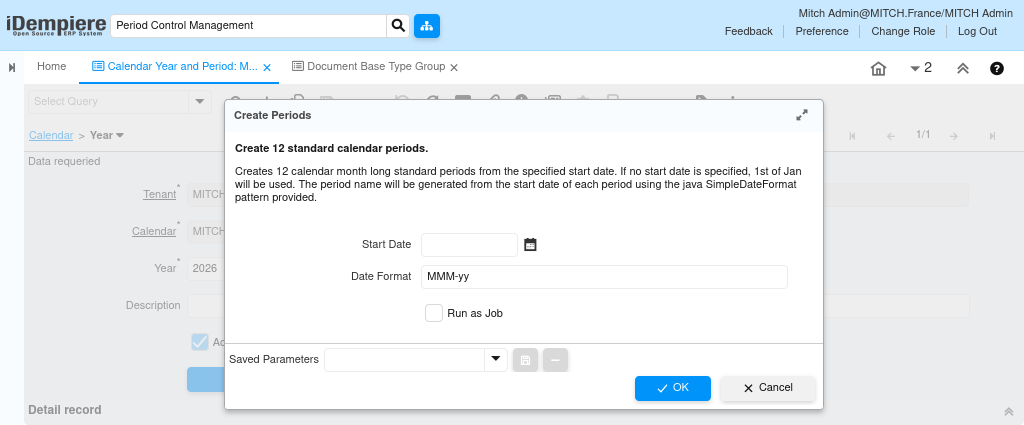
Step 5 – Generate Periods Automatically
iDempiere provides a Create Periods button within the Year tab that automatically generates 12 monthly periods. This is the recommended approach for standard monthly periods.
Year Tab → Button: Create Periods
After clicking Create Periods, iDempiere generates 12 period records with the following defaults:
- Period Type: Standard
- Period Name: Month abbreviation and year (e.g., Apr-2025, May-2025)
- Start Date: First day of the month
- End Date: Last day of the month
- Status: Never Opened – must be opened before use
Note: If your fiscal year does not follow standard monthly periods (e.g., 4-4-5 retail calendar or 13-period structure), create periods manually in the Period tab instead of using Create Periods.
Step 6 – Review the Period Tab
Navigate to the Period child tab under the Year record to review the auto-generated periods.
Calendar Window → Year Tab → Period Tab (Child Tab)

| Field | Description |
| Period No. | Sequential period number (1–12 for monthly). Used for ordering. |
| Name | Display name shown in transaction dropdowns — e.g., Apr-2025. |
| Period Type | Standard (normal accounting) or Adjustment (for year-end entries). |
| Start Date | First date of the period. Transactions must fall on or after this date. |
| End Date | Last date of the period. Transactions must fall on or before this date. |
| Active | Must be checked for the period to be selectable in transactions. |
Step 7 – Open the Period Control Tab
Inside each Period record, there is a child tab called Period Control. This is where the actual open/close status of the period is managed separately for each Document Base Type. Navigate to it as follows:
Calendar Window → Year Tab → Period Tab → Period Control Tab (Child Tab)
The Period Control tab contains one row per Document Base Type for example, AP Invoice, AR Invoice, GL Journal, and so on. Each row independently controls whether that category of document can be posted in the selected period.
Note: A period is not simply open or closed globally. Period Control allows fine-grained control for example, you can keep AR and AP open while closing GL Journal entries, or open all document types at once using the Open All action.
Step 8 – Configure Period Control Records
When a period is first created, Period Control records may not exist yet. You can create them manually one row per Document Base Type, or use the Open All action which creates them automatically.
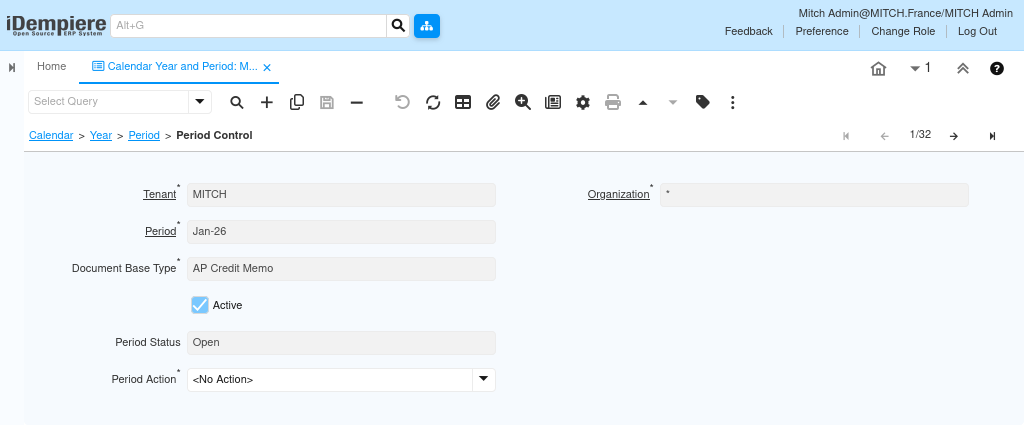
For each row, the fields are:
| Field | Value / Options | Notes |
| Organisation | * | Use * to apply across all organisations. |
| Document Base Type | AP Invoice, AR Invoice, GL Journal, etc. | One row per document type to be controlled. |
| Period Status | Never Opened / Open / Closed / Permanently Closed | Set to Open to allow posting for that document type. |
| Active | Checked | Must be active for the control record to take effect. |
Period Status values and their effect on transaction posting:
| Period Status | Meaning | Posting Allowed |
| Never Opened | Default when a period is first created. No postings permitted. | No |
| Open | Period is active and accepting transactions for this document type. | Yes |
| Closed | Period manually closed. No further postings for this document type. | No |
| Permanently Closed | Period is permanently locked. Cannot be reopened. | No |
Step 9 – Open All Document Types for a Period
For most retail implementations, all document base types should be opened together at the start of each period. iDempiere provides a convenient Open All action at the Period tab level to do this in one step.
- Select the Period record in the Period tab
- Click the Open button (Open All) in the toolbar
- iDempiere creates or updates Period Control records for all document base types, setting their status to Open
- Navigate to the Period Control tab to verify that all required document base types now show Status = Open
Common Document Base Types configured in a retail iDempiere implementation:
| Document Base Type | Description | Typical Retail Usage |
| AP Invoice | Accounts Payable Invoice | Supplier invoices for goods and services |
| AP Credit Memo | Accounts Payable Credit Memo | Supplier returns and debit notes |
| AP Payment | Accounts Payable Payment | Payments made to suppliers |
| AR Invoice | Accounts Receivable Invoice | Customer sales invoices |
| AR Credit Memo | Accounts Receivable Credit Memo | Customer returns and credit notes |
| AR Receipt | Accounts Receivable Receipt | Customer payments received |
| GL Journal | General Ledger Journal | Manual journal entries and adjustments |
| Material Receipt | Goods Receipt | Purchase order goods receipts into warehouse |
| Material Delivery | Goods Delivery / Shipment | Sales order shipments to customers |
Important: Open only the current period and near-future periods. Keep past periods closed once reconciliation and reporting are complete to prevent backdated entries.
Step 10 – Link Calendar to Accounting Schema
The Calendar must be linked to the Accounting Schema for period validation to function on transactions. Navigate to:
Menu → System → Accounting → Accounting Schema
Open the relevant Accounting Schema record and set the Calendar field to the calendar created above. Save the record.
| Field | Value |
| Accounting Schema Name | Your Accounting Schema (e.g., Retail Accounting) |
| Calendar | Retail Fiscal Calendar |
Configuration Examples
Indian – April to March Fiscal Year (FY 2025-26)
| Period No. | Period Name | Start Date | End Date | Type |
| 1 | Apr-2025 | 01-Apr-2025 | 30-Apr-2025 | Standard |
| 2 | May-2025 | 01-May-2025 | 31-May-2025 | Standard |
| 3 | Jun-2025 | 01-Jun-2025 | 30-Jun-2025 | Standard |
| 4 | Jul-2025 | 01-Jul-2025 | 31-Jul-2025 | Standard |
| 5 | Aug-2025 | 01-Aug-2025 | 31-Aug-2025 | Standard |
| 6 | Sep-2025 | 01-Sep-2025 | 30-Sep-2025 | Standard |
| 7 | Oct-2025 | 01-Oct-2025 | 31-Oct-2025 | Standard |
| 8 | Nov-2025 | 01-Nov-2025 | 30-Nov-2025 | Standard |
| 9 | Dec-2025 | 01-Dec-2025 | 31-Dec-2025 | Standard |
| 10 | Jan-2026 | 01-Jan-2026 | 31-Jan-2026 | Standard |
| 11 | Feb-2026 | 01-Feb-2026 | 28-Feb-2026 | Standard |
| 12 | Mar-2026 | 01-Mar-2026 | 31-Mar-2026 | Standard |
| 13 | Adj-2026 | 01-Apr-2026 | 01-Apr-2026 | Adjustment |
Calendar Year – January to December (2025)
| Period No. | Period Name | Start Date | End Date | Type |
| 1 | Jan-2025 | 01-Jan-2025 | 31-Jan-2025 | Standard |
| 2 | Feb-2025 | 01-Feb-2025 | 28-Feb-2025 | Standard |
| 3 | Mar-2025 | 01-Mar-2025 | 31-Mar-2025 | Standard |
| 4 | Apr-2025 | 01-Apr-2025 | 30-Apr-2025 | Standard |
| 5 | May-2025 | 01-May-2025 | 31-May-2025 | Standard |
| 6 | Jun-2025 | 01-Jun-2025 | 30-Jun-2025 | Standard |
| 7 | Jul-2025 | 01-Jul-2025 | 31-Jul-2025 | Standard |
| 8 | Aug-2025 | 01-Aug-2025 | 31-Aug-2025 | Standard |
| 9 | Sep-2025 | 01-Sep-2025 | 30-Sep-2025 | Standard |
| 10 | Oct-2025 | 01-Oct-2025 | 31-Oct-2025 | Standard |
| 11 | Nov-2025 | 01-Nov-2025 | 30-Nov-2025 | Standard |
| 12 | Dec-2025 | 01-Dec-2025 | 31-Dec-2025 | Standard |
Business Flow Overview
In a retail environment, the typical period management cycle is:
- At start of month: Open the current month’s period
- During the month: All transactions post against the open period
- At month-end: Complete reconciliation, run period-end reports
- After sign-off: Close the period to prevent further postings
- Year-end: Post adjustment entries to the Adjustment period, then permanently close the year
Common Issues and Resolutions
| Issue | Likely Cause | Resolution |
| Error: Period not found for document date | Period does not exist for the transaction date, or Calendar is not linked to the Accounting Schema. | Verify the transaction date falls within a configured period. Confirm the Calendar field is set in the Accounting Schema. |
| Error: Period is closed | The period covering the transaction date is in Closed status. | Open the period from the Period tab using the Open Period action, or post to a different open period. |
Best Practices
- Always create an Adjustment period (Period Type = Adjustment) for year-end closing entries.
- Use Organisation = * for the Calendar so all organisations under the client share the same fiscal structure, unless the business requires separate fiscal calendars per entity.
- Open periods at the start of each month, not in advance – pre-opening future periods increases the risk of accidental backdated or future-dated entries.
- Never permanently close a period until audits and statutory filings for that period are complete.
- Maintain consistent Period Name conventions: use MMM-YYYY format (e.g., Apr-2025) for easy identification across all transaction screens.
- If running multiple companies under one iDempiere tenant with different fiscal years, create separate Calendar records per fiscal year type and link each to its respective Accounting Schema.
Naming Convention
| Element | Convention | Example |
| Calendar Name | <Business Name> Fiscal Calendar | Retail Fiscal Calendar |
| Year Name (Apr-Mar) | FY YYYY-YY | FY 2025-26 |
| Year Name (Jan-Dec) | YYYY | 2025 |
| Period Name (Standard) | MMM-YYYY | Apr-2025, Dec-2025 |
| Period Name (Adjustment) | Adj-YYYY | Adj-2026 |
Next Steps
After completing Calendar Year and Period configuration, continue with the following setup tasks:
- Link Calendar to Accounting Schema