How to Create a Customer RMA in iDempiere
Introduction
Customer RMA (Return Material Authorization) is an iDempiere document used to process products returned by customers after a completed sales shipment.
It provides a controlled workflow for damaged or expired returns, maintaining traceability between the original shipment and the generated return order.
Completing a Customer RMA triggers the Create Order From RMA process, which generates a return Sales Order and directly impacts inventory and accounts receivable.
Business Rules
- Customer RMA must reference an existing completed Customer Shipment.
- Only products delivered in the selected shipment can be added as return lines.
- RMA Type must be selected to identify the return reason (Damaged or Expired).
- At least one RMA Line must exist before the document can be completed.
- Movement Quantity on the return line cannot exceed the original shipped quantity.
- The RMA must be in Completed status before running Create Order From RMA.
- Generated return Sales Orders retain a reference link to the originating RMA.
Configuration Steps
Step 1: Create the Customer RMA Header
The header establishes the return document, links it to the originating shipment, and identifies the return reason through the RMA Type.
- Open Customer RMA and click New Record.
- Select Document Type, enter Name, select RMA Type, click the Shipment/Receipt lookup to choose the original shipment, and save.
| Field | Sample Value | Description |
| Document No | 30003 | Auto-generated RMA reference number |
| Name | Damaged Product Return | Descriptive name for the return |
| Document Type | Customer Return Material | Identifies this as a Customer RMA document |
| RMA Type | Damaged | Reason for the customer return; Damaged or Expired |
| Shipment/Receipt | 500002_06/25/2026 | Original shipment from which products were delivered |
| Business Partner | ALPHA RETAIL SOLUTIONS | Customer initiating the return (auto-populated from shipment) |
| Sales Representative | Harish Natarajan | Sales representative responsible for the return |
| Amount | 1,400.00 | Total return value, auto-calculated from RMA Lines |

Step 2: Select the Original Shipment
Selecting the correct shipment ensures only products actually delivered to the customer can be returned, maintaining full return traceability.
- Click the Shipment/Receipt field lookup.
- The Shipment Info window opens listing all customer shipments.
- Filter by Business Partner or Movement Date if needed, select the correct shipment row, and confirm.
| Field | Sample Value | Description |
| Business Partner | ALPHA RETAIL SOLUTIONS | Filter shipments by customer |
| Movement Date | 06/25/2026 | Date the original shipment was dispatched |
| Document No | 500002 | Shipment document number to select |
| Sales Transaction | Checked | Confirms the shipment is a customer delivery |
Step 3: Create RMA Lines
RMA Lines define which products and quantities are being returned. The Create lines from process pulls products directly from the selected shipment.
- Click Create lines from. The Create lines from RMA window opens showing all product lines from the selected shipment.
- Select the product row, enter Movement Quantity, and click Create lines from RMA.
| Field | Sample Value | Description |
| Business Partner | ALPHA RETAIL SOLUTIONS | Customer from the selected shipment |
| Line No | 10 | Shipment line number |
| Product | AASH-ATTA-5KG_Aashirvaad Atta – 5kg | Product available for return from the shipment |
| Quantity | 5.00 | Original quantity delivered in the shipment |
| Movement Quantity | 5 | Quantity the customer is returning; editable field |
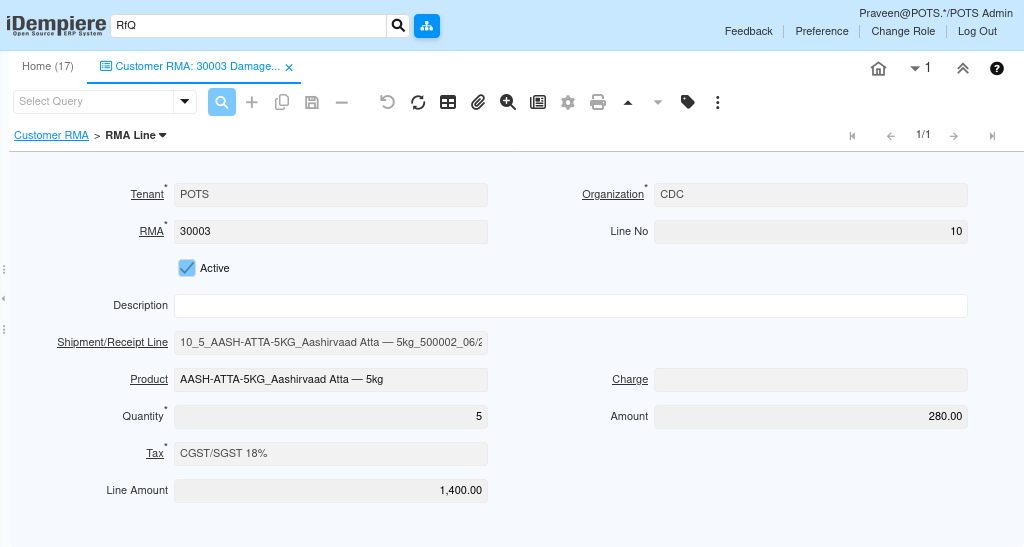
Step 4: Review RMA Lines
Reviewing the RMA Line tab confirms the returned product, quantities, pricing, and tax are correctly populated before the document is completed.
- Open the RMA Line tab and verify each line. Confirm Product, Shipment/Receipt Line, Quantity, Amount, Tax, and Line Amount.
- Line Amount is calculated automatically as Quantity × Amount.
| Field | Sample Value | Description |
| Line No | 10 | Sequence number for the return line |
| Shipment/Receipt Line | 10_5_AASH-ATTA-5KG – 5kg_500002_06/25/2026 | Original shipment line reference |
| Product | AASH-ATTA-5KG_Aashirvaad Atta – 5kg | Returned product |
| Quantity | 5 | Number of units being returned |
| Amount | 280.00 | Unit selling price of the returned product |
| Tax | CGST/SGST 18% | Tax derived from the product Tax Category |
| Line Amount | 1,400.00 | Calculated as Quantity × Amount (5 × 280) |
Step 5: Execute Document Action
- Click Document Action in the toolbar. The dropdown shows Complete, Prepare, and Void. Select the required action.
- For standard processing, select Complete to finalize the RMA.
| Document Action | Resulting Status | When to Use |
| Prepare | In Process | Validates the RMA and checks for errors without finalizing; useful for pre-completion review |
| Complete | Completed | Finalizes the RMA and enables the Create Order From RMA process; standard action for confirmed returns |
| Void | Voided | Permanently cancels the RMA; no return order can be generated; use when the return is no longer required |
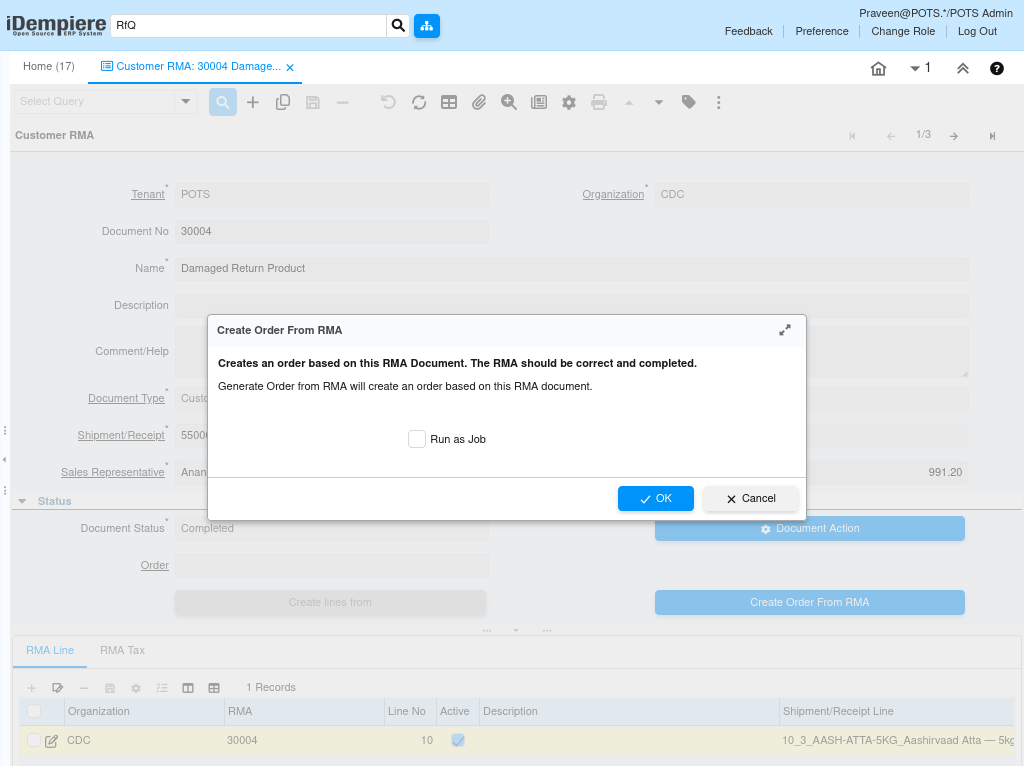
Step 6: Generate Return Sales Order
Create Order From RMA converts the completed RMA into a return Sales Order, enabling downstream processing such as return receipt and credit handling.
- On the completed RMA, click Create Order From RMA.
- The dialog confirms the RMA document is correct and completed.
- Enable Run as Job if background processing is preferred, then click OK.
| Field | Value | Description |
| Prompt | Creates an order based on this RMA Document. The RMA should be correct and completed. | System confirmation before order creation |
| Run as Job | Unchecked | Enable to run the order generation as a background process |
Step 7: Verify the Generated Sales Order
After order creation, the RMA header shows Order Created and the Order field is populated. Verifying the order confirms all return details were carried forward correctly.
- Click the Order link on the completed RMA or open the Sales Order window and search for the generated order.
- Verify Business Partner, Product, Quantity, Warehouse, Price List, and the RMA reference.
| Field | Expected Value | Description |
| Document No | 20004 | Auto-generated return Sales Order number |
| Business Partner | ALPHA RETAIL SOLUTIONS | Customer from the originating RMA |
| Warehouse | CDC Godown | Warehouse receiving the returned goods |
| Price List | Standard Sales Price List | Price list from the customer account |
| Product (Order Line) | AASH-ATTA-5KG Aashirvaad Atta – 5kg | Product carried from the RMA line |
| Order (on RMA) | 20004_07/02/2026 | Reference shown on the completed RMA linking to the return order |
Common Issues and Resolutions
| Issue | Cause | Resolution |
| Shipment not found in lookup | Shipment belongs to a different customer | Filter by the correct Business Partner in the Shipment Info window. |
| No products in Create lines from | Wrong shipment selected | Return to the header and select the correct Shipment/Receipt. |
| Movement Quantity exceeds original | More units entered than shipped | Set Movement Quantity to the original shipped quantity or less. |
| Unable to complete RMA | No RMA Lines added | Add at least one return line using Create lines from before completing. |
| Create Order From RMA button absent | RMA is not in Completed status | Complete the RMA using Document Action before generating the return order. |
| Line Amount is zero on RMA Line | Amount field is empty or zero | Verify the unit price is populated; re-select the product if needed. |
| Tax not shown on RMA Line | Product Tax Category not configured | Assign the correct Tax Category to the product in Product Master. |
Next Steps
- Process the return Sales Order to receive goods back into the warehouse.
- Generate a Customer Credit Memo or Credit Invoice for the returned amount.
- Reconcile returned inventory using the Storage Detail report.
- Update the customer account balance after credit processing.
- Review return volumes periodically using RMA and return order reports.