Start Session Point Of Sale (POS)
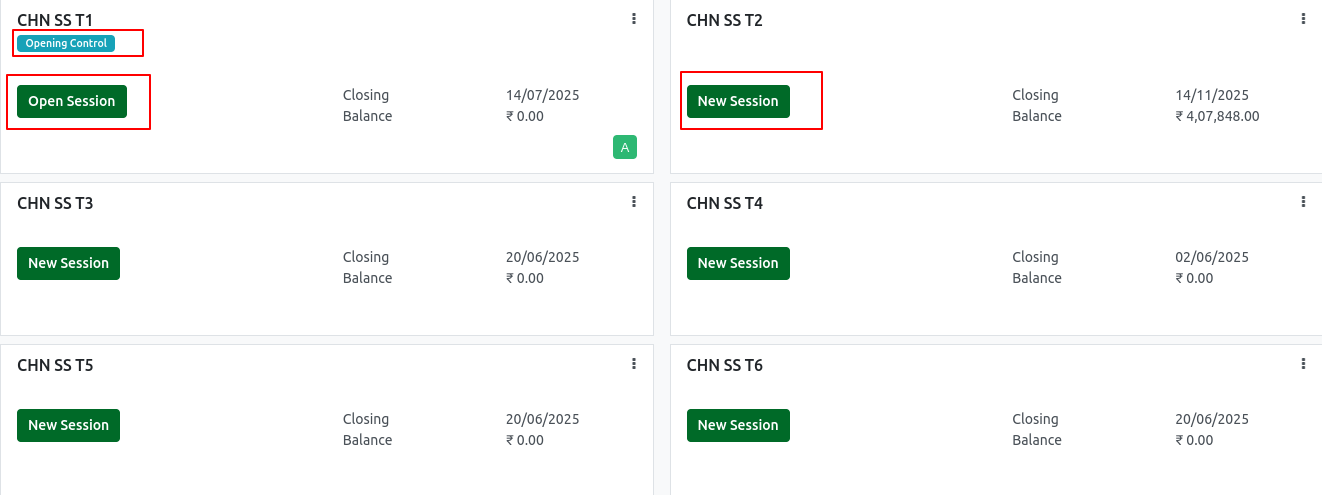
Step 1 : Navigate to POS Dashboard
- Go to Point of Sale Module
- Click Point of Sale → Dashboard to view all configured POS terminals.
Step 2 : Select Your POS Terminal
- Click on the specific terminal you want to use (e.g., “Terminal – 1”, “Terminal – 2”) to open its session.
Step 3: Click “New Session”
- Click the “New Session” or “Start Session” button.
- If cash control is enabled:
- You’ll be prompted to enter the opening cash balance.
- Confirm by clicking “Open Session”.
POS Terminals
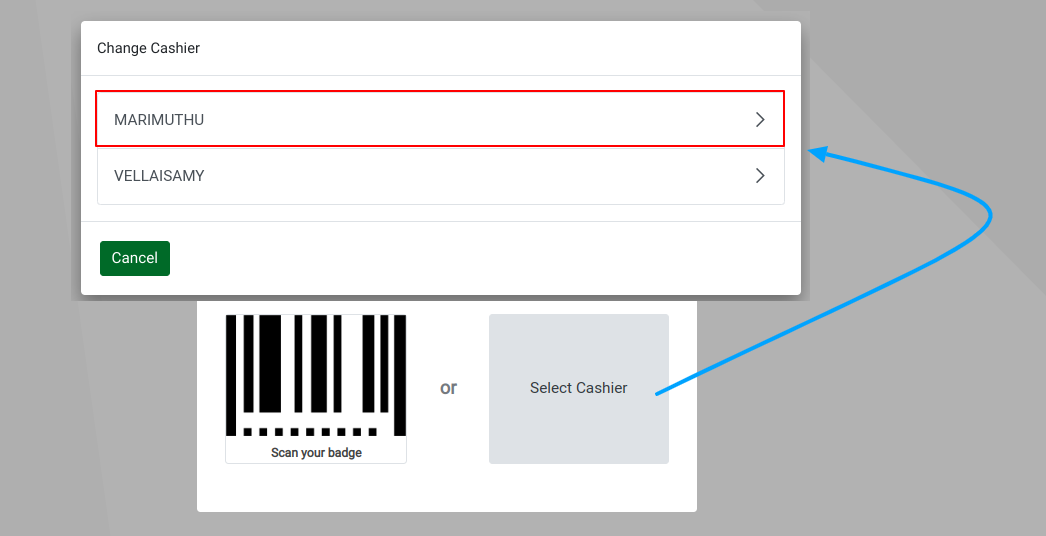
Step 4: POS Screen Opens – Terminal Login & Cashier Selection
- The POS screen will open in full-screen mode.
- The system will prompt you to select a cashier from the list of authorized users.
- Click the cashier’s name.
- Or scan a badge/barcode to log in (if enabled).
Step 5 : POS session load
- Once the POS session is logged in:
- Products, Lots, and Pricelists are automatically loaded into the POS interface for immediate use.
- Available Quantity Display: The system will show available stock for each product ,ensuring only in-stock products can be sold.
