How to Create a Customer in Odoo
Managing customer information efficiently is essential for smooth business operations. The Customer Master module streamlines the process of creating, updating, and validating customer data, ensuring accuracy across your invoicing and sales systems.
Accessing and Viewing Customers
Start by navigating to Invoicing → Customers → Customers. You can also access customers through Sales and Point Of Sales.
This will take you to the Customer screen, where you can view all existing customers in a kanban view. Each card represents a customer and it’s details.

By default, Odoo applies the “Customer Invoices” filter on this screen. This filter ensures that only real customers, those who have completed at least one confirmed sale or invoice are displayed. If you prefer a more detailed view, you can easily switch to the list view for a tabular format of customer information.
Creation Of New Customer in Odoo
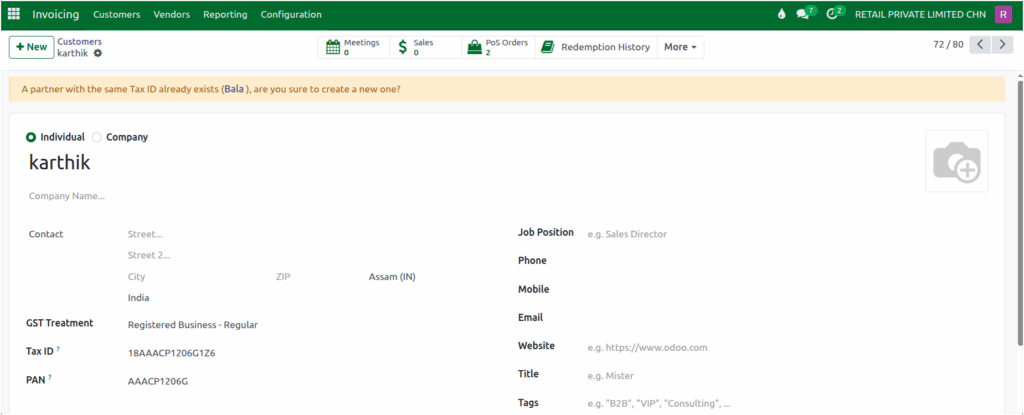
To create a new customer in Odoo, simply click the +New button on the Customer screen. This will open a form where you can enter the customer’s details.
Begin by selecting the Individual radio button if you are creating a profile for a single customer rather than a company.
The Name field is mandatory, so make sure to enter the correct customer name before proceeding. Just below this field, you’ll find a drop down option to select a Company(Optional). If the customer is associated with or works for a company, choose the appropriate company name from the list.
Enter a valid email address in the Email field to ensure correct communication and invoicing.

In Odoo, you can make sure customers have a correct mobile number by enabling Phone Number Validation. Navigate to Settings → Constrain Validation Section → Enable the Phone Number Validation check box.

When this check box is turned on, you must enter a mobile number in the Mobile field while creating a customer. If you don’t, the system will display an Validation Error: “Please Enter Mobile number.”
The mobile number must have exactly 10 digits. If it’s shorter or longer, the system will display an Validation Error: “Mobile number should be 10 digits.”

Also the mobile number must always start with digits 6, 7, 8, or 9. This rule ensures that only valid mobile numbers are stored in the system.
When adding a Tax ID , the system follows certain rules based on the GST Treatment. If the customer is chosen as a Registered Business – Regular, entering a Tax ID is mandatory. For Unregistered Businesses, entering a Tax ID is optional.
When a valid Tax ID is entered, Odoo connects to the GST Portal to automatically map customer details such as the address and PAN.
For unregistered customers, the address can be manually entered in the system since GST mapping is not applicable.
Odoo also checks for duplicate Tax IDs. If the same Tax ID already exists, the system shows an warning message to prevent duplicate entries.
In addition, any extra spaces before or after the Tax ID are automatically removed, helping keep your customer data clean and accurate.
Each customer can have different types of addresses — a main contact for general use, an invoice address for billing, a delivery address for shipments, and other addresses for extra locations or branches.
To add multiple addresses for a customer, open the Contacts & Addresses section in the customer profile and click to add new addresses. This helps you keep all multiple customer details.

Then in the Sales section of a customer profile, you can configure important details for smooth transactions.
You can set Payment Terms and assign a Price List specific to the customer. If the customer uses a customer card, their Card Number can be entered in the Barcode field. For interstate customers, you can also set a Fiscal Position to handle taxes correctly.

In the Invoicing section, you can set a customer’s Credit Limit in the Partner Limit field.
Once you’ve filled in all the required fields, click Save to store the new customer in the system. These customer records can then be used in Point of Sale (POS) and Sales modules for creating orders, invoices, and managing transactions.
