How To Receive and Validate Orders in Odoo?
Step 1: Access the Purchase Menu
To receive and validate purchase orders in Odoo, open the confirmed Purchase Order, click the Receipt smart button, review the quantities, and select Validate to update your inventory
- Log in to your backend with Manager privileges
- Navigate to Purchase → Order
Step 2: Create or Open a Purchase Order in Odoo
- Click Create to make a new PO or select an existing one.
- Basic information:
- Vendor: Choose the vendor/supplier you’re purchasing from.
- PO Date: Defaults to today; adjust if needed.
- Delivery Date: Optional; set if you expect delivery on a specific day.
- Click “Add a Product” in the Order Lines section.
- For each product:
- Choose the Product (drop down).
- Quantity: Enter the quantity you want to buy.
- MRP: Automatically filled from the product, but can be overridden if needed.
- Basic Cost: Enter the basic cost manually, or allow it to auto-fill from the product’s vendor price list.
- Mark-up and Mark-down : Automatically calculate markup or markdown percentage
Step 3: Receive and Validate Products
After saving the PO and confirming the order:
- Click Receive Products to access the Incoming Shipment.
- Enter the Inward Register (IR) Number (this is mandatory).
- Review the product quantities received.
Validate the Receipt:
- Click Validate to confirm receipt of the goods.
- Upon validation:
- A Lot Number is automatically created using the MRP value.
- You can manually edit the lot if needed.
Step 1 :Open Order -> Purchase Orders
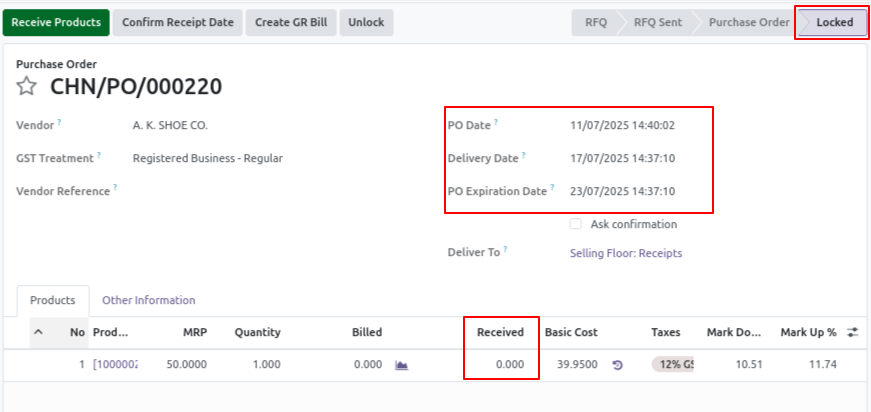
Step 2 : Click Receive Products
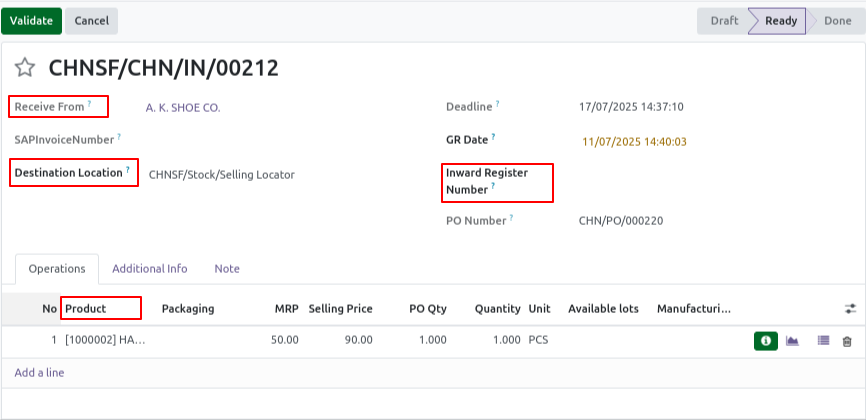
Step 3 : Validate the Order
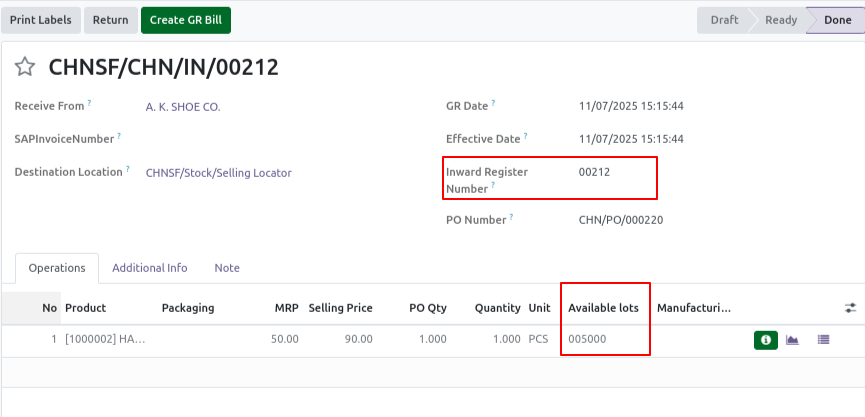
Step 4: Save the Order, Receive and Validate
- Once the vendor delivers the products, click “Receive Products”.
- It will open a receipt (incoming shipment) window where you can:
- Click “Validate” to finalise the receipt process
Step 5 : Print GRN
- After validating receipt, click Print > Picking Operations
- This serves as your GR document
Step 6: View Stock Moves (Audit)
- From the validated receipt, go to the Operations tab
- Check:
- Product
- Quantity
- From: Vendor
- To: Stock location
