Transfer to Selling Location
Step 1: Access the Product or Purchase Order
- Log in to your backend with Manager privileges.
- Navigate to:Inventory → Internal Transfer →Internal Stock Transfer
Step 2: Create a Product Transfer
- To set the Routes and Rules in Inventory Configuration:
- Use Pull and Push actions to define the Rules.
- Create a new Route to transfer products from one location to another and select Warehouse.
- Internal Transfer Form.
- Select the Contact, and the Scheduled Date defaults to the current date, but you can modify it.
- Source Location and Destination Location act as Transfer Types.
- This works based on GRN (Goods Receipt Note) and Product Categories.
- Under the Lines:
- Products will be listed according to their GRN or assigned Product Category.
Choose Product Category OR GRN and Click on Transfer
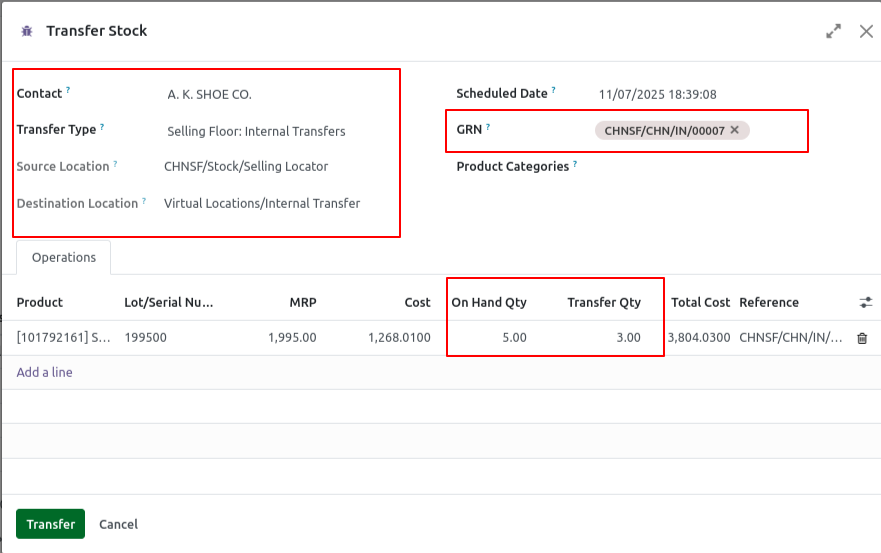
Generate Document

Click the Reference (CHNSF/INT/00503)
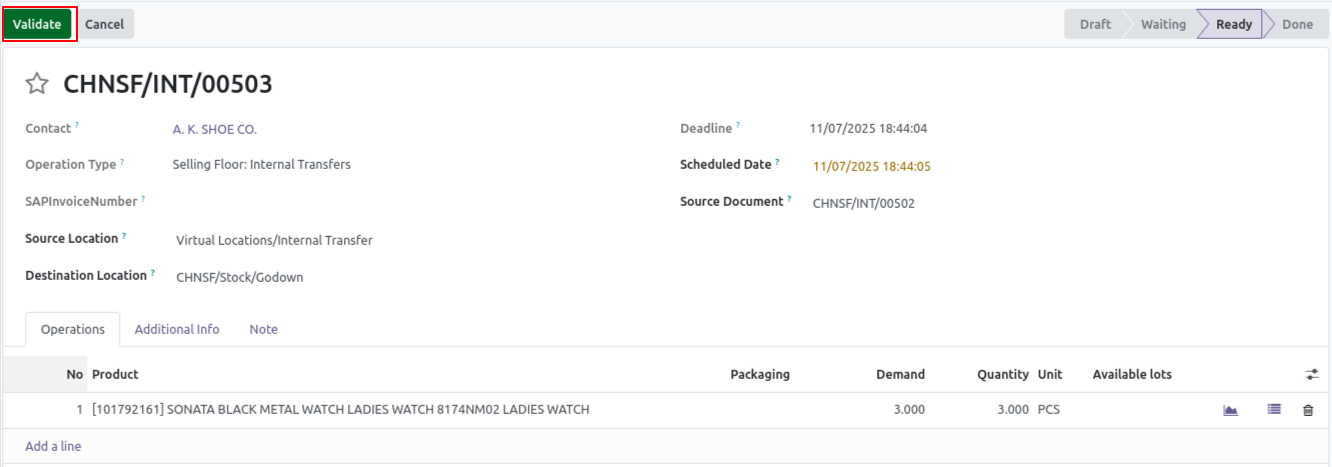
After Validation
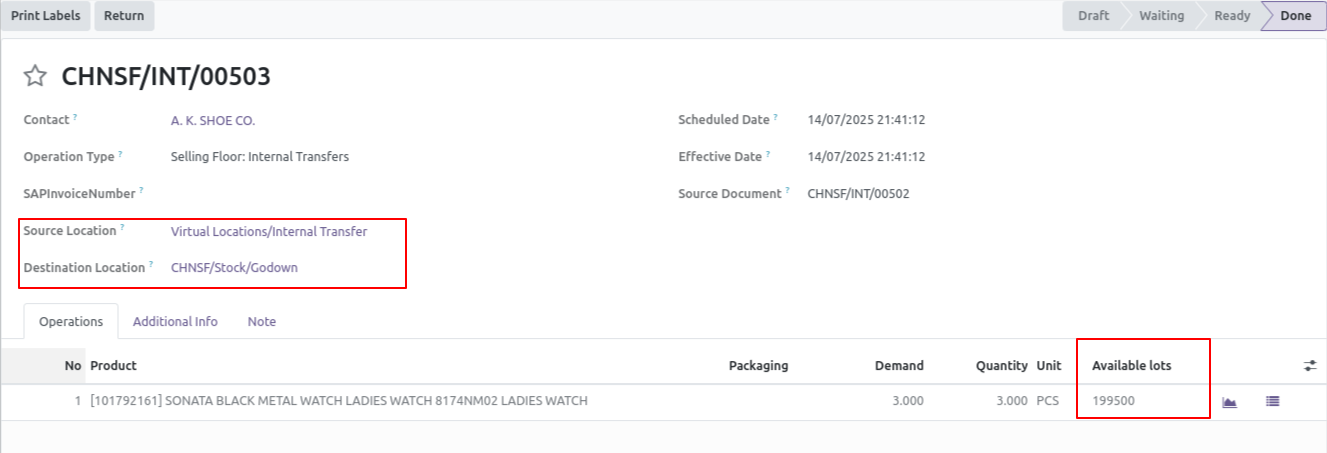
Lot Location

Step 4: Validate the Transfer
- Once the product lines are added, click Validate.
- Then complete the transfer.
