How to Print and View Picking Operations in Odoo Purchase
Printing picking operations in Odoo Purchase helps warehouse teams know exactly what items need to be picked and moved. It improves accuracy, keeps inventory records clean, and makes the receiving process more efficient.
Creating the GRN in Odoo Purchase
Start by going to the Purchase module from the dashboard. Click New to create an RFQ and fill in the basic details. Once the RFQ is confirmed, complete the Purchase Order. After this, click Receive Products to create a new Goods Receipt Note (GRN).
Enter the Inward Register Number and check all necessary details. When everything is correct, click Validate. Only after validating the GRN can you print the Picking Operations document.
Printing the Picking Operations Document in Odoo Purchase
Once the GRN is validated, open the Goods Receipt form view and click the Settings (gear) icon. Choose Print from the dropdown menu, then select Picking Operations.
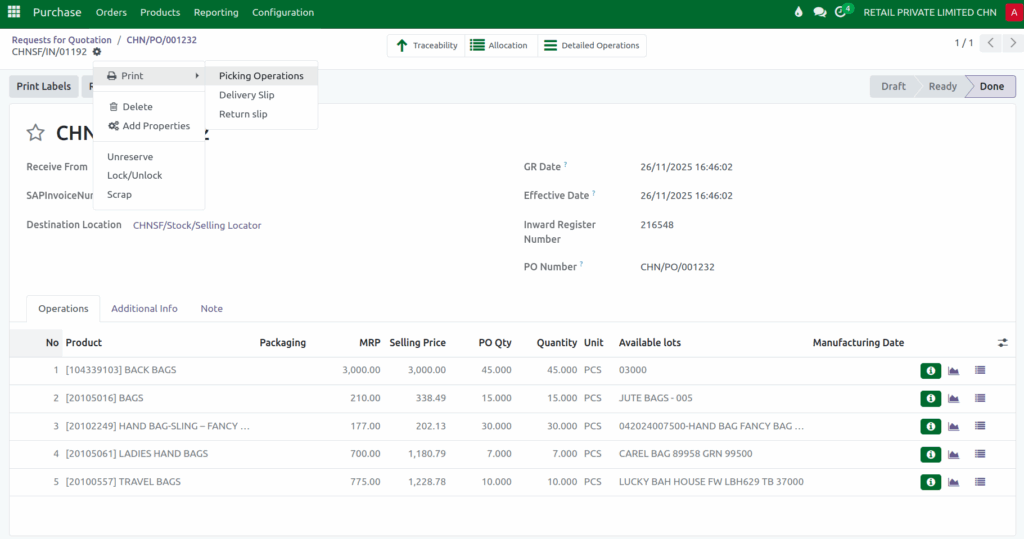
If you try to print before validating the GRN, Odoo will show a message saying, “Please validate the record to continue printing.” After validation, the Picking Operations PDF will download automatically.

Understanding the Picking Operations print
After downloading and opening the Picking Operations PDF, you will see the document neatly organized with important details at the top. On the left side, the company logo appears. In the center, the title “Goods Receipt” is displayed, clearly showing the purpose of the document.
Below this, the Warehouse Address is shown on the left, including the buyer’s company name, address, and GSTIN. On the right, the Vendor Address is displayed, showing the supplier’s details such as name, address, mobile number, and GSTIN. The document also includes the PO Number, PO Date, Movement Date, and IRN, which help track the receiving process accurately.
Verifying Product Details in the Picking Operations Print
Below this, the product table lists all received items line by line. Each row shows the Line Number (L.No), the Product with its code, name, and HSN/SAC Code, the assigned Lot or Serial number, the MRP, and the Quantity received. At the bottom of the table, a SUM row displays the total quantity of all items received. The document ends with a placeholder for the Authorized Signature, confirming that the goods have been verified and recorded properly.

