How to Export Stock Adjustment for Correcting Counted Quantities in Odoo?
Efficient inventory management is critical for any business. Conducting regular stock takes properly handling stock adjustments ensures accurate inventory records, reduces discrepancies, and helps maintain operational efficiency. This stock take process, stock adjustment creation, exporting data, and physical verification in Odoo.
Initiating a Stock Take in Odoo
The first step in inventory management is to initiate a stock take for a selected warehouse or location. Begin by selecting the warehouse or location where the stock take will be performed. Then, physically count or scan all products, including their lot numbers or serial numbers.
The system automatically records the counted quantities. Once the counting is complete, submit the stock take for review and validation. This process ensures that your system maintains an accurate record of all items present in the selected location.
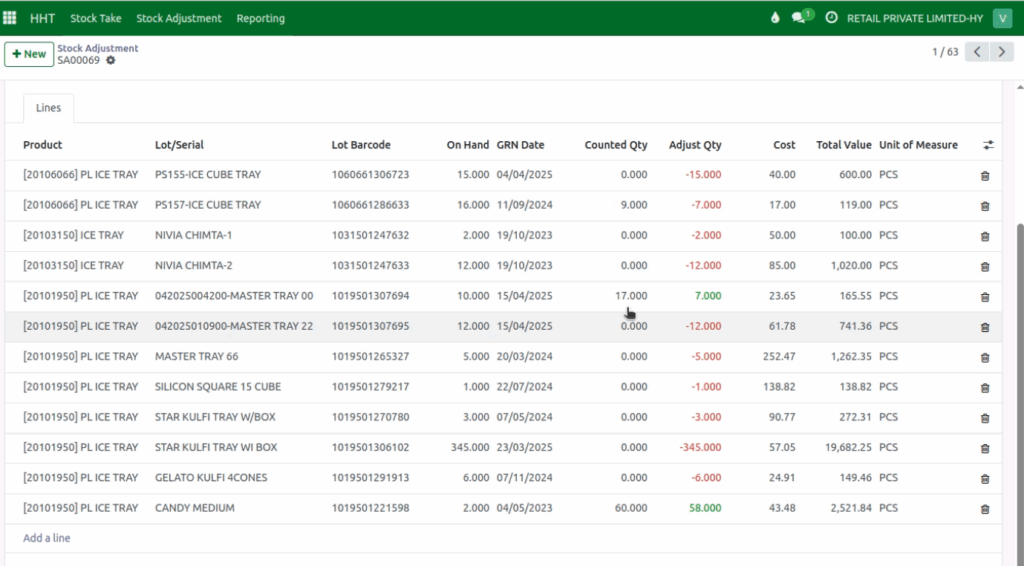
Stock Adjustment Document Creation
Once the stock take is complete, the system identifies discrepancies through a stock adjustment document, automatically generating lines for differences between counted and recorded quantities. Adjustments are consolidated by warehouse, and missed or unscanned lots are recorded as zero, ensuring all discrepancies are documented for correction.
Exporting Stock Adjustment Lines
Stock adjustment lines can be exported to Excel or CSV by selecting the document, choosing Export, and confirming the Stock Report template. The file is then downloaded for verification and updates.
Export: Click Top Actions → Export → choose Template: Stock Report.

Physical Verification of On-Hand Stock
The exported file serves as a guide for physically verifying inventory on shelves or bins. Focus especially on items where the counted quantity is zero, as these were unscanned during the stock take.
Physically verify if these items exist and update the counted quantity in the Excel sheet where discrepancies are found. This step ensures that all stock items are accurately accounted for and prevents potential errors in inventory reporting.
Importing the Updated Stock Take Document
After performing a physical stock verification, the next step is to update your stock take document in the system. Start by clicking the Import option, then select the stock take document you wish to update, using the same document number. Upload the corrected Excel file containing the updated quantities to ensure the system reflects the most accurate inventory data.

Testing and Validating the Import
Before finalizing the update, it’s important to verify that the import file and its fields are correct. Use the system’s Test feature to check for any errors during the import process. The system will highlight any issues, allowing you to correct them before proceeding. This step ensures a smooth and error-free update of your stock records.
Finalizing the Stock Adjustment Document
Once the import passes without errors, proceed to upload the file. The system updates the existing stock adjustment document with the new quantities. Finally, validate the document to complete the stock adjustment process.
This ensures that inventory records are accurate and reflect the corrected stock levels, maintaining reliability and consistency in your inventory management.