How to Mark a Vendor Return as “To Do” in Odoo
Handling vendor returns in Odoo is simple when you know the right steps. The Vendor Return feature helps you send products back to your supplier when there are issues such as damage, wrong items, or excess quantity. Here’s a clear and easy guide on how to create a vendor return and mark it as
“To Do” in Odoo.
Opening the Vendor Return Menu
To begin, go to Inventory → Operations → Vendor Return. This section lists all vendor return records created in the system. To make a new one, click the New button. This opens a fresh vendor return form where you can enter the necessary details.
Entering Vendor and Basic Information
Start by choosing the vendor from the dropdown list. Then select the reason for return using the available return reasons. After entering these details, save the form so the system can generate a
Transfer ID, which helps you track the return.
Adding Product Details
Next, you need to pick the product you want to return. Click Add a line, and a dropdown will appear where you can choose a product. You can also select it by its product code to make the process faster. Then choose the GR Bill from the Bill field and enter the quantity you want to return in the Demand field. This ensures the system knows exactly what item and how much of it you are returning.
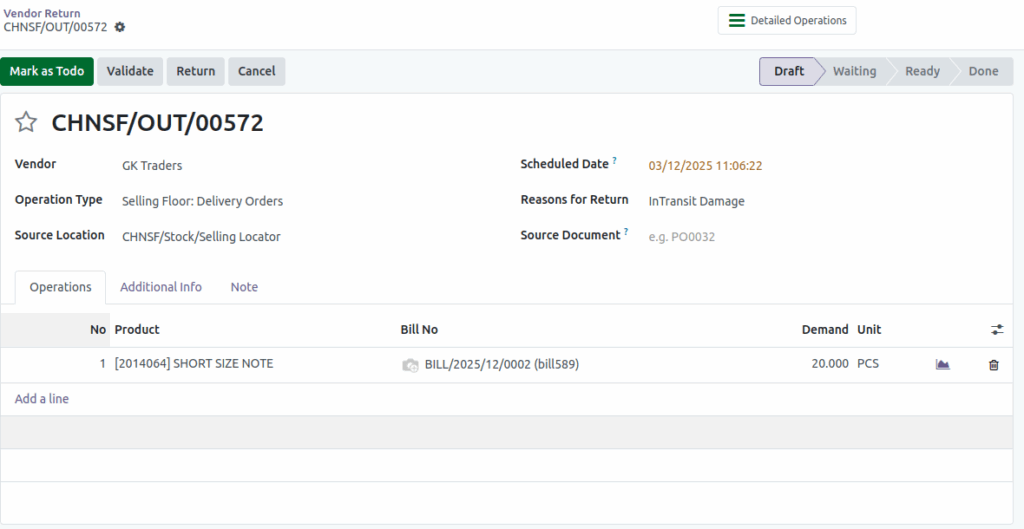
Marking the Return as “To Do”
Once all the details look correct, click Mark as To Do. This step confirms the vendor return and moves it to the next stage. After marking it as “To Do,” you won’t be able to change the vendor, so double-check the details before proceeding.
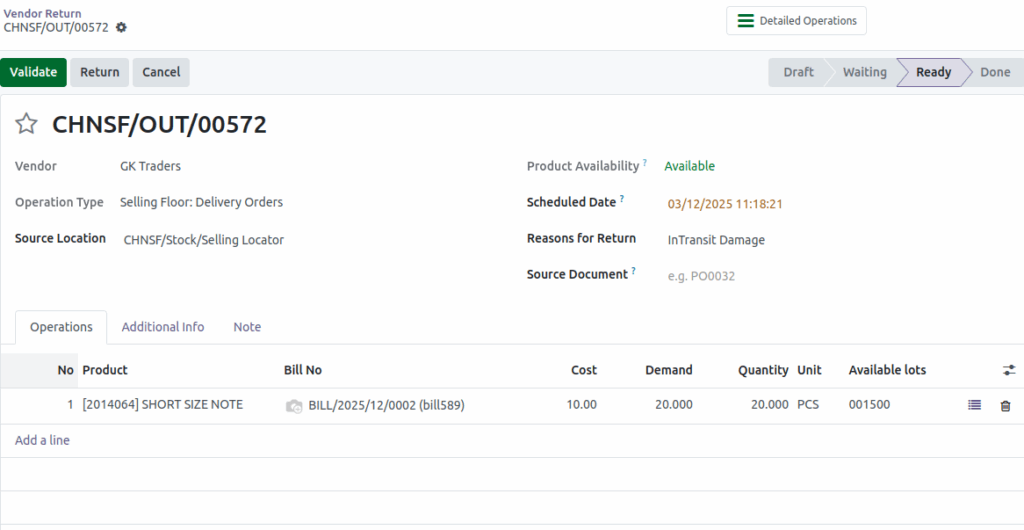
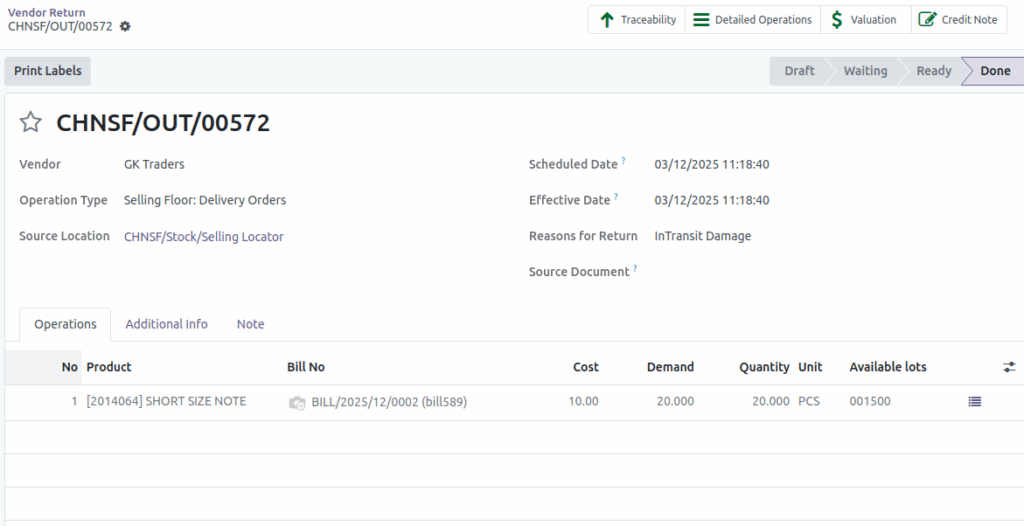
Validating the Vendor Return
Before completing the return, make sure the Product Availability and Available Lot fields show the correct information. When everything is accurate, click Validate. This final step processes the return, and the product is officially sent back to the vendor.
This simple process helps you manage vendor returns smoothly and ensures accurate tracking within your inventory system in Odoo.