How to Create an Invoice for an Odoo Sales Order
Creating invoices in Odoo is one of the most important steps in the sales process, as it ensures that customer billing, tax calculations, and payments are recorded accurately. Before generating an invoice, a sales order must be created and confirmed so that Odoo can pull the correct customer details, product information, taxes, and pricing into the final invoice.
Creating a New Sales Order
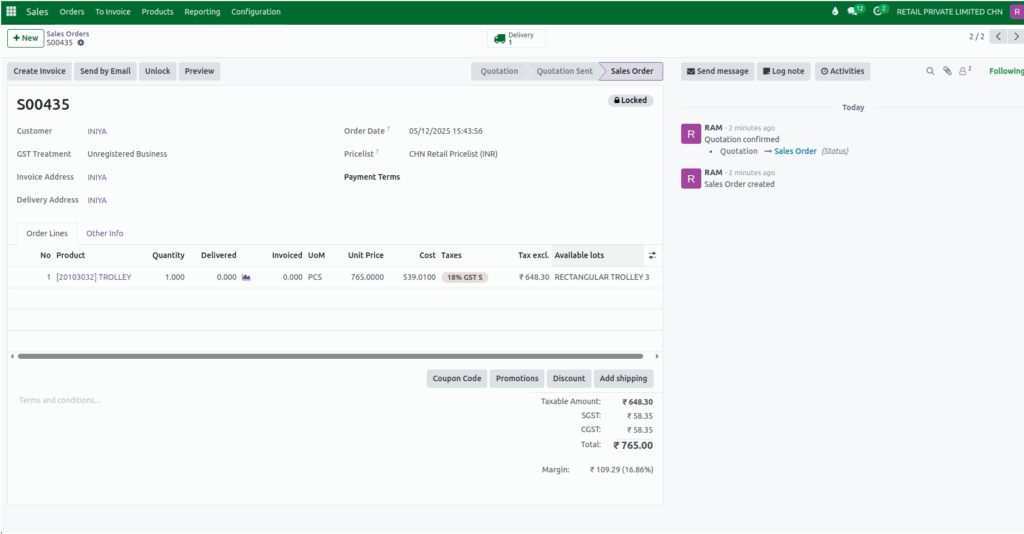
To begin, open the Sales module and navigate to the Orders section and select the Orders submenu. A new sales order can be created by clicking the button +New. Customer information, invoice address, and delivery address are mandatory fields, and once the customer is chosen, Odoo automatically fills in the GST treatment, invoice address, and delivery address based on the customer record. The appropriate pricelist can be selected for the order, and once the form is saved, Odoo generates a unique sales order document number.
Products can then be added to the sales order. If a product is tracked by lot, the corresponding lot number can be selected from the Available lots. In the unit price field, Odoo displays the selling price of that product according to the selected pricelist. After reviewing the details, the sales order can be confirmed, which completes the order and prepares it for invoicing.
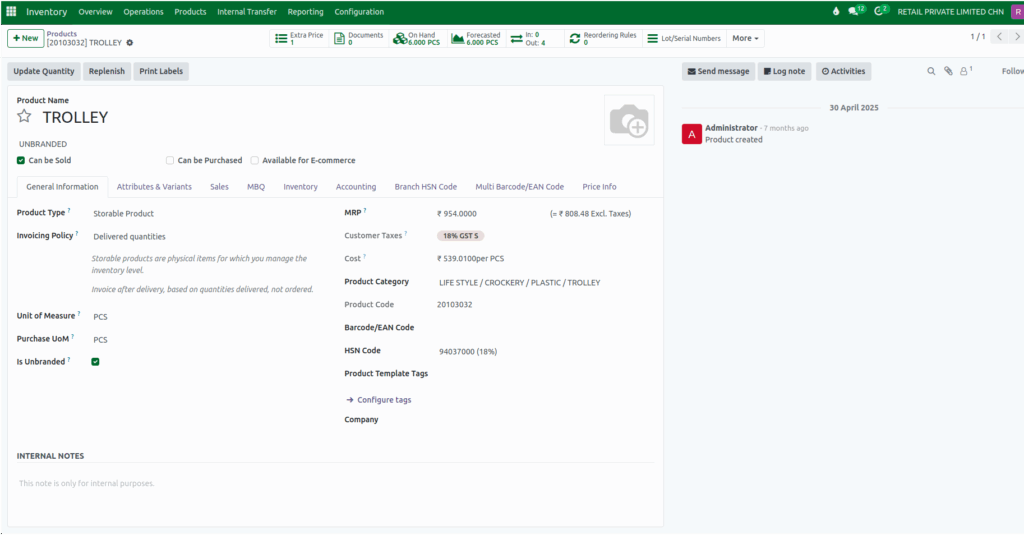
Invoicing Policies in Product
Odoo offers two invoicing policies at the product level: “Ordered Quantities” and “Delivered Quantities.” When a product is configured to invoice ordered quantities, the “Create Invoice” button becomes enabled as soon as the sales order is confirmed.
If the product is set to invoice delivered quantities, the button becomes enabled only after the related delivery order is completed. This ensures that invoices are generated according to the business’s billing method and product configuration.
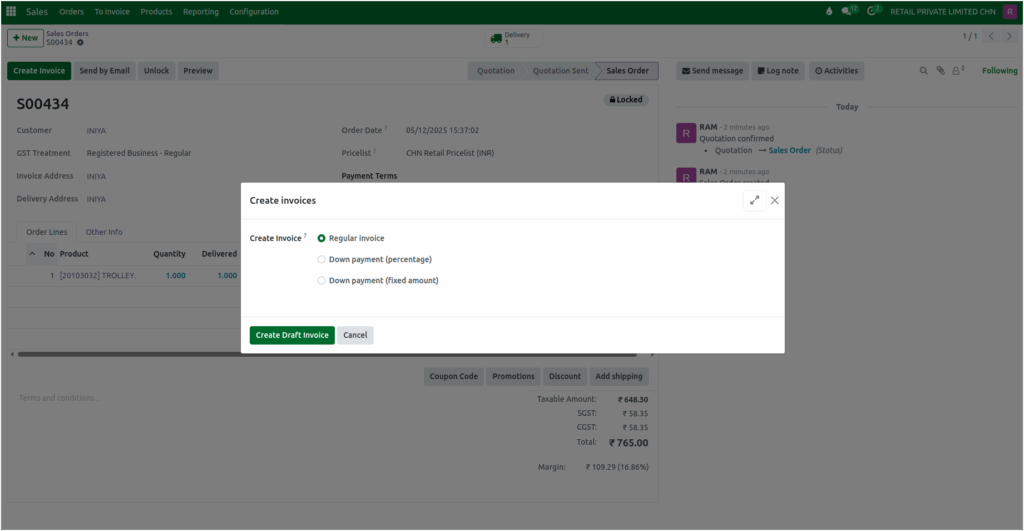
Creating the Invoice for Sales Order
Once the “Create Invoice” button becomes available, it can be selected to begin generating the invoice. A popup window appears with different invoicing options such as Regular Invoice, Down Payment (Percentage), and Down Payment (Fixed Amount).
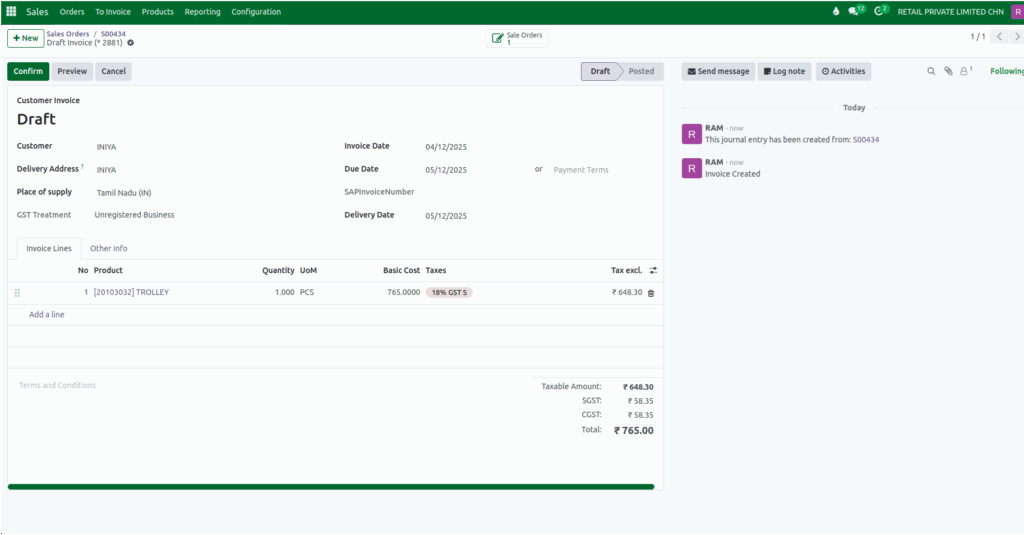
After choosing the appropriate option and confirming, Odoo generates a draft invoice. This draft includes all essential details pulled directly from the sales order, such as the customer name, delivery address, place of supply, and GST treatment. The invoice date and due date are also filled in automatically.
Delivery Date Display in Odoo Invoices
When an invoice is created after the delivery has been completed in Odoo, the delivery date is not displayed on the invoice by default. The delivery date is recorded only in the delivery order within the Inventory module, where the system keeps track of when the goods were shipped or delivered.
Reviewing Invoice Details
The invoice displays all products included in the sales order, along with their quantities. The basic cost field shows the unit price taken from the sales order, and the UOM and taxes are displayed based on the product’s customer taxes. The tax-excluded amount is calculated by dividing the basic cost by the value of one plus the tax rate.
The taxable amount reflects the total tax-excluded value of the order, and the tax field displays the appropriate GST or customer-specific tax. The total of the invoice is the sum of the taxable amount and the tax.
Confirming the Invoice
After reviewing all invoice details, the invoice can be confirmed to finalize it. Once confirmed, Odoo assigns a customer invoice document number. At this stage, the invoice becomes official and can be sent to the customer for payment.

