How to Configure the Bills & Receipts Settings in Odoo POS
Setting up the Bills and Receipts section in Odoo POS helps you manage how customer receipts look and what information they include. These settings make it easier to customize headers and footers, automate printing, add QR codes, and generate unique codes for quick invoice access. With these features, you can make the billing process faster and more customer-friendly.
Accessing the Bills & Receipts Settings
To begin, open the Point of Sale module and go to the Configurations menu. From there, click on Settings and choose the POS terminal you want to configure in the Point of Sale field. Once the terminal is selected, scroll to the Bills & Receipts section. This is where all the related customization options are available.

Customizing Header & Footer
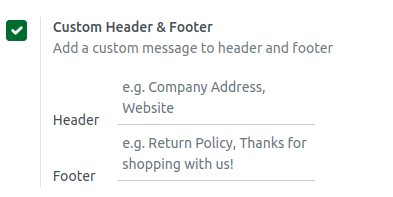
The Header and Footer settings allow you to add personalized messages to the receipts. After enabling the “Custom Header & Footer” option, two text fields will appear. Here, the information that customers wants to see. Many businesses add their company address or website in the header, while the footer often includes thank-you messages, offers, or important notes. This helps create a more professional and informative receipt for customers.
Adding QR Codes, Auto Printing & Code Generation
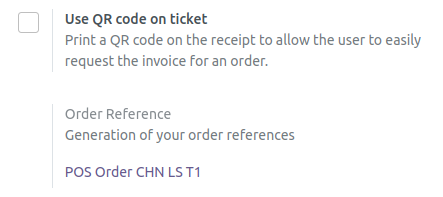
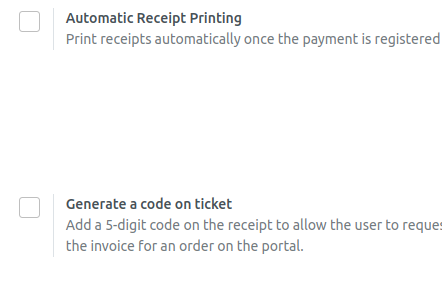
Enable features that improve speed and customer convenience. Turning on the “Use QR code on ticket” option prints a QR code on every receipt. When customers scan it, they can instantly access their invoice online. Another useful option is “Automatic Receipt Printing,” which prints the receipt immediately after payment without needing any manual action. For easier invoice retrieval, you can enable “Generate a code on ticket.” This creates a unique 5-digit code on each receipt, allowing customers to look up their invoice quickly through an online portal.
Saving Your Receipt Settings
Once you finish adjusting all the settings in the Bills & Receipts section, review everything to make sure the information is correct. When everything looks right, click the Save button to store the changes in your POS system. This ensures that all receipts printed from the selected terminal follow your updated configuration.
