How to configure Company Master in ADempiere Retail
Company Master is the main setup that holds all key information about your company, such as its name, address, GST number, financial year, and other legal and operational details.
User Access
Who Can Access
- Admin
- Back Office
- Manager
What User Can Do
- View Company Information
- Edit Company Information
- Add New Company Records
- Delete Company Records
- Configure Default Settings
- Integration with Other Modules
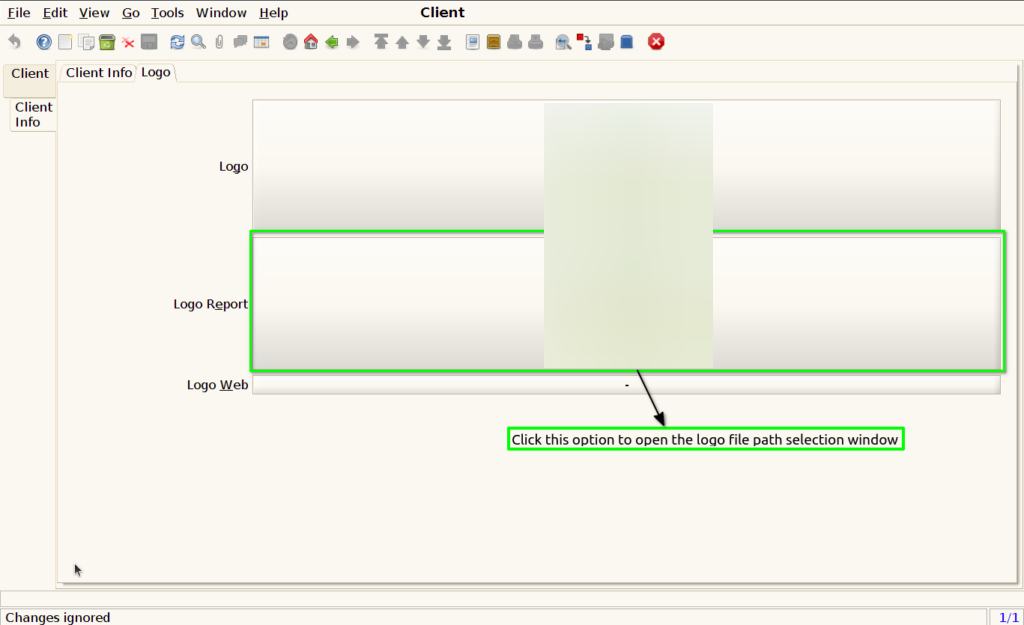
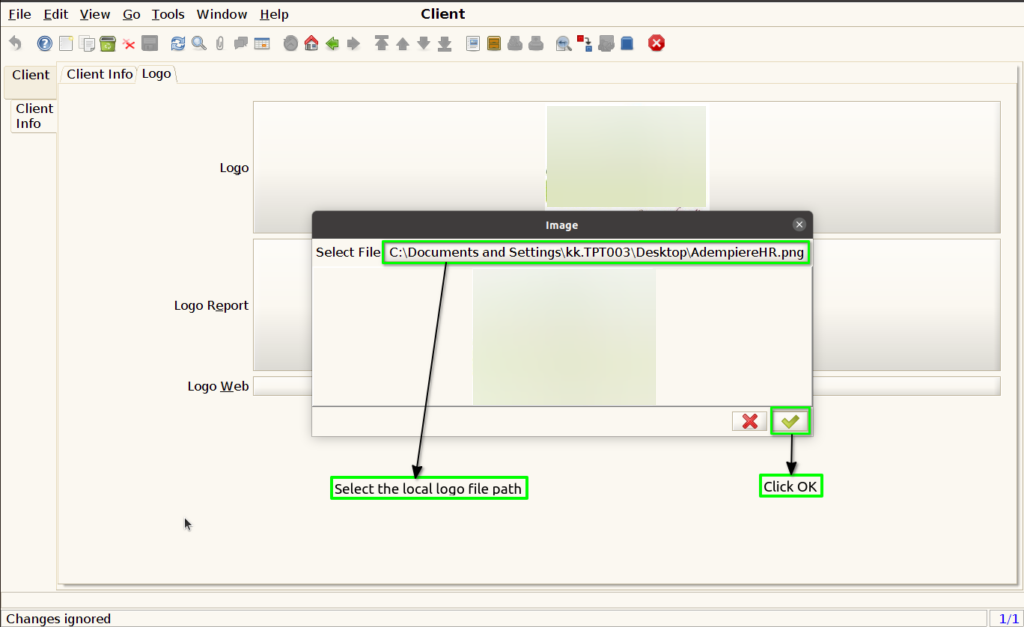
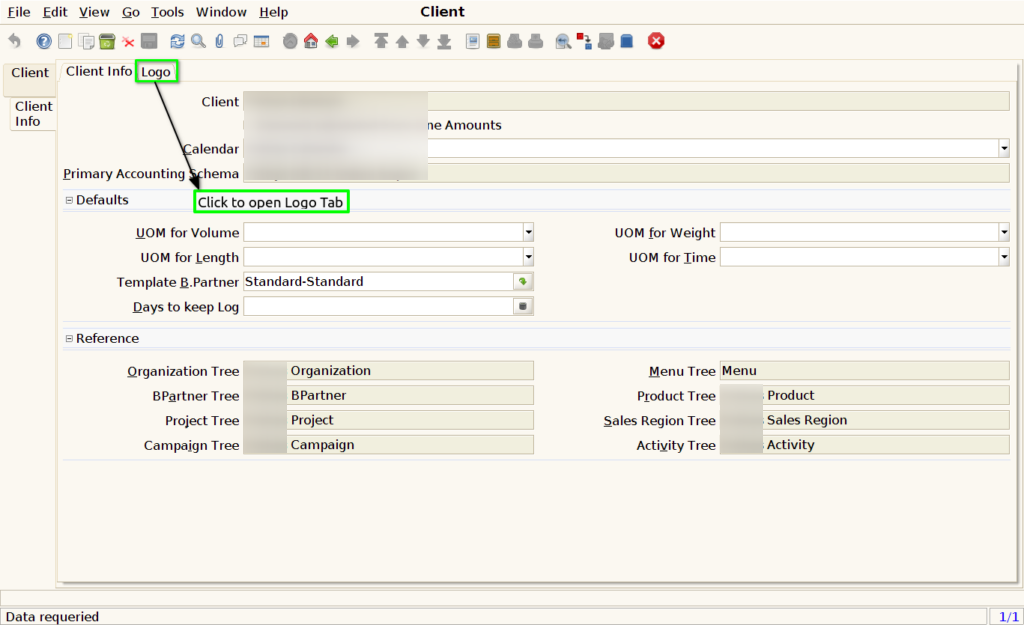
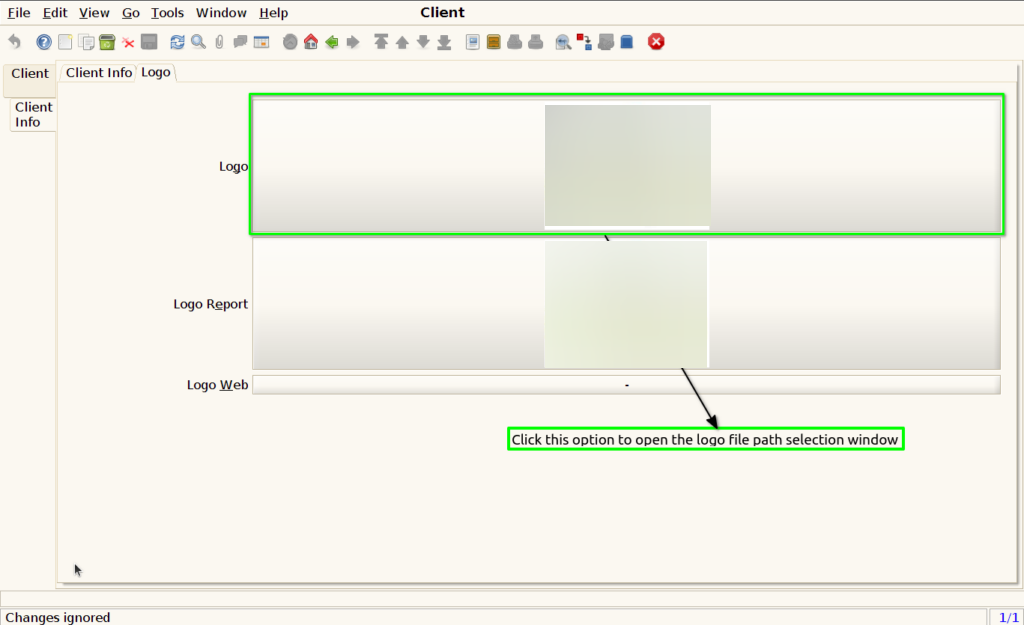
- To Set Logo
Pre-Requisite Activities
- Legal company name
- Business address
- Tax identification numbers (e.g., TIN, VAT)
- Contact information (phone, email, website)
- Logo
Business Rules
- Only one active company master should be allowed per legal entity
- Company details must be accurate and match legal documents
- GST and PAN must be valid for tax compliance
User Interface
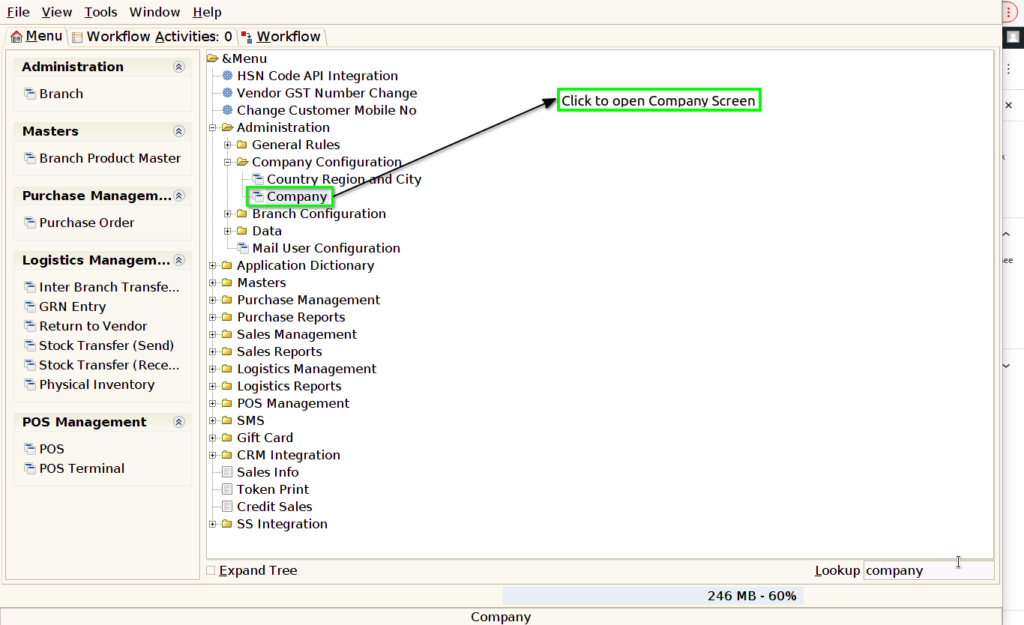
Step 1 : Select ‘Company’ in Menu -> Administration > Company Configuration > Company or Search Company in Lookup.
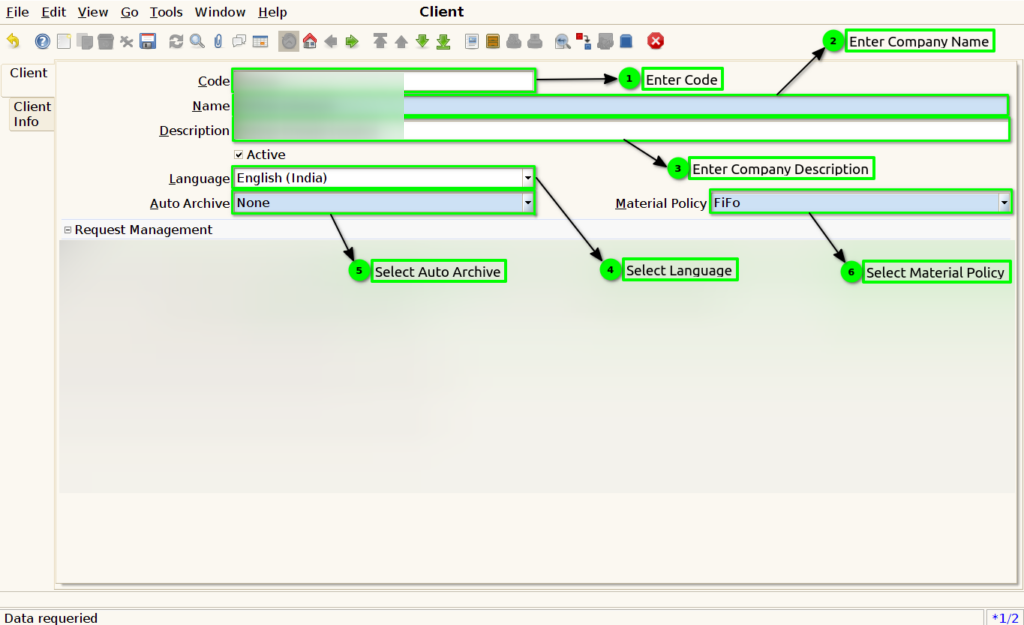
Step 2 : Creating a new record and configuring company details typically involves several steps,
Steps to Create a New Company Record:
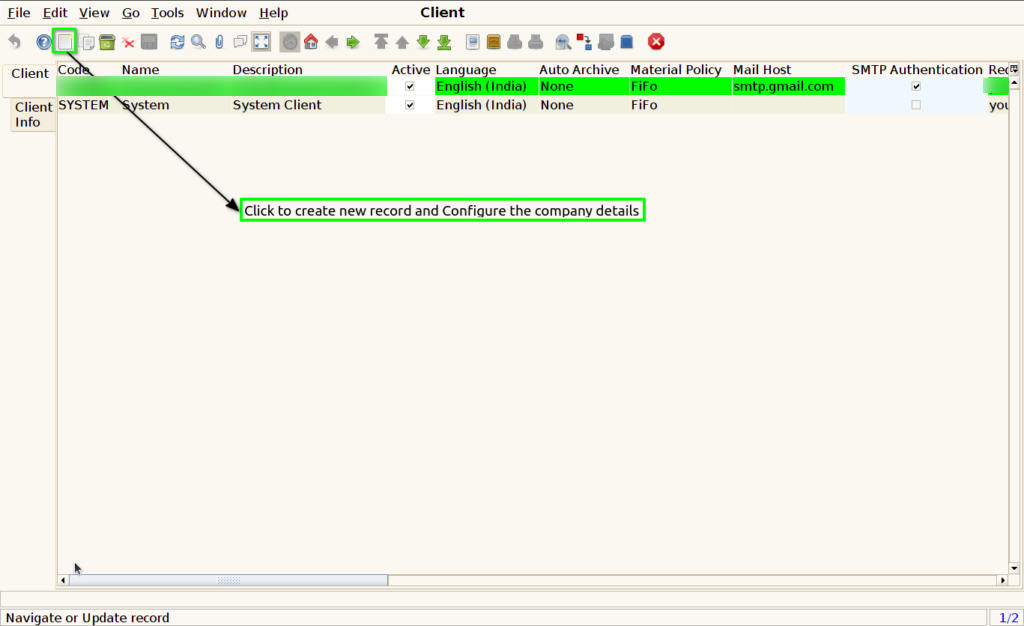
Step 3 : To configure a company record effectively, you’ll need to enter various details in specific fields.
Company Details Configuration
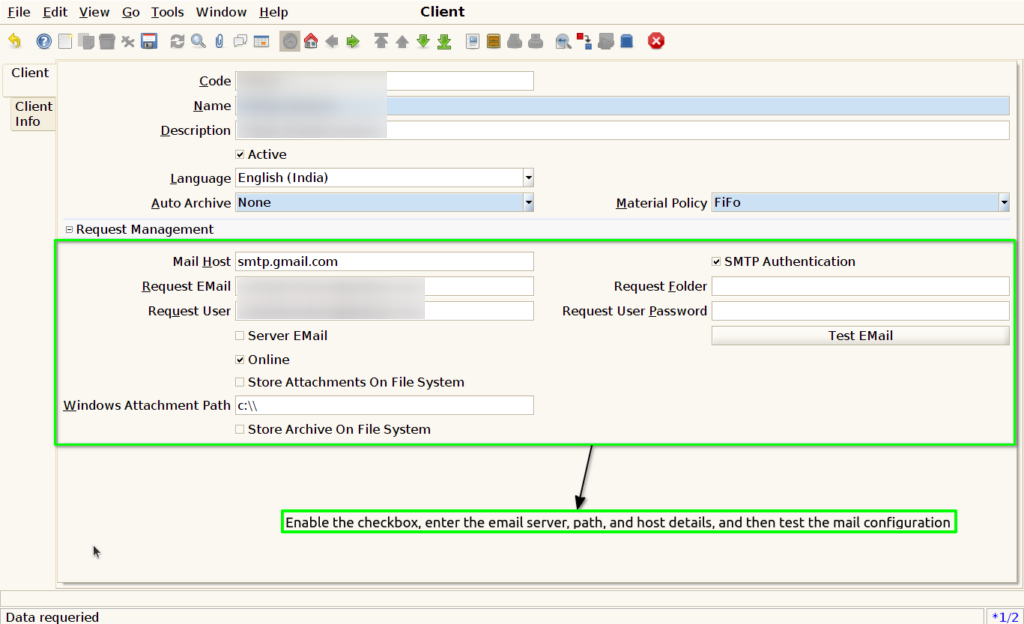
- Mail Host : The term “Mail Host” typically refers to the server that handles sending and receiving email. When configuring a mail host in an application or system. The SMTP server address (e.g.,
smtp.gmail.com). - Request EMail : Enter their company email ID.
- Request User : Enter their User email ID.
- Request User Password : Enter their company email ID and authentication password.
- Windows Attachment On File System : Set the path for updating the prices of weighing products and item details in the process file.
- SMTP Authentication :Enable the checkbox for SMTP authentication to send company-based emails. Disable the checkbox for SMTP authentication to prevent sending company-based emails.
- Online : Enable the checkbox and set the POS to online mode. Disable the checkbox to set the POS to offline mode.
- Test EMail : Verify the configuration of the email ID in the testing process.
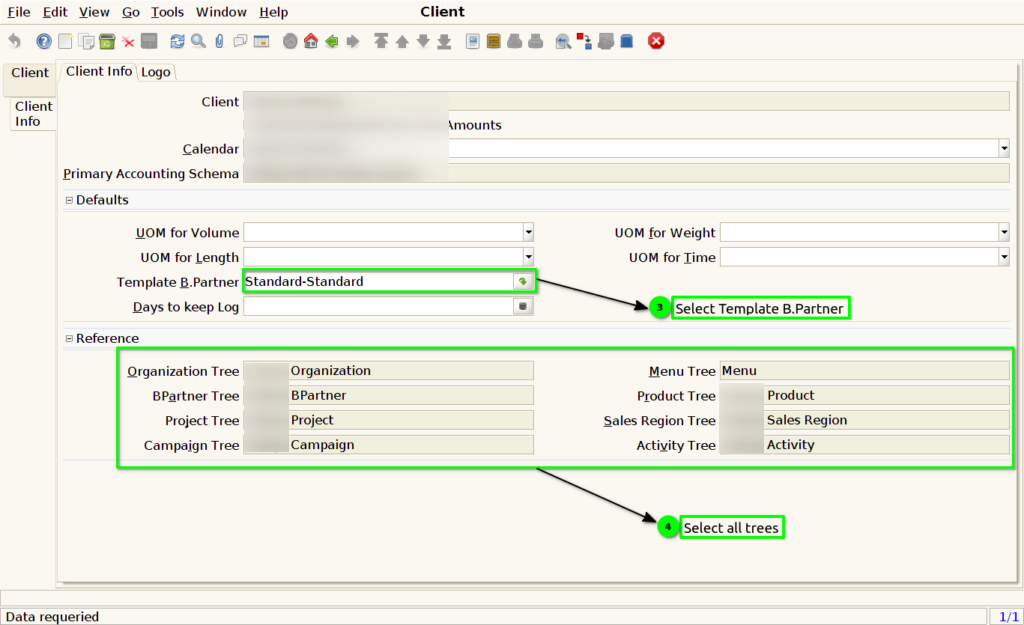
Step 4 : Open the Client Info tab and enter the client information by following these steps:
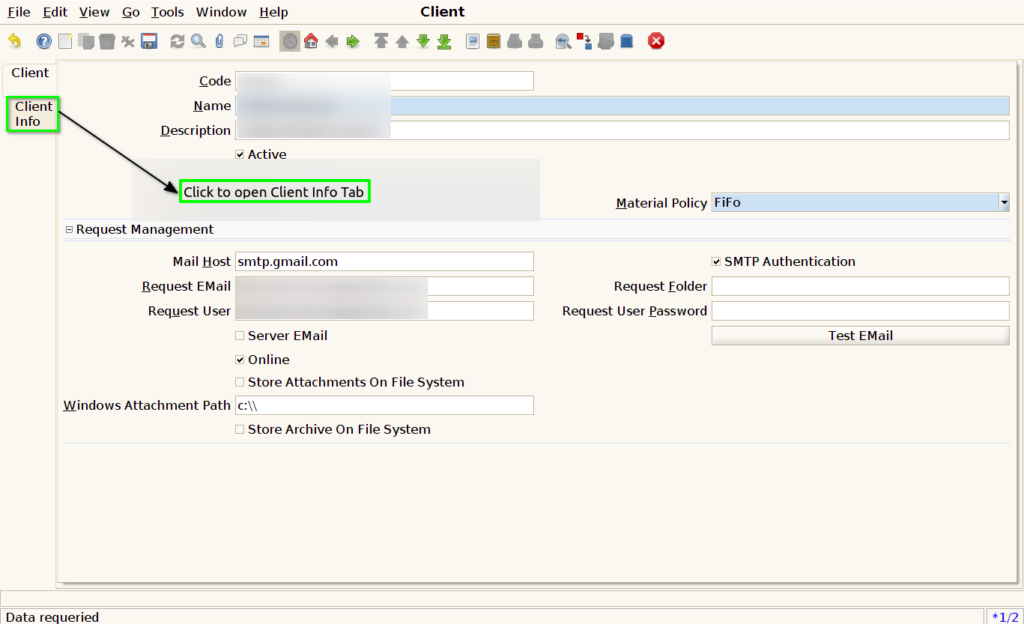
Client INFO
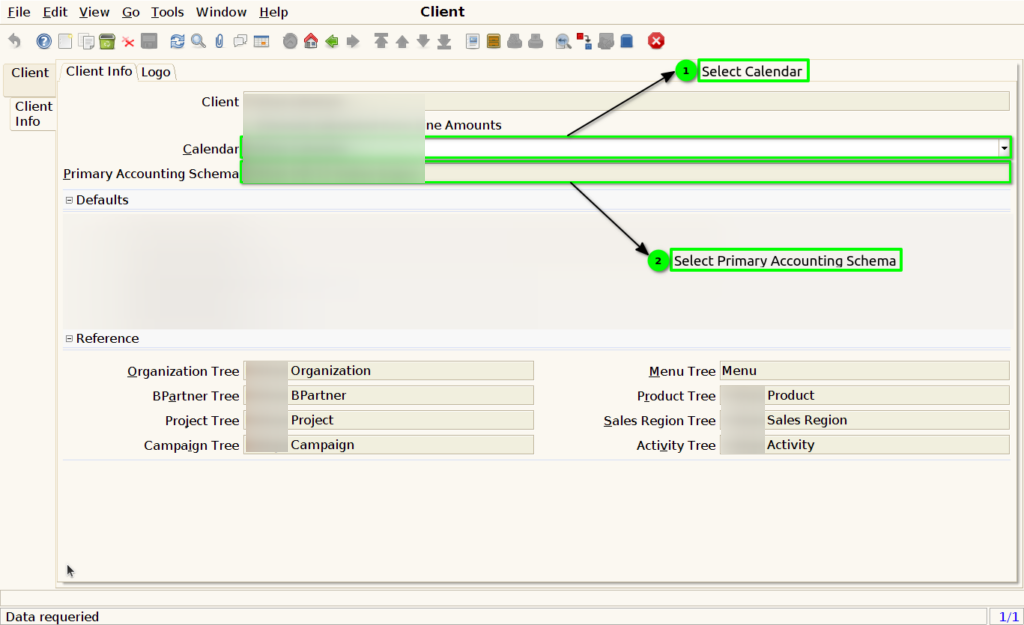
Logo
To set Company Logo
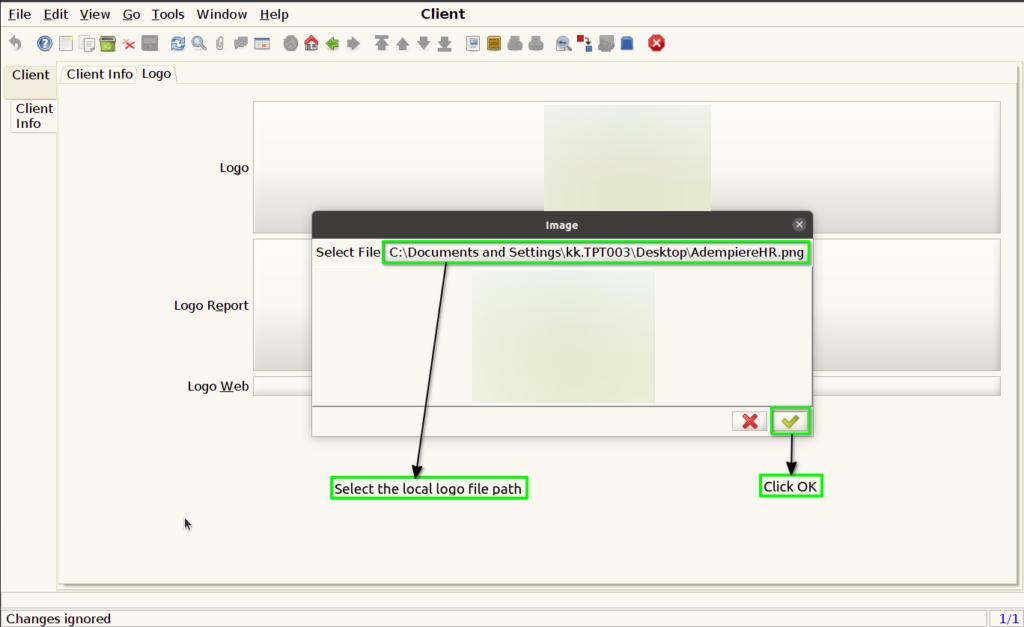
To set Logo Report