How to create a Calendar, Year & Period in Adempiere Retail
The Calendar Year and Periods defines the calendars that will be used for period control and reporting. Used for managing and closing financial activity.
User Access
Who Can Access
- Back Office
- Cashier
- Manager
- Admin
What User Can Do
- Create a New Calendar Year
- Edit or Update Calendar Settings
- Open or Close Periods
Pre-Requisite Activities
- Confirm Period Naming Convention
- Plan the Number and Duration of Periods
- Check for Existing Calendar Conflicts
- Set Permissions and Access
Business Rules
- Each Calendar Year Must Be Unique
- Periods Must Not Overlap
- Closed Periods Cannot Be Re-Opened Without Authorization
- Transactions Can Only Be Posted in Open Periods
User Interface
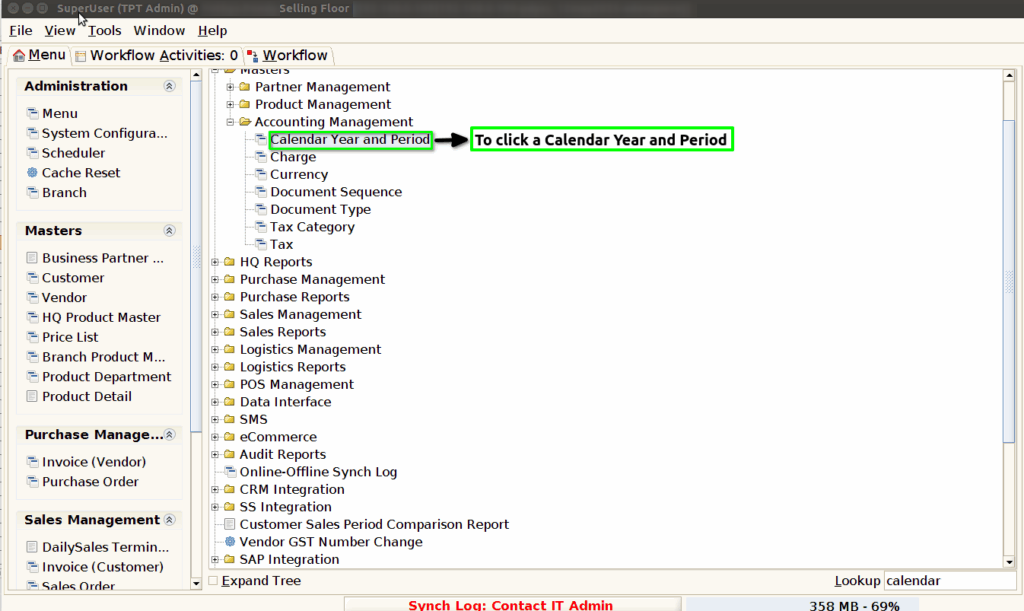
Step 1 : To Select a Branch in Menu.Then to click a CALENDAR YEAR & PERIOD.
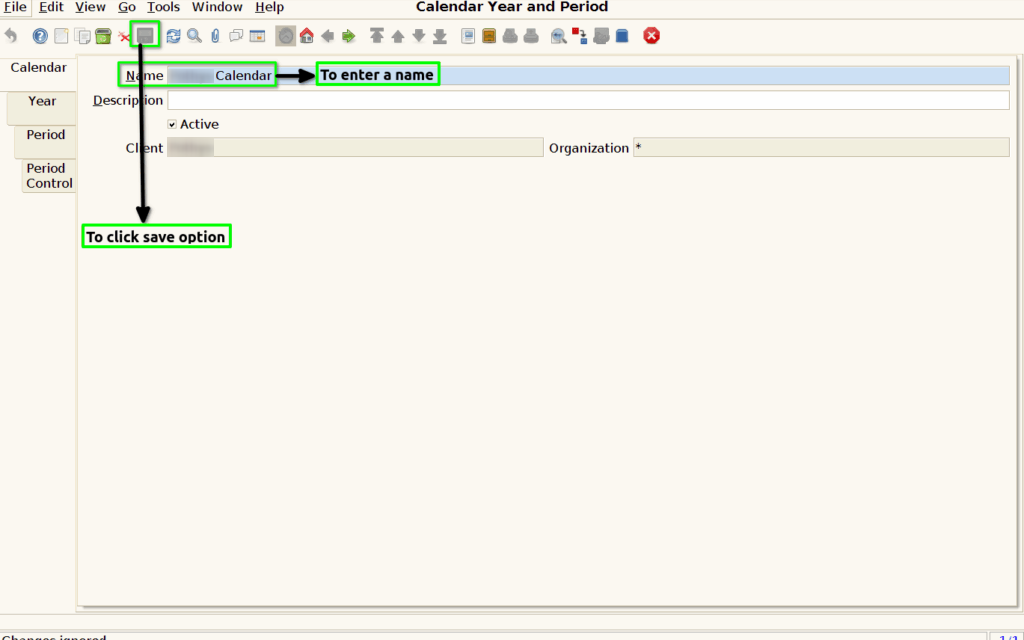
Step 2 :Once to open the tab then to click a create a new record option.To enter a name and then to save the record.
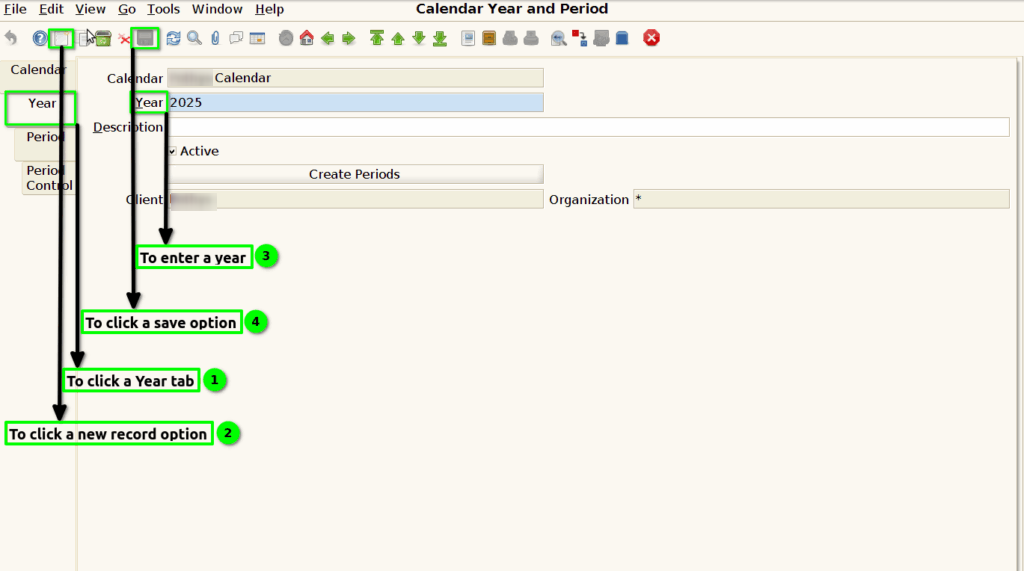
Step 3 :To click a Year tab and to click a create a new record option and then to enter a year to save the record .
Step 4 : To click a Period tab and to click a create new record option and then to enter a Period no,name, Start date and End date.Finally to save the record.

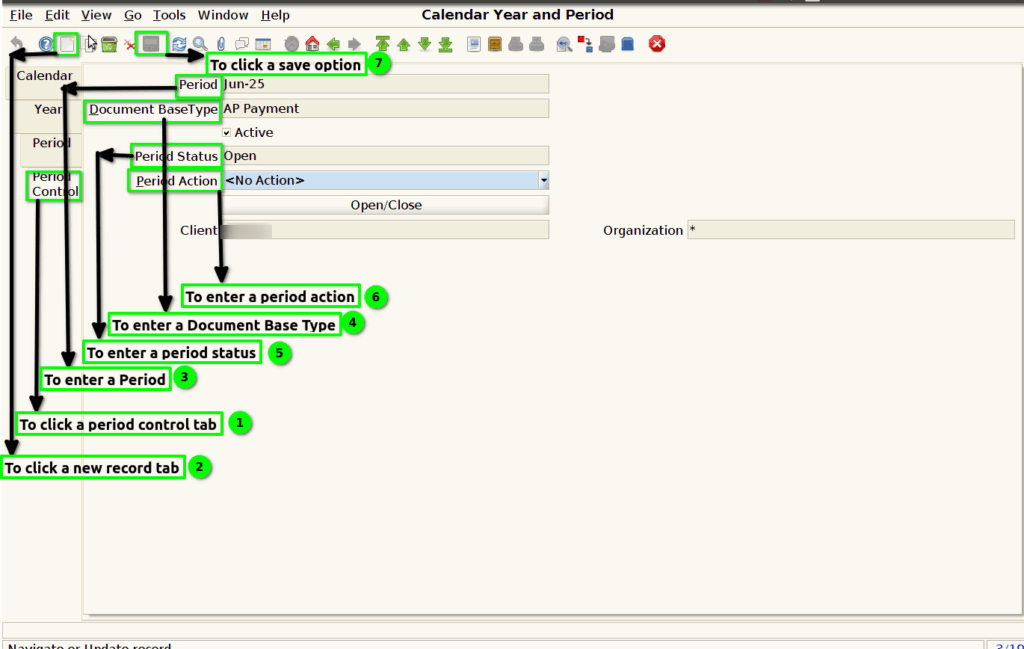
Step 5 :To click a period control tab and to click a create new record option and then to enter a period,Document Base Type,Period Status,Period Action and then to click a save option.