How to receive stock using GRN Scan option in Adempiere Retail
GRN Scan means scanning the barcode/QR code of items when receiving goods from a supplier.
User Access
Who Can Access
- Admin
- Cashier
- Manager
- Back office
What User Can Do
- Scan Items Being Received
- Verify Item Details
- Match Items with Purchase Order
- Update Received Quantities Automatically
- Save or Submit the GRN
Pre-Requisite Activities
- Purchase Order (PO) must be created and approved
- Items must have barcodes/QR codes
- Supplier must deliver the goods
- User must have correct device for scanning
- PO items must be available in the system
- User must have required permissions
BUSINESS RULES
- Scanning must match the Purchase Order
- Scanned quantity cannot exceed PO quantity
- Each scan updates quantity automatically
- Duplicate scans should be detected
- GRN Scan allowed only for valid POs
- Item must have a valid barcode
USER INTERFACE
Step 1: To click a application on HHT device then to login.
Step 2:To click a Logistics Management in Menu.
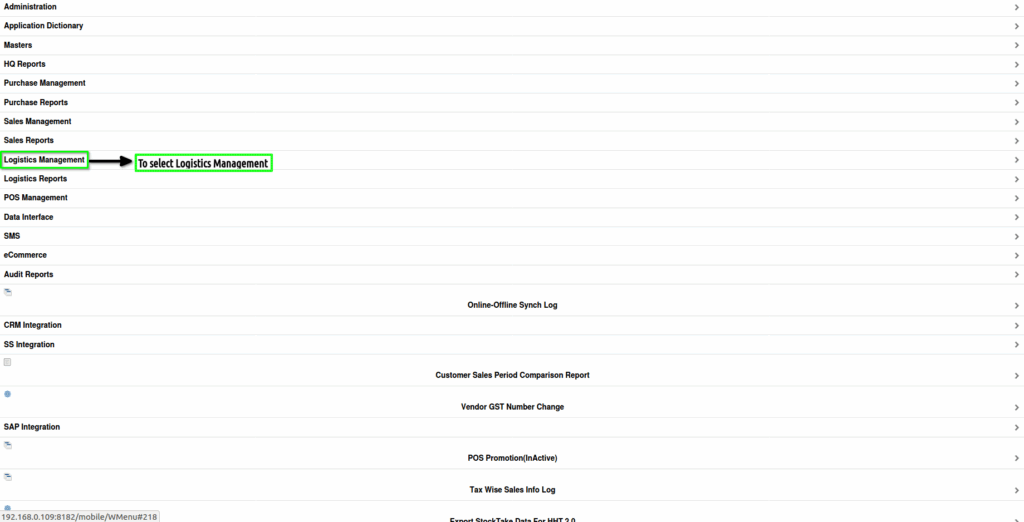
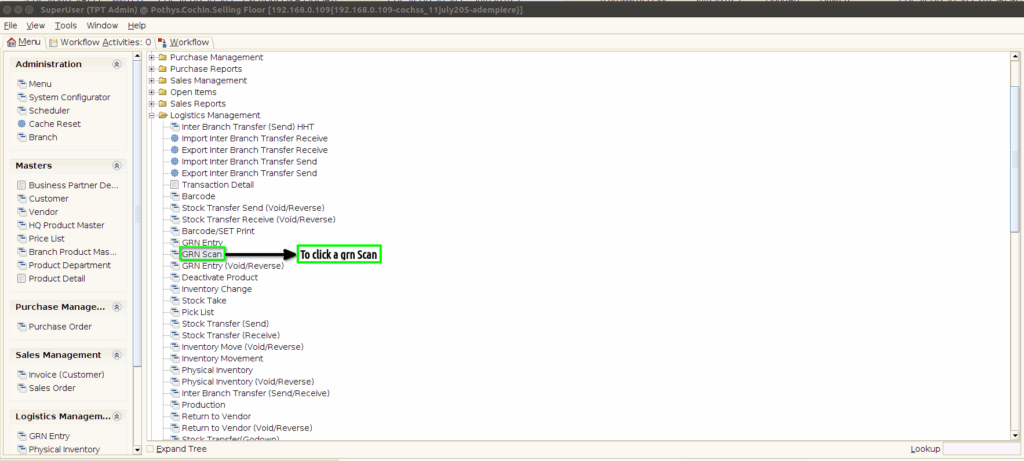
Step 3:To Click a GRN Scan option.

Step 4:To click a Create New Record option.

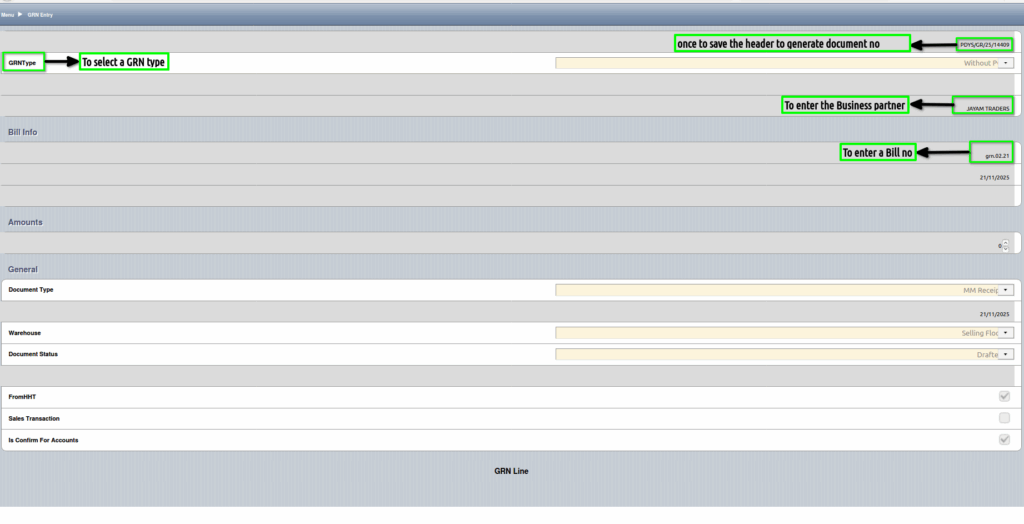
Step 5: To enter the values for header tab in GRN Type,Business Partner,Bill number then to save to generate document no automatically.Then to save the GRN header screen.
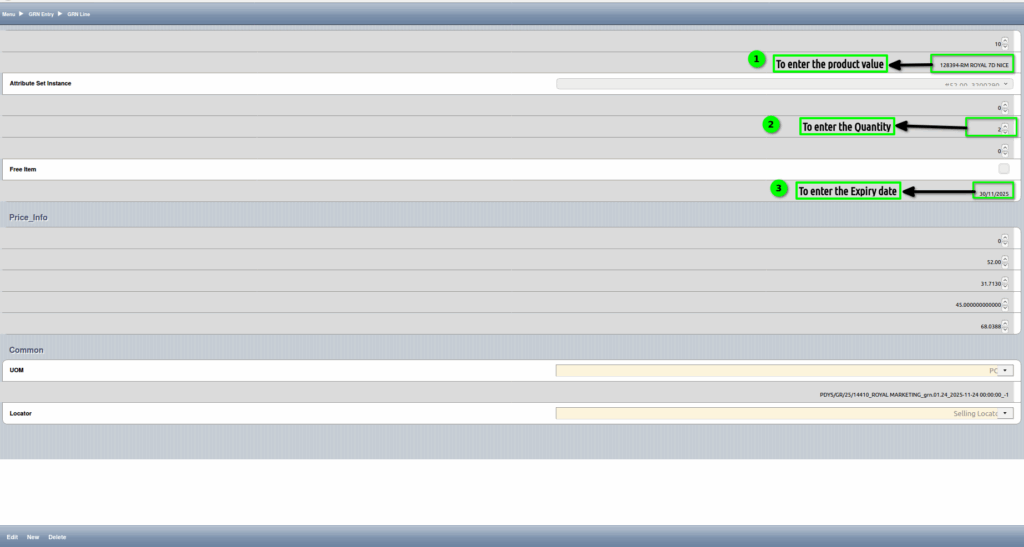
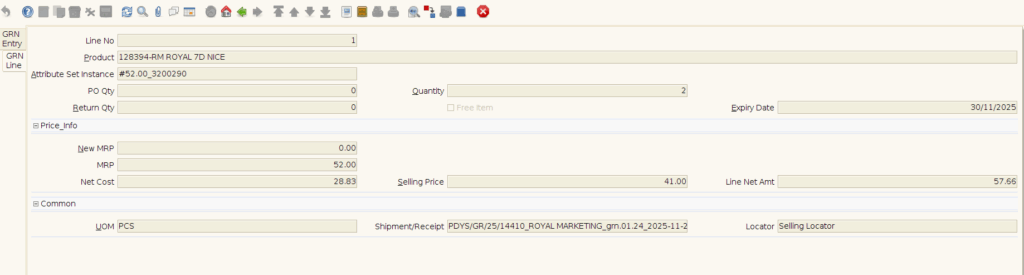
Step 6:To click GRN line option.Then to click new Record option and then to enter the values for Product value,Quantity and Expiry Date.Finally to save the GRN line.
Step 7:To click the GRN Scan in Menu.
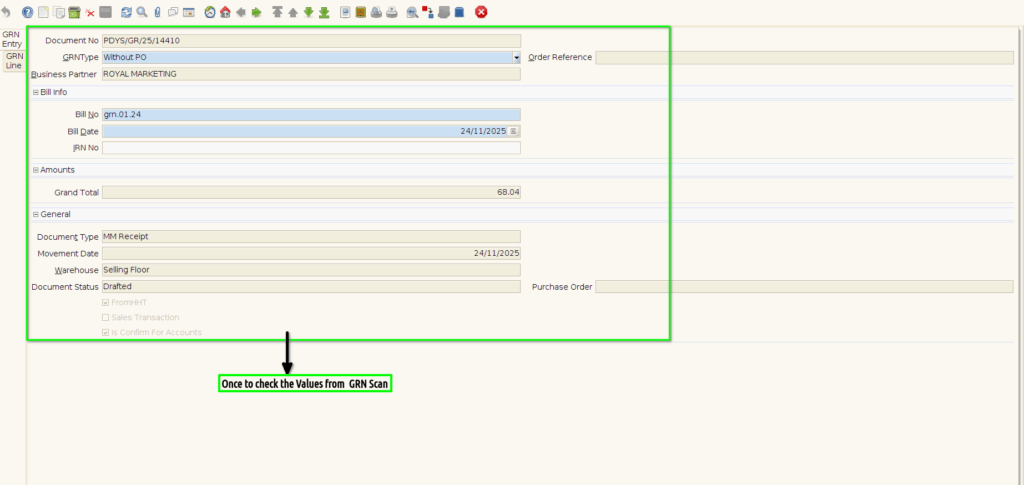
Step 8:To check the values from GRN Scan.Once to print the values from HHT to synch the values from GRN Scan and GRN entry.
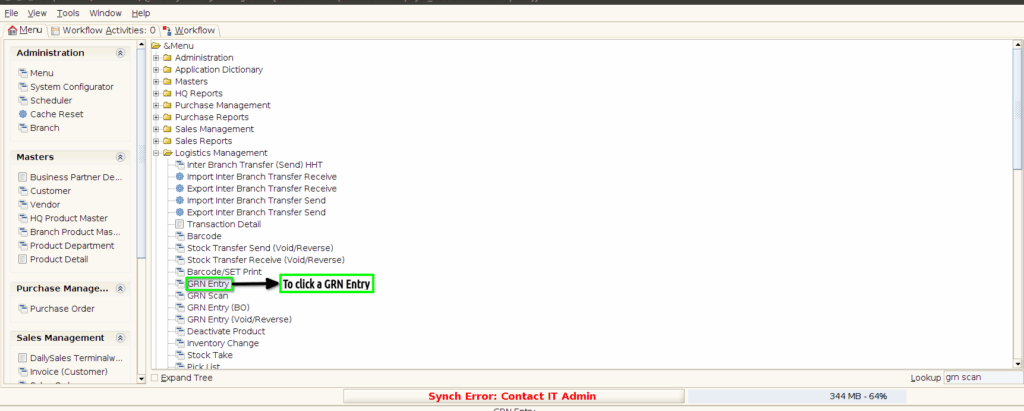
Step 9:To click a GRN Entry in Menu.
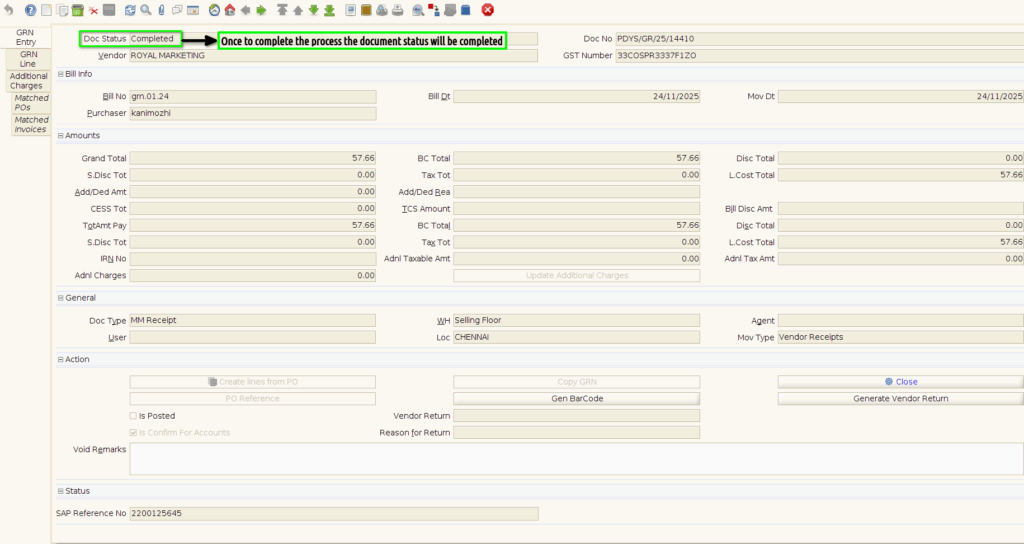
Step 10:To sync the document then to enter the values and to click the Complete Process.

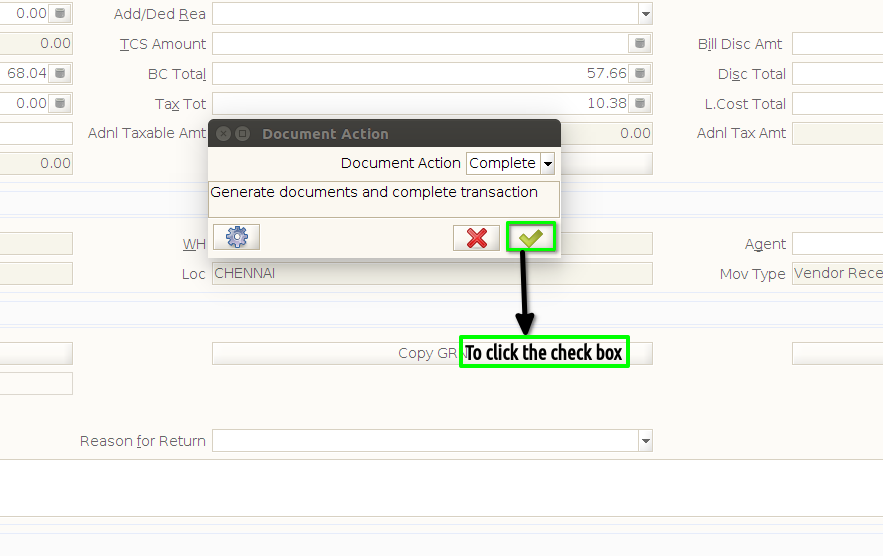
Step 11:To click the check box.
Step 12:Once to Complete the process to show the document status will be Completed.