How to create Return to Vendor transactions Adempiere Retail
Vendor Return means sending back items to the vendor that were previously purchased but are now rejected or need to be returned due to reasons like damage, expiry, or excess quantity.
User Access
Who Can Access
- Back Office
- Manager
- Pothys Admin
- Purchase Manager
- Cashier
What User Can Do
- Create
- Update
- Void
- Complete
Pre-Requisite Activities
- Vendor and item master should be created
- GRN process must be completed for incoming items
- Define return reasons (as master data)
- Enable vendor return settings in inventory module
Business Rules
- Return allowed only against GRN or valid PO reference
- Quantity returned cannot exceed received quantity
- Only authorized users can initiate vendor return
- Once return is confirmed, it must update inventory and accounts
- Duplicate return for the same GRN and item must be blocked
USER INTERFACE
Step 1 : Select ‘Return to Vendor’ in Menu -> Logistics management > Return to Vendor or Search Return to Vendor in Lookup.
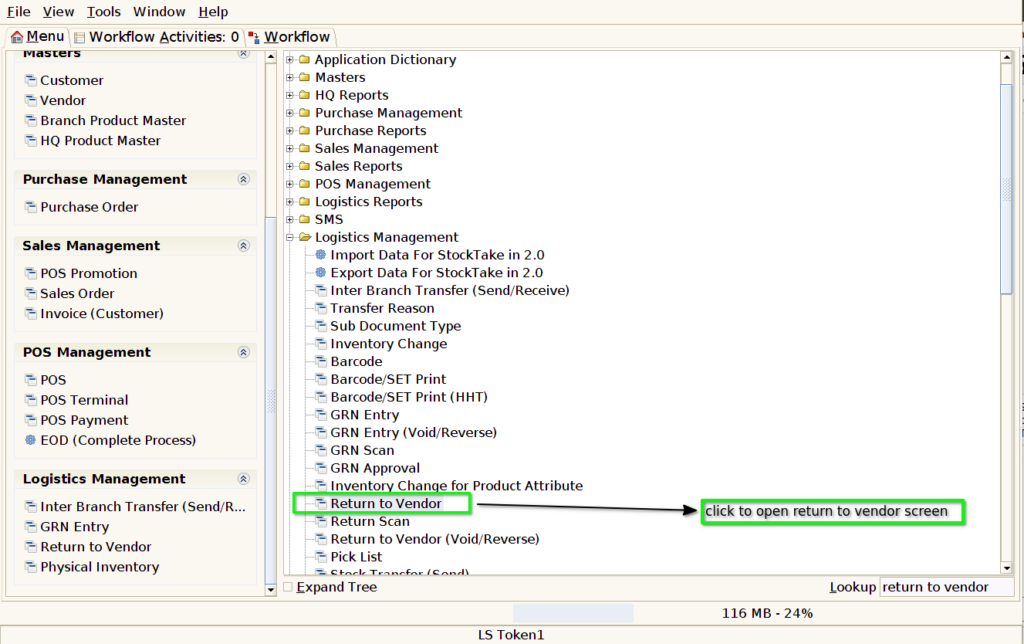
Return To Vendor Header
Step 2 : To create new return to vendor document

Step 3 : Choose the vendor, enter the bill number, select the document type, and provide the reason for return to save the header details of the return to vendor.


Return To Vendor Line Tab
Step 4 : Choose the Return Line tab to add line item details and access the Line tab in the return to vendor screen.
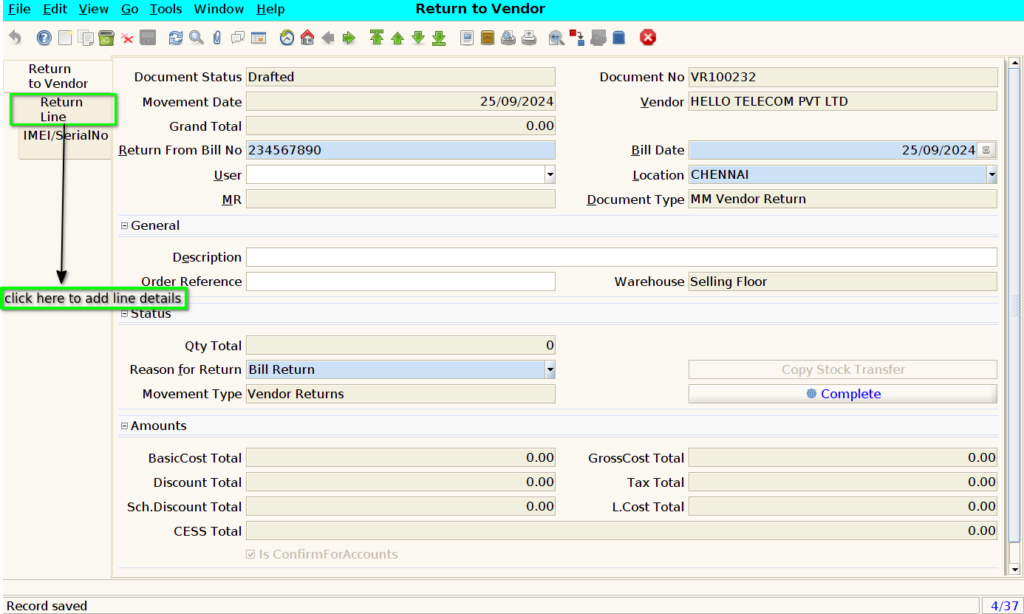
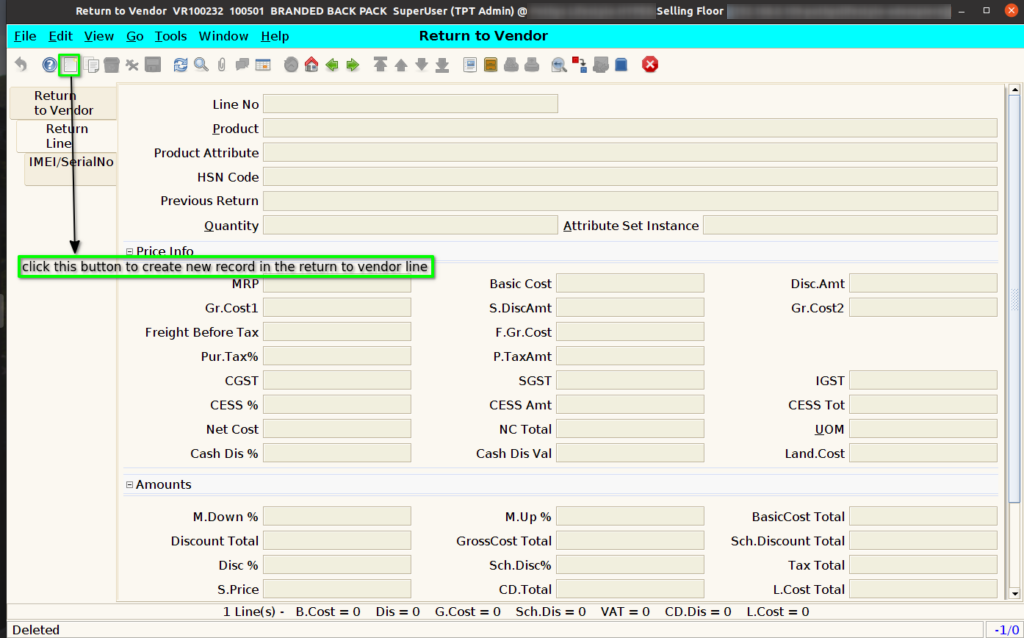
Step 5 : click the new button to start adding line items in the line Tab
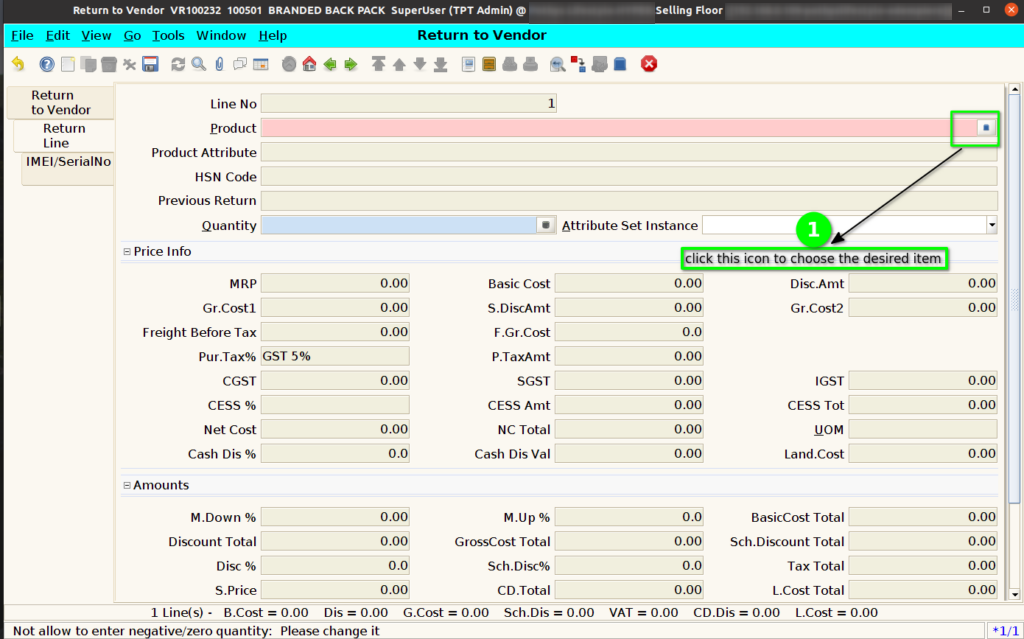
Step 6 : click the blue box to choose the product like image below
Step 7 : after click the blue box in product text box the product info frame will open with list of item.which is combination of choosen vendor business partner on header tab
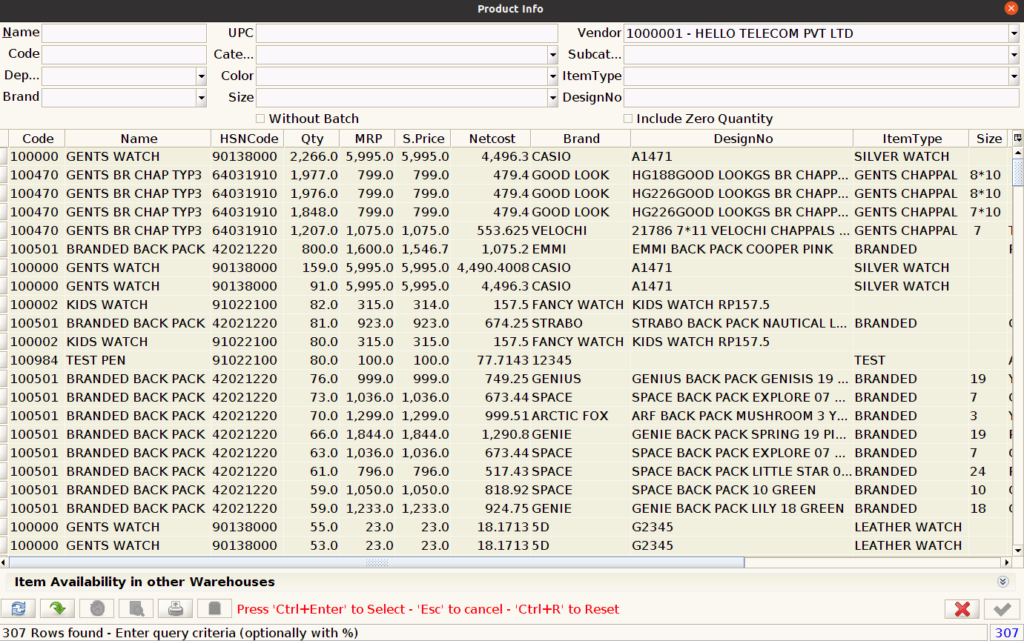
Step 8 : like image below we can choose any of the item and choose the green ok button(tick) to move to line tab.

Step 9 : after choose the item enter the quantity manually to proceed further

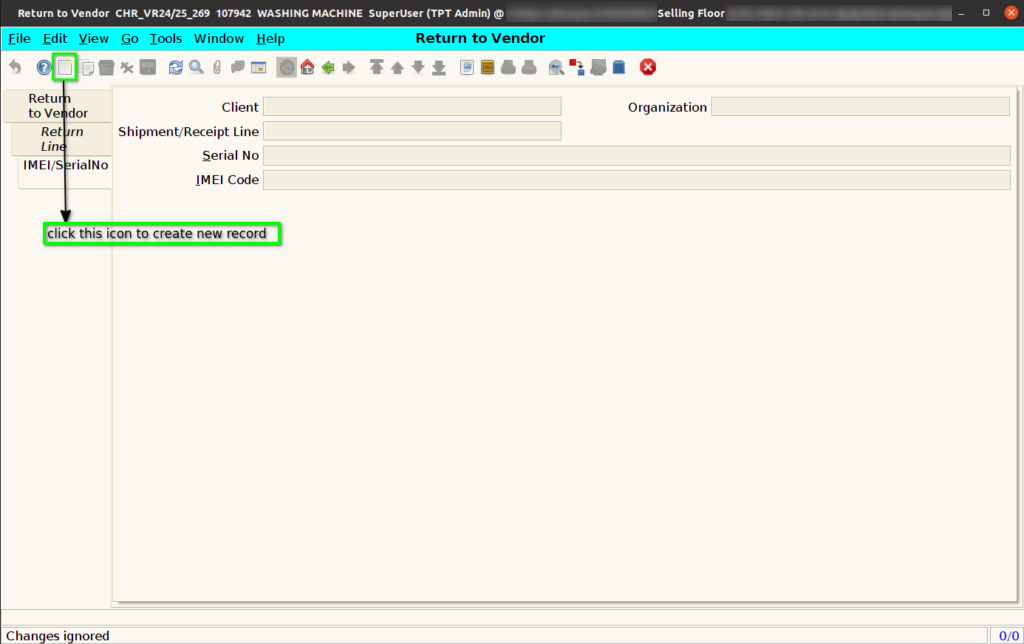
Step 10 : IMEI/Serial No Tab
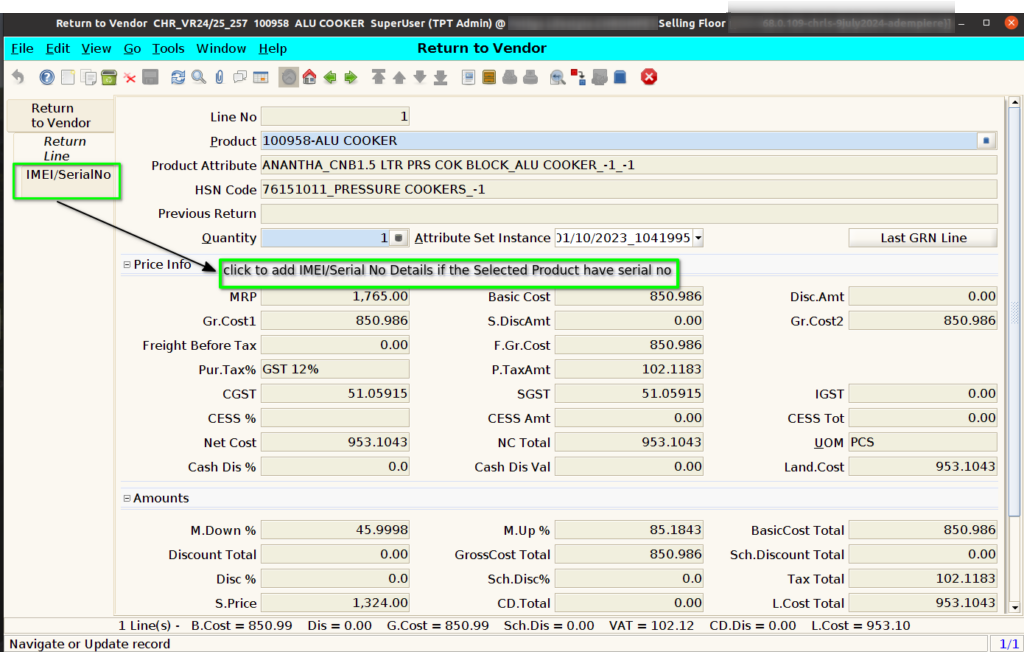
Step 11 : Create new record on serialno/imei tab like below image
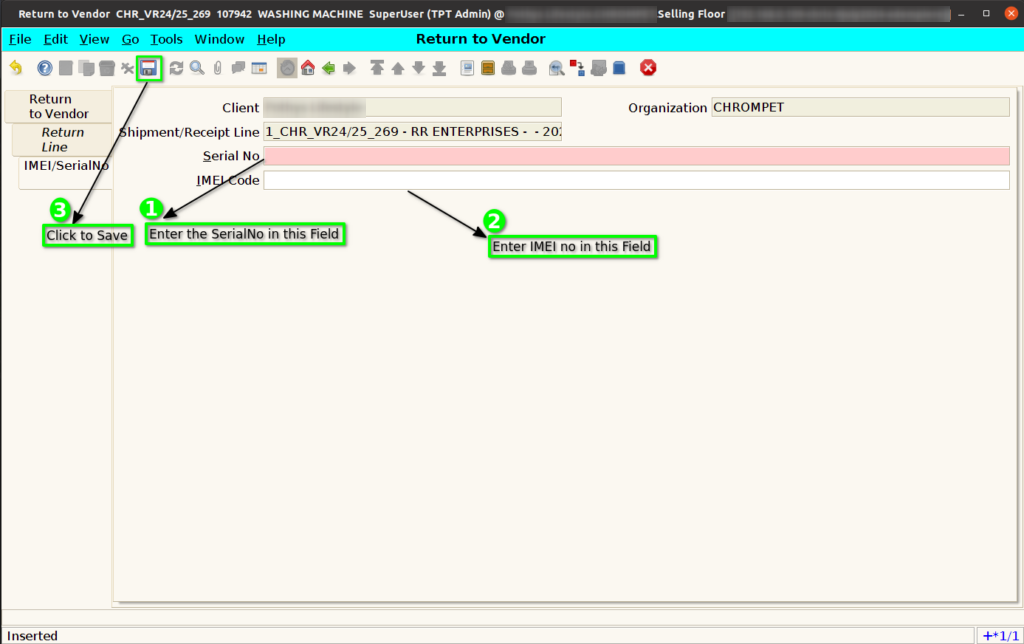
Step 12 : Fill Up The IMEI/SERIAL NO details
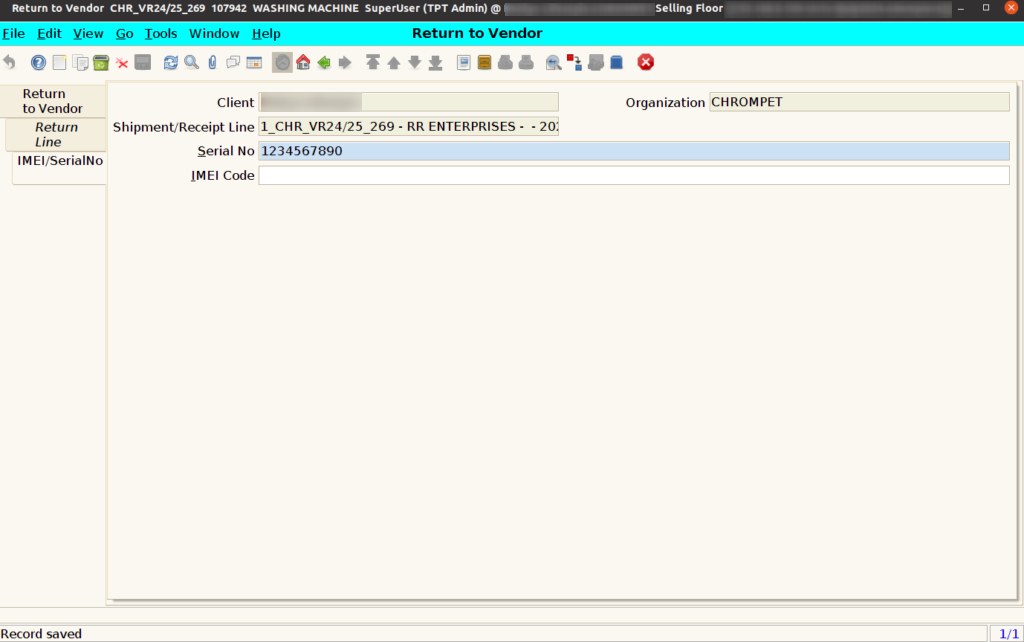
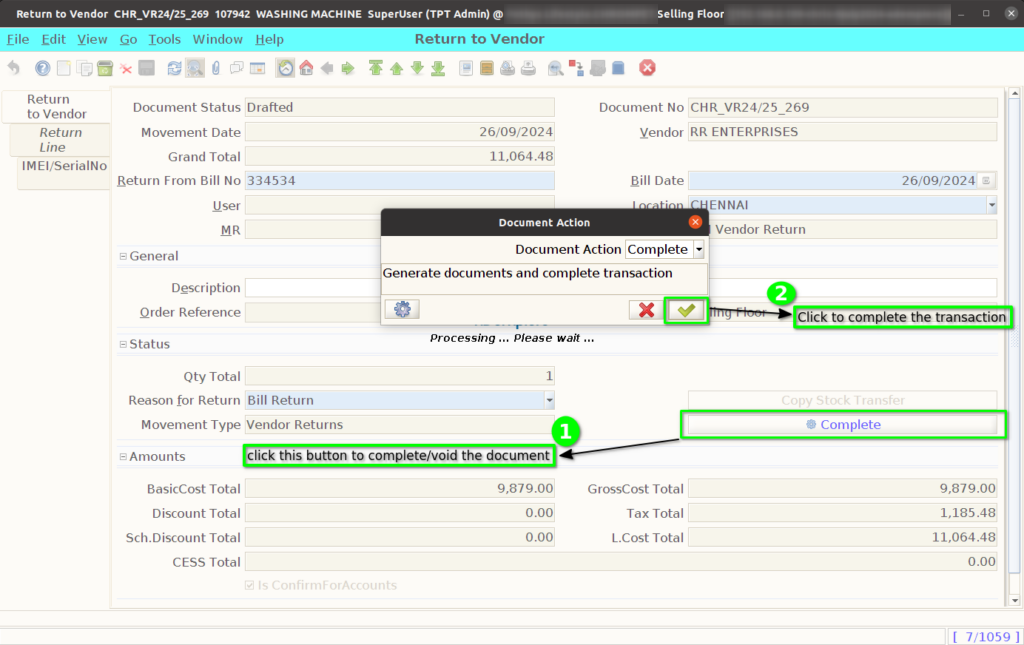
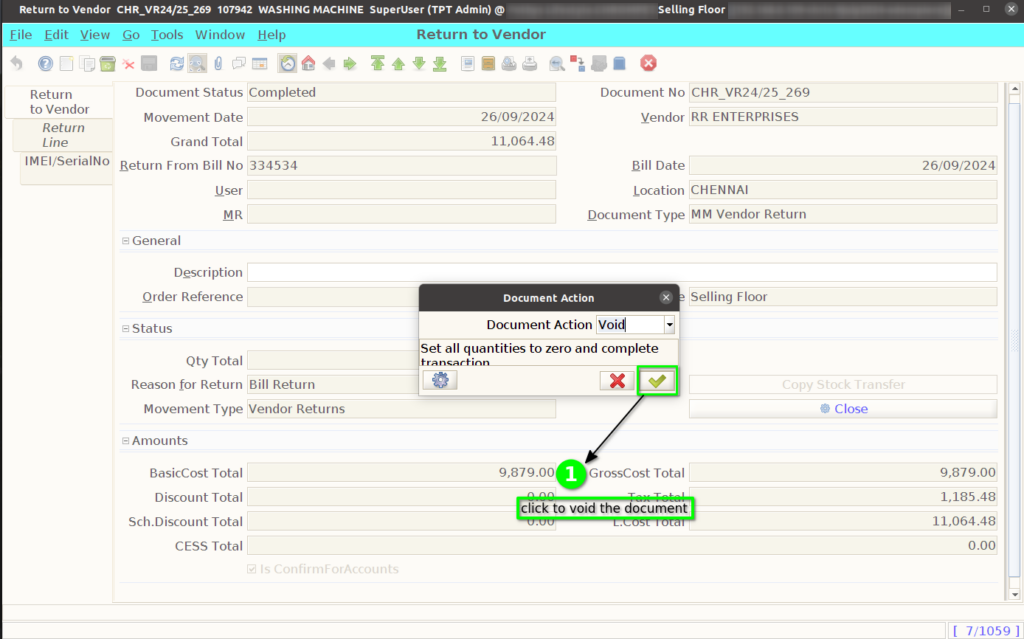
Step 13 : Complete the Document to complete/void the Transaction