How to create a Customer in ADempiere Retail
A Customer is an individual or organization that purchases goods or services from your business.
Customer record captures all essential details needed for sales, billing, delivery, and relationship management.
User Access
Who Can Access
- Admin
- Cashier
- Back Office
What User Can Do
- Create
- Update
- Active Customer
- De-Active Customer
Pre-Requisite Activities
- Define Mandatory Fields
- Set Up Related Masters
- Obtain Necessary Permissions
- Gather Accurate Customer Data
Business Rules
- Customer Code Must Be Unique
- Mandatory Fields Cannot Be Blank
- Valid Contact & Tax Formats
- Inactive Customers Cannot Be Used
- Credit Limit & Payment Terms Applied
User Interface
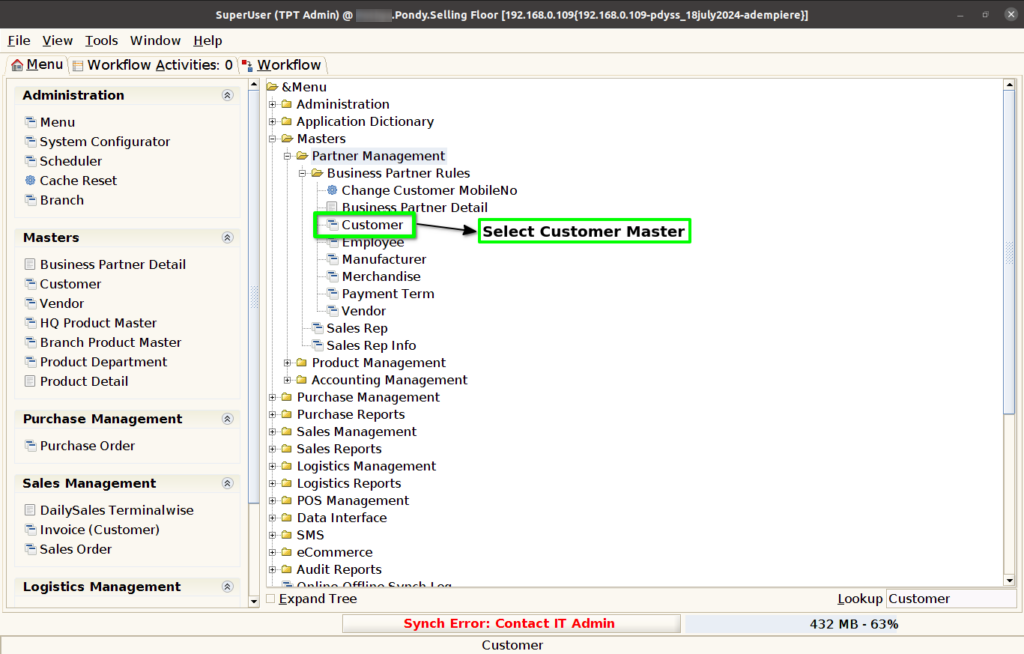
Step 1 : Select ‘Customer’ in Menu Partner Management -> Customer or Search Customer in Lookup.
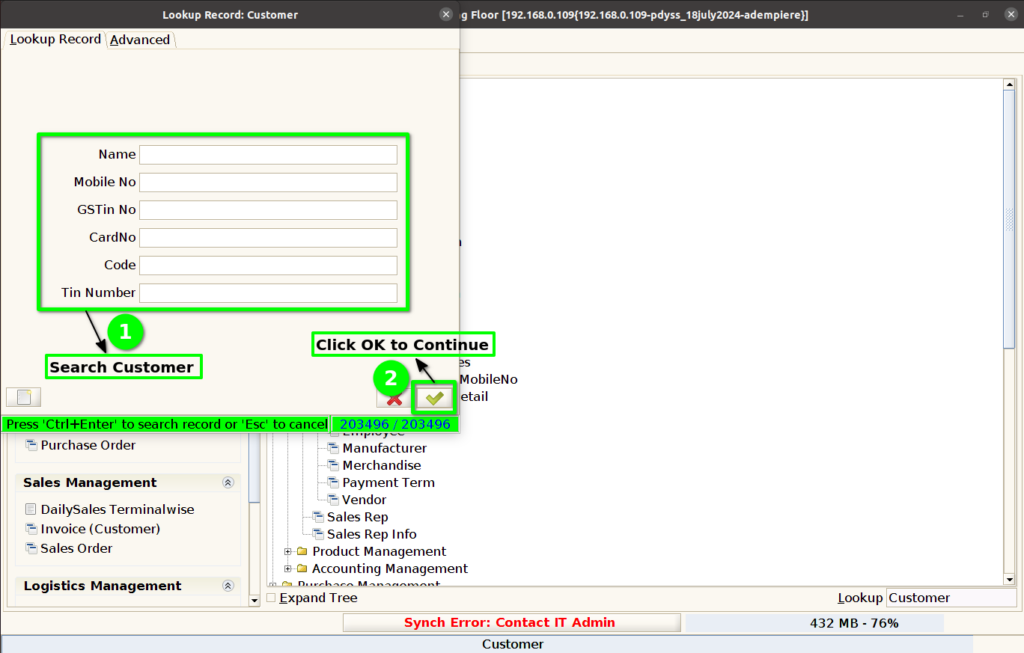
Step 2 : Search Customer based on below option.
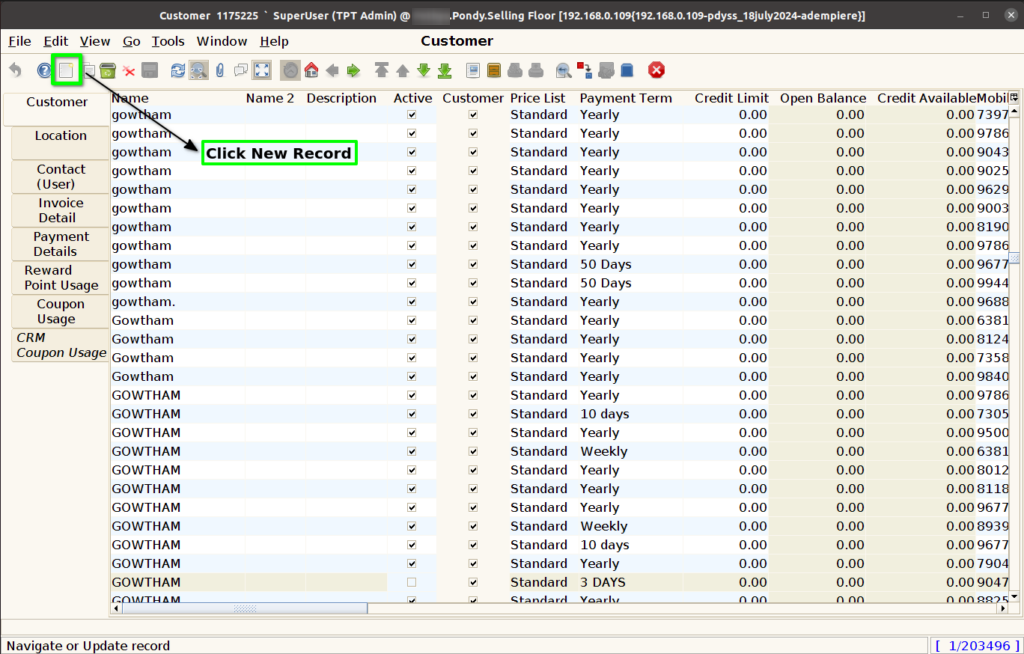
Step 3 : Click to New Record for Customer creation.
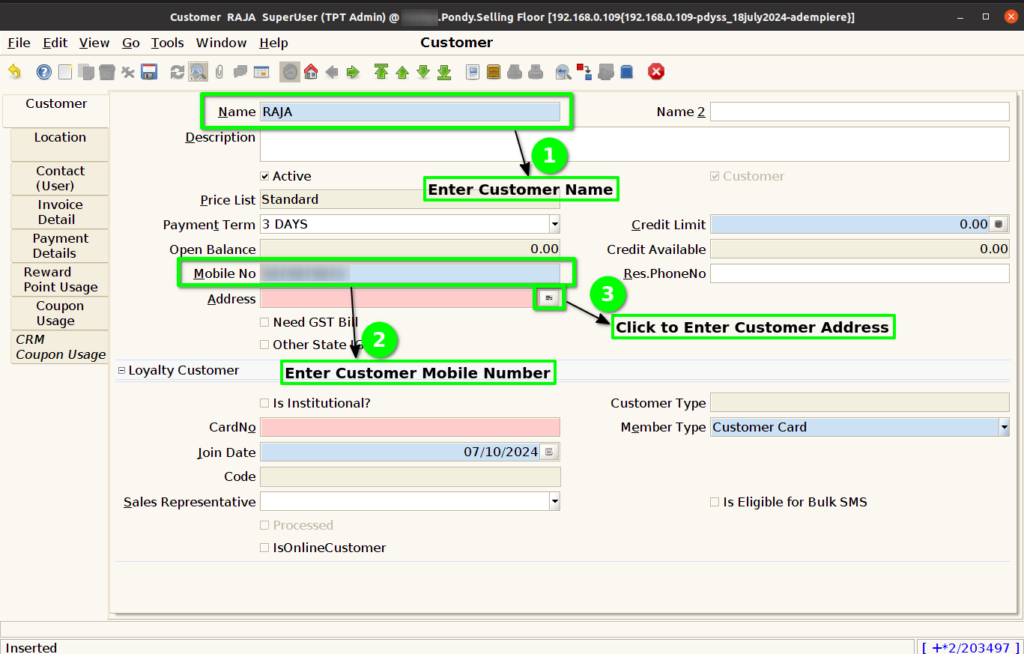
Step 4 : Enter Customer Name, Mobile Number and Click Address.
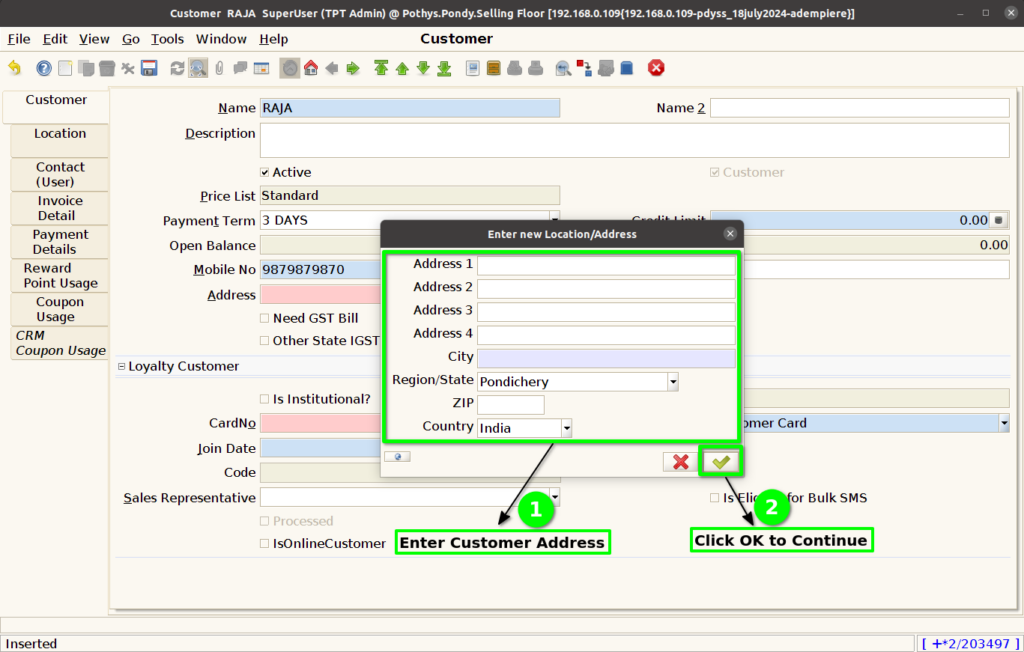
Step 5 : Enter Customer Address.
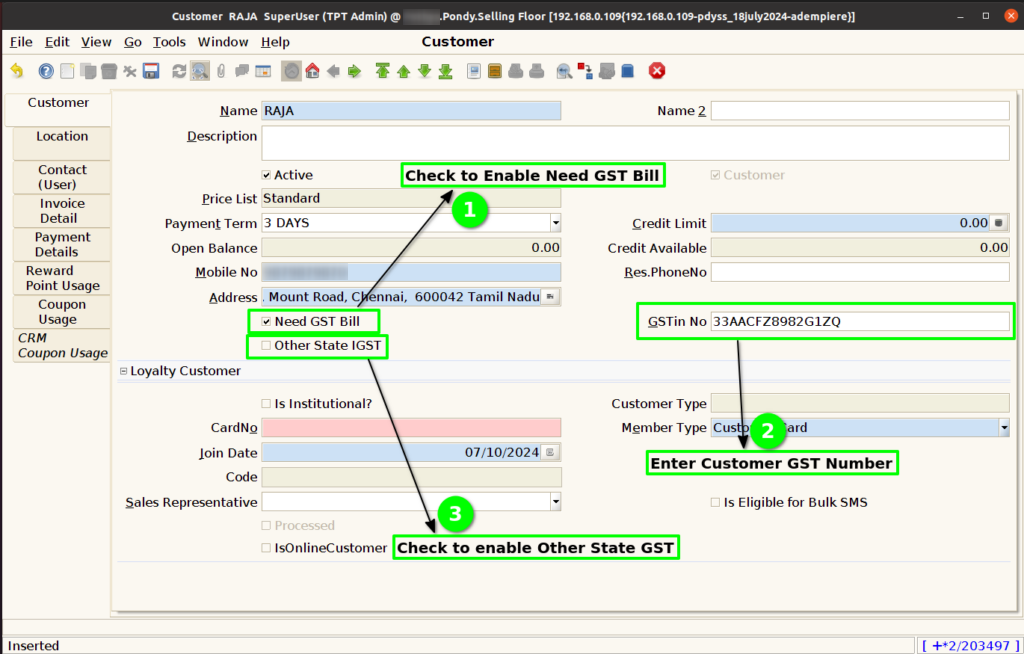
Step 6 : Check to enable below function, if required
- Need GST Bill – Check to enable the customer want GST Bill. If Unchecked all invoice should be as normal invoice
- Enter GST Number – Once checked Need GST Bill, Enter GST Number for the customer
- Other State IGST – Check to enable for calculate IGST bill. If Unchecked calculate as GST Bill.
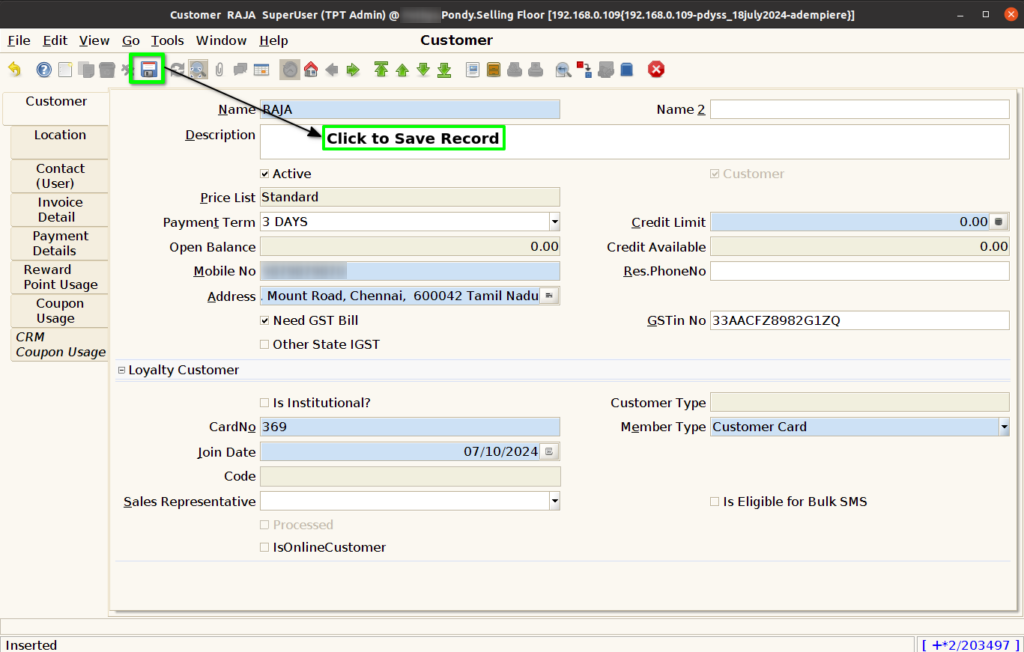
Step 7 : Enter Loyalty Customer Information as Below
- Is Institutional – Check to enable Is Institutional for change the Price list for customer. If Unchecked the customer as default price list.
- Card Number – Enter Customer Card Number to search in POS
- Member Type – Choose member type, based on that customer loyalty points will be calculate
- Is Online Customer – Check to enable for that customer as online customer. If Unchecked the customer will available for both Online & Offline.

Step 8 : Click to Save Record.
Location
Step 9 : Click to Location Tab.

Step 10 : Customer Address details show from customer master.
- Ship Address – If the Ship Address is selected, the location is used to ship goods to a customer or receive goods from a vendor.
- Pay – From Address – If the Pay-From Address is selected, this location is the address the Business Partner pays from and where dunning letters will be sent to
- Invoice Address – If the Invoice Address is selected, the location is used to send invoices to a customer or receive invoices from a vendor.
- Remit-To Address – If the Remit-To Address is selected, the location is used to send payments to the vendor.

Step 11 : Click to Save Record.

Contact (User)
Step 12 : Click to Contact(User) Tab and click New Record button.
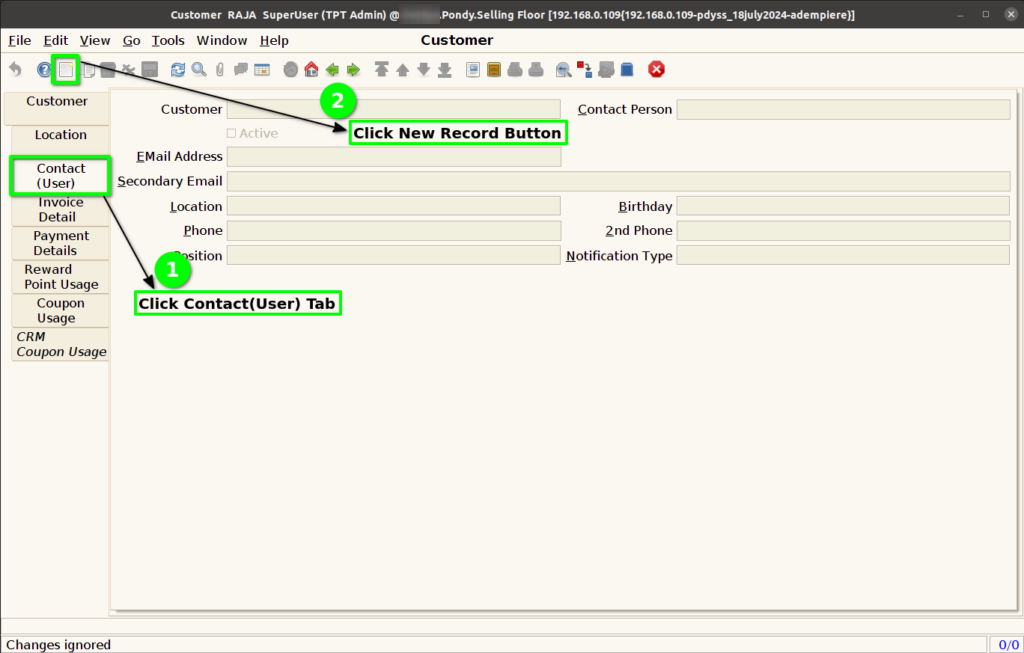
Step 13 : Enter below customer details (Optional)
- Email Address – Enter the Email Address is used to access the self service application functionality from the web.
- Secondary Email – Enter the 2nd email field identifies an alternate Email Address
- Location – The Partner address indicates the location of a Business Partner
- Birthday – Enter the Birthday or Anniversary day
- Phone 1 – Enter the Phone field identifies a telephone number
- Phone 2 – Enter the 2nd Phone field identifies an alternate telephone number.
- Notification Type – Emails or Notification sent out for Request User.
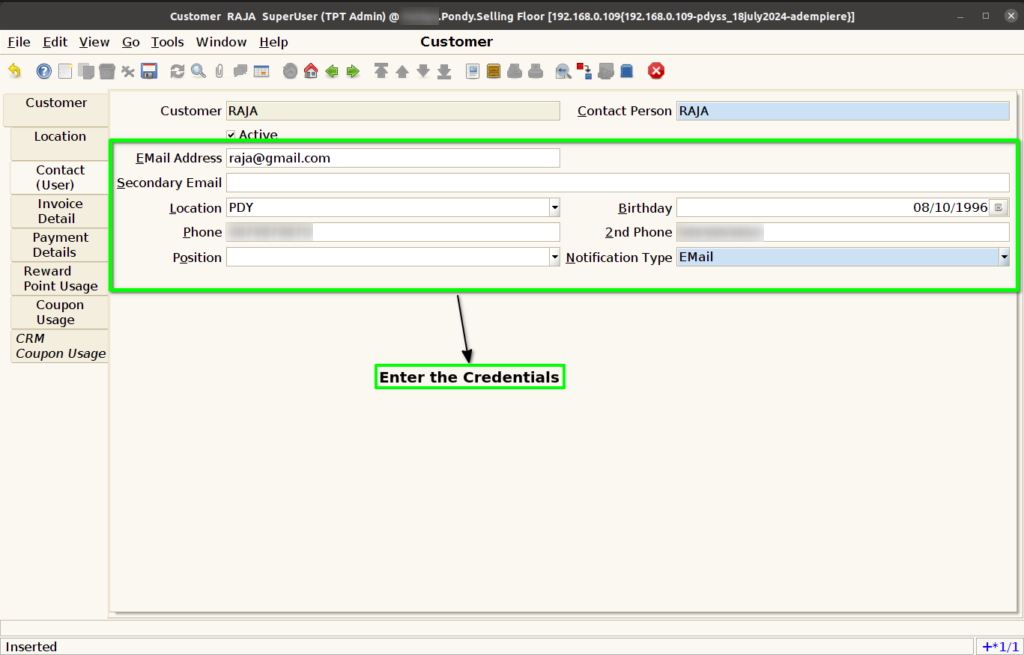
Step 14 : Click to Save Record.

Invoice Details
Step 15 : Click to Invoice Detail Tab.
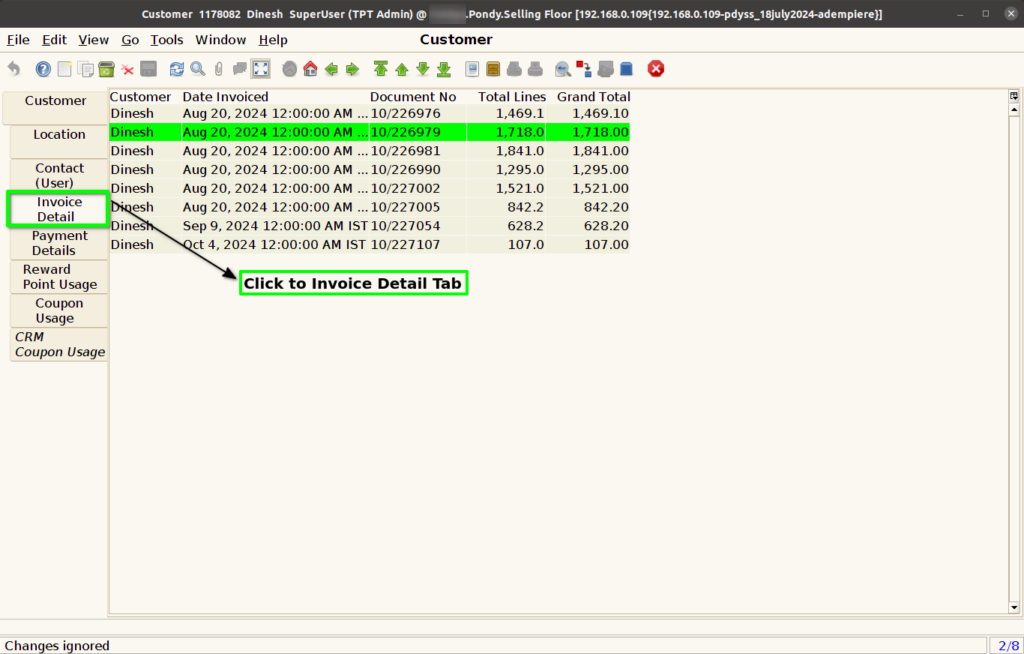
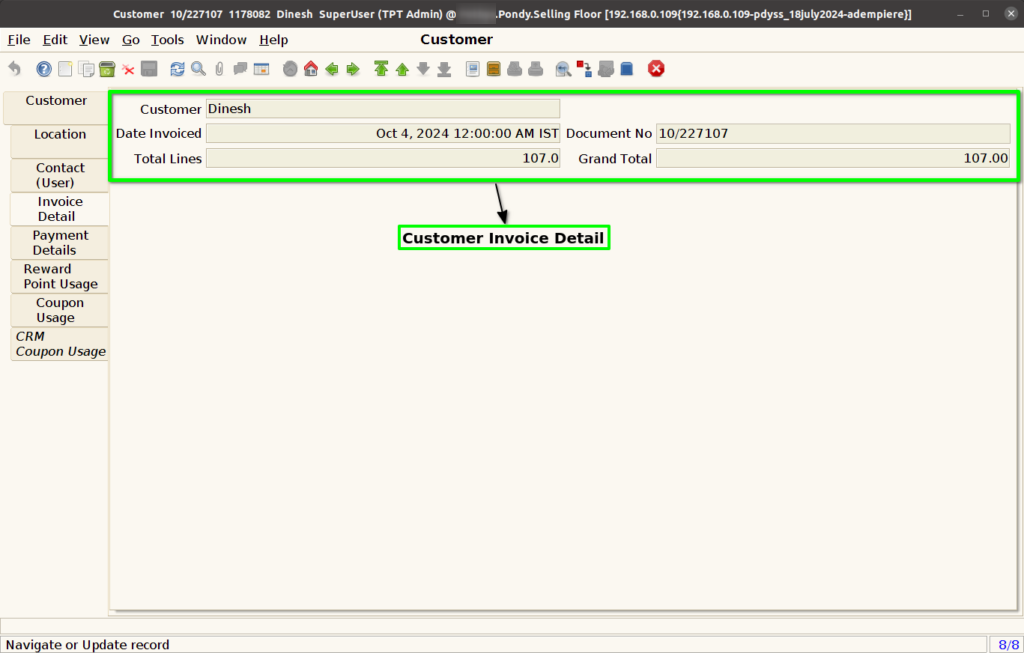
Step 16 : Customer Invoice detail shown based on POS
- Date Invoiced – The Date Invoice indicates the date printed on the invoice
- Document Number – The document number is usually automatically generated by the system and determined by the document type of the document.
- Total Lines – The Total amount displays the total of all lines in document currency
- Grand Total – The Grand Total displays the total amount including Tax and Freight in document currency.
Payment Details
Step 17 : Click to Payment Details Tab.
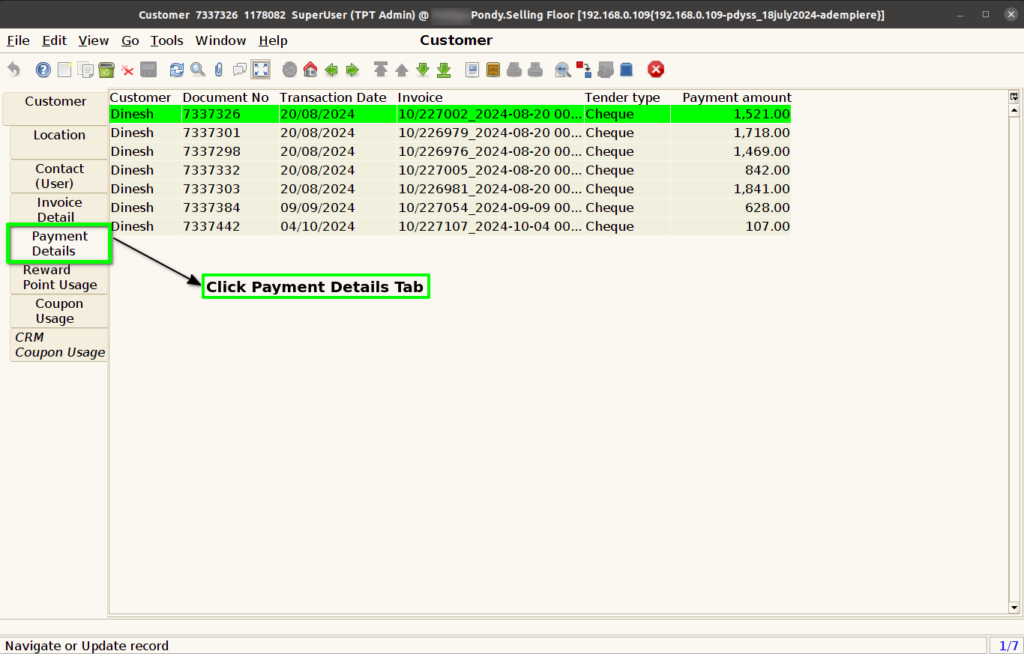
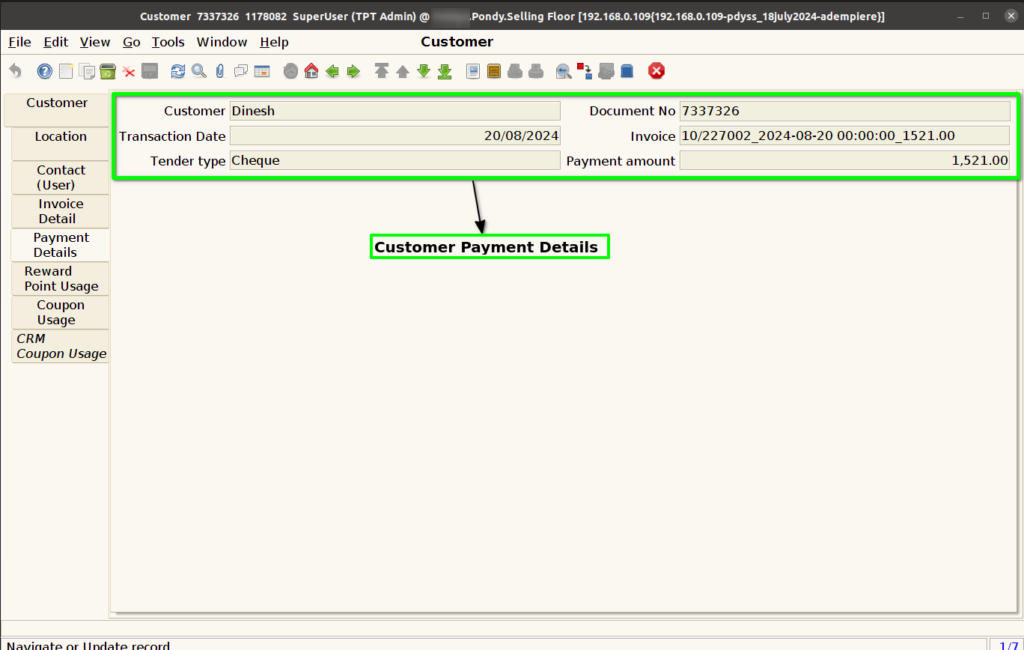
Step 18 : Customer Payment details shown based on POS Payment
- Document Number – The document number is usually automatically generated by the system and determined by the document type of the document.
- Transaction Date – The Transaction Date indicates the date of the transaction
- Invoice – The Invoice number
- Tender Type – The Tender Type indicates the method of payment (Cash, Card, UPI, etc)
- Payment Amount – The payment amount can be for single or multiple invoices or a partial payment for an invoice.
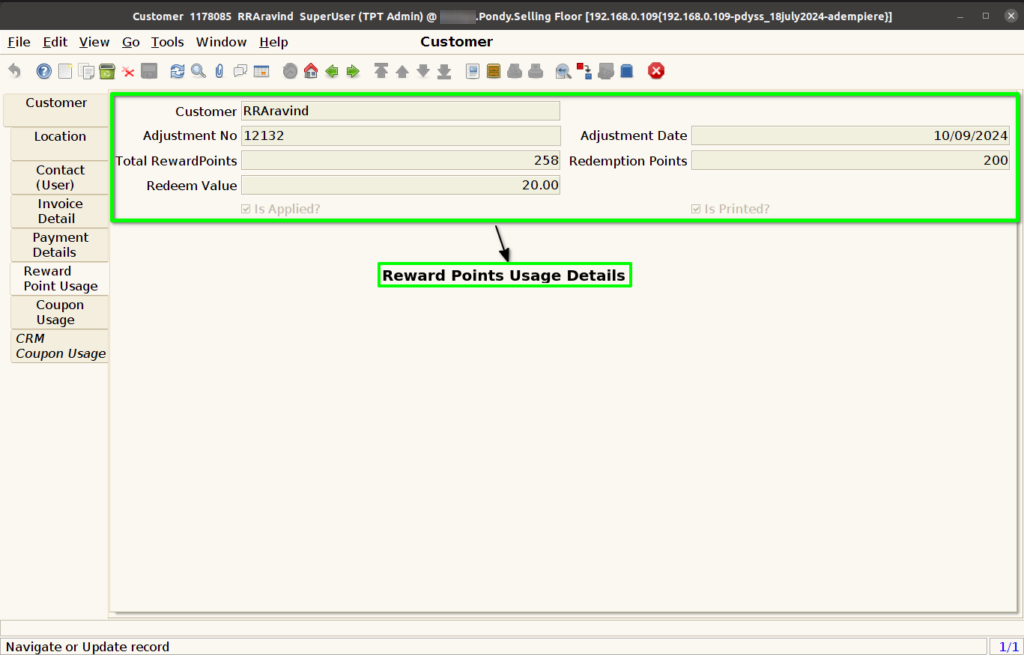
Reward Point Usage
Step 19 : Click to Reward Point Usage Tab.
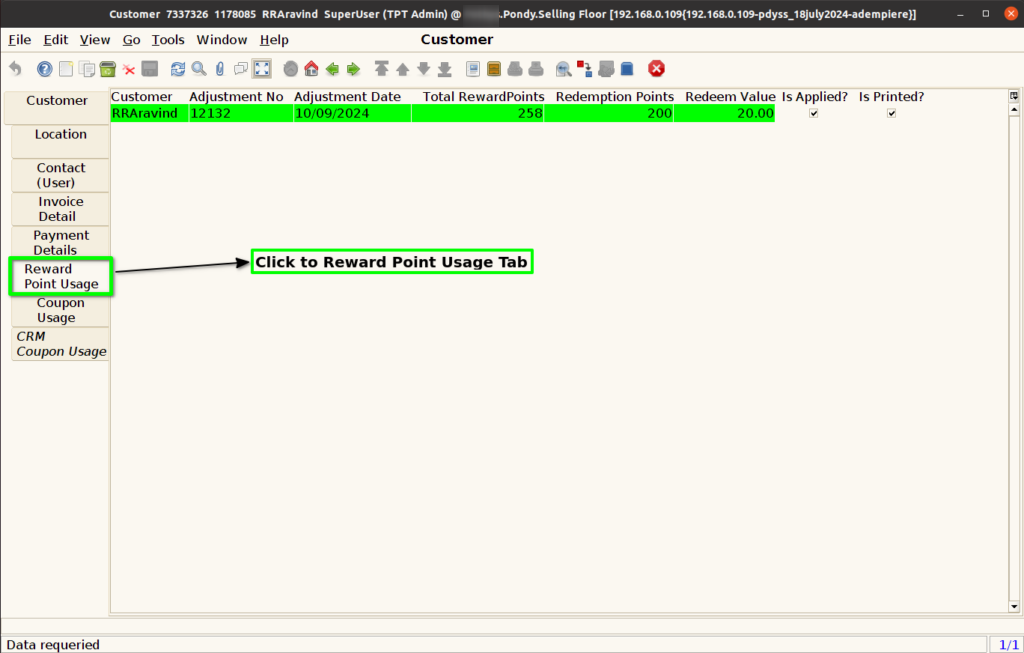
Step 20 : Customer Reward Point Usage details shown based on POS
- Adjustment Number – Reward Point Usage Document Number
- Adjustment Date – Reward Point Usage Date
- Total Reward Points – Total Available Points to Redeem
- Redemption Points – Current Redeem points form Total Points
- Redeem Value – Redeem Value from Redemption Points
- Is Applied – Once Redemption Applied automatically check
- Is Printed – Once Redemption Coupon Printed automatically check.