How to do POS Info setup in Branch screen of ADempiere Retail
POS Info Setup refers to the configuration of rules, behaviours, and integrations related to sales transactions that occur at the retail point of sale. This ensures accurate billing, tax application, inventory deduction, and integration with back-office systems.
User Access
Who Can Access
- Admin
- Cashier
- Manager
- Back Office
What User Can Do
- Update
- Activate
- De-Activate
Pre-Requisite Activities
- Store or branch must be created
- Users and cashiers must be set up
- Products and tax rates should be configured
- POS terminal must be linked to the store
- Loyalty or CRM setup
Business Rules
- Each POS must be linked to a valid store
- Invoices must have a unique number
- Tax must be applied as per product settings
- Returns should be linked to original bills
User Interface
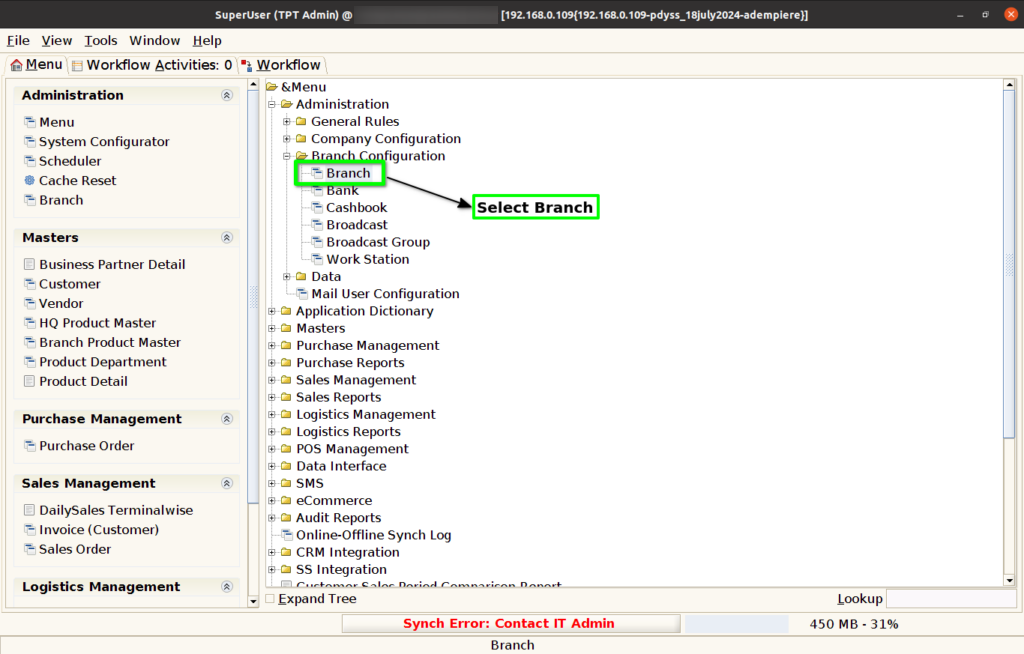
Step 1 : Select ‘Branch’ in Menu Branch Configuration -> Branch or Search Branch in Lookup.
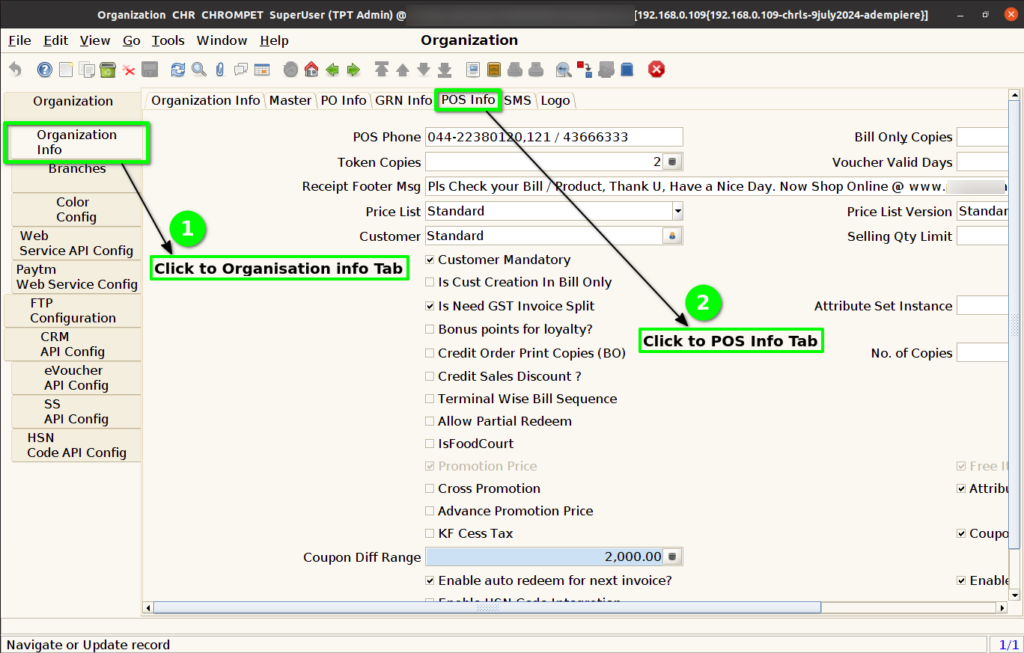
Step 2 : Select Organization Info -> POS Info Sub Tab.
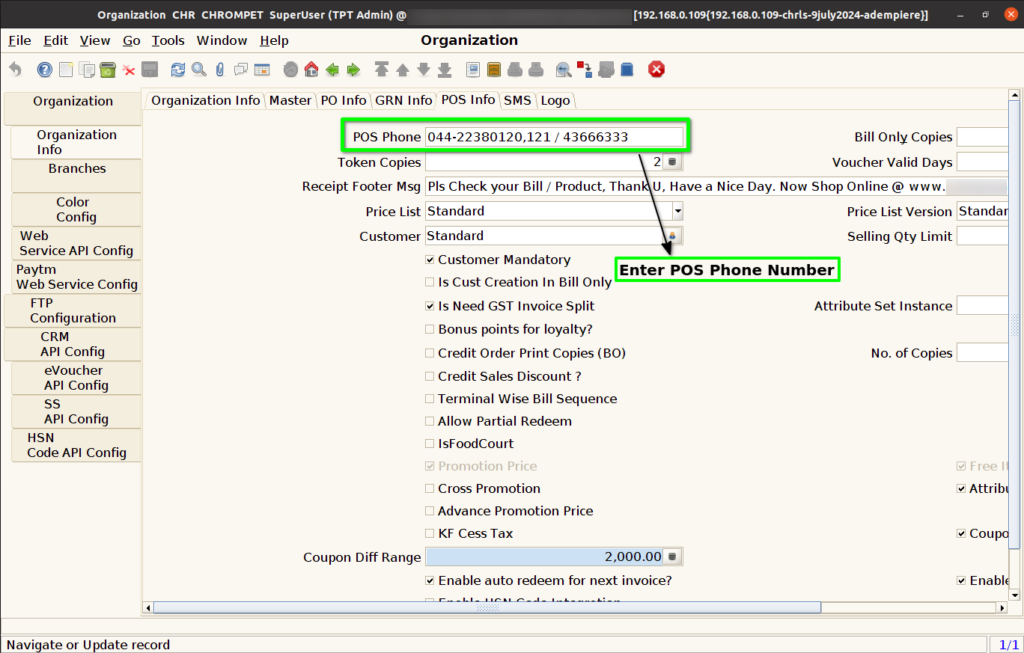
Step 3 : Enter POS Phone number to print in POS Bill Copy.
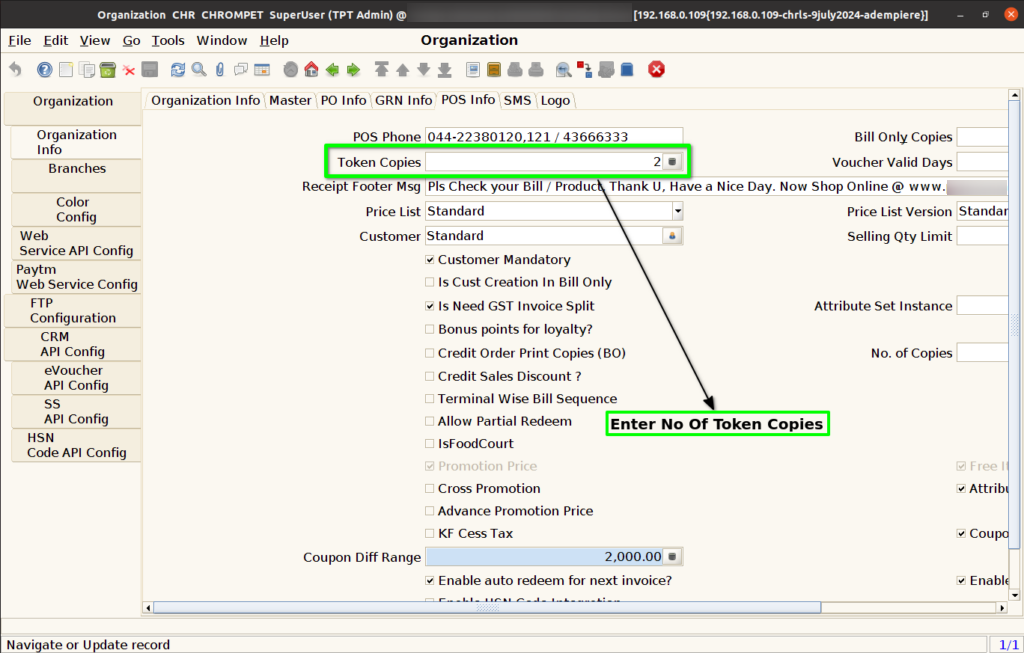
Step 4 : Enter No Token Copies need to Print only for LS.
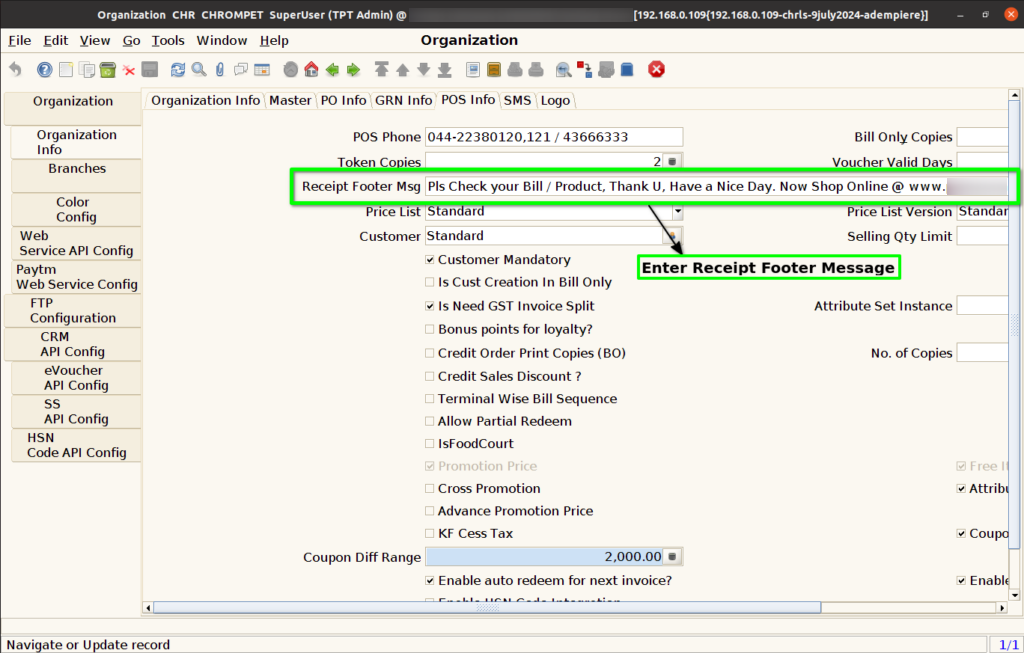
Step 5 : Enter Receipt Footer message to print in POS Bill Copy for Normal Orders.
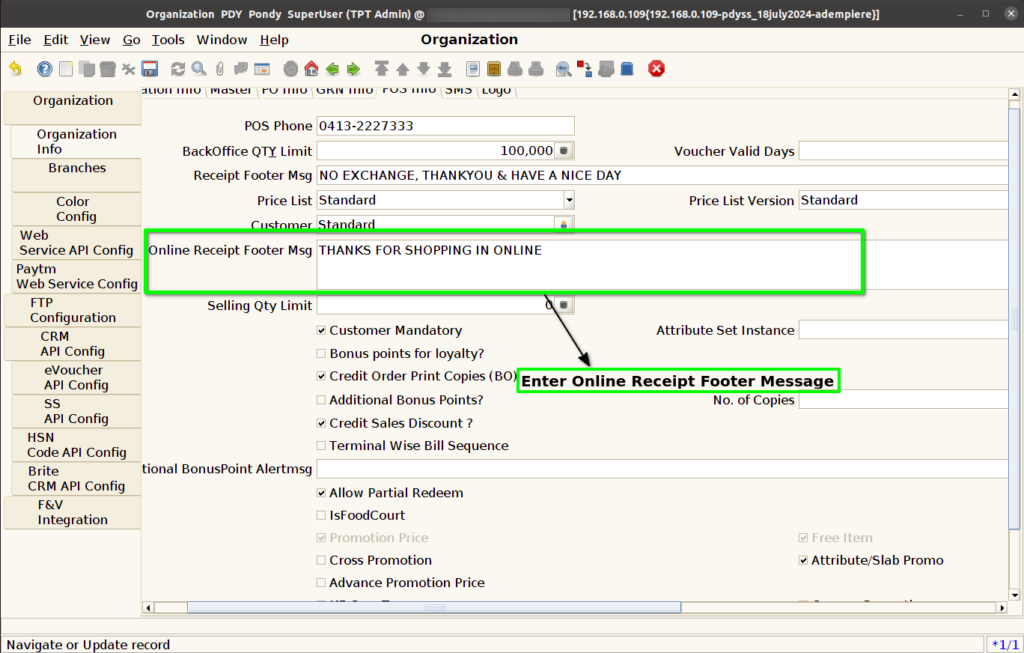
Step 6 : Enter Online Receipt Footer message to print in POS Bill Copy for Online Orders for SS Only.
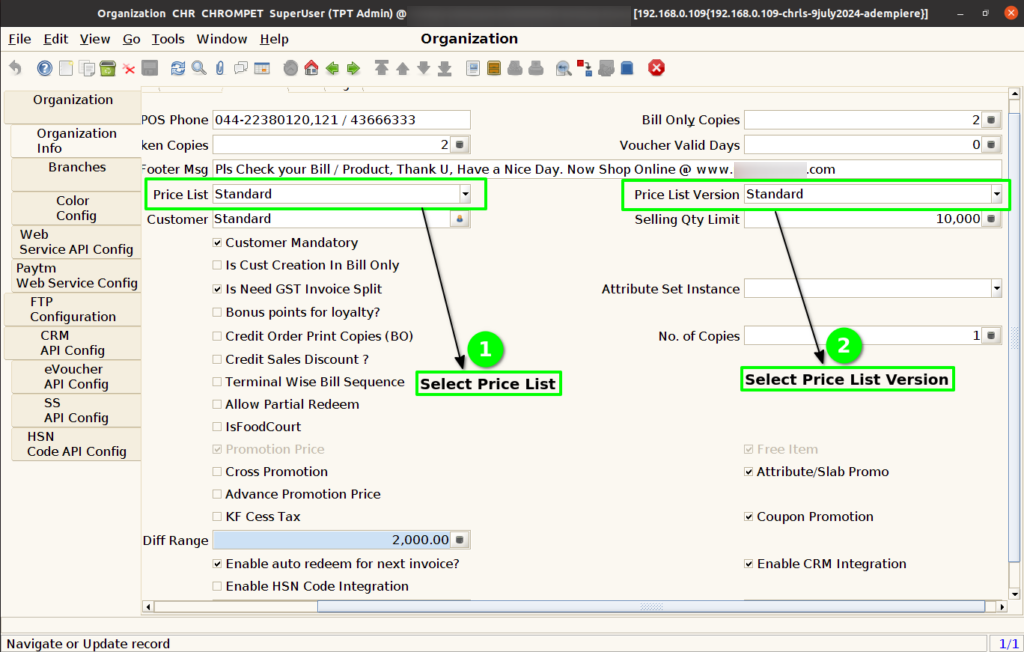
Step 7 : Select Price List and Price List Version, based on this product selling price shown in POS.
Step 8 : Select Default customer for POS Order.
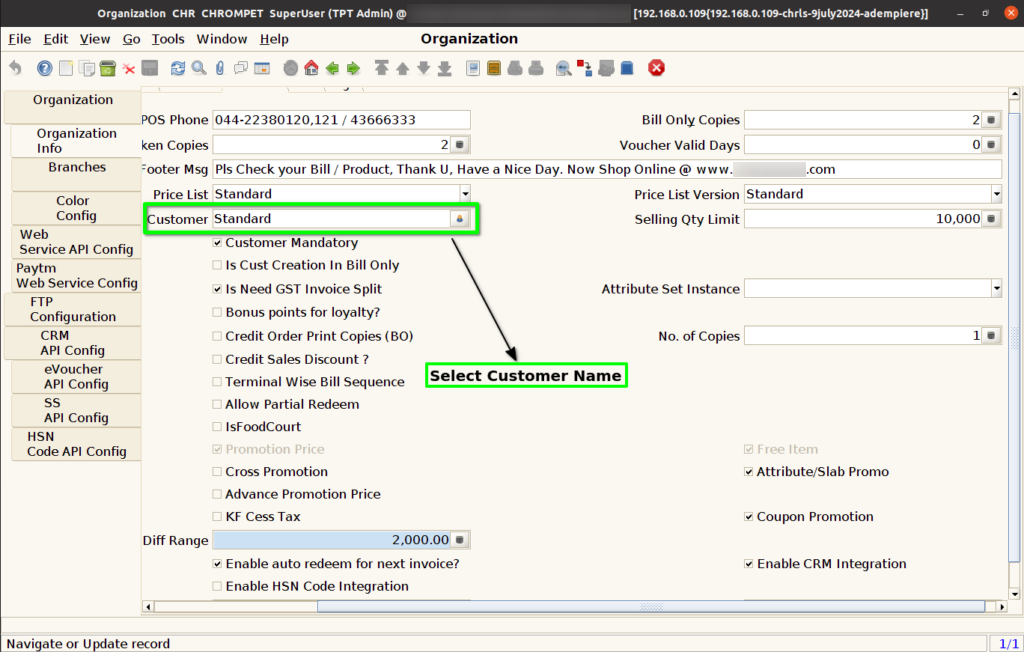
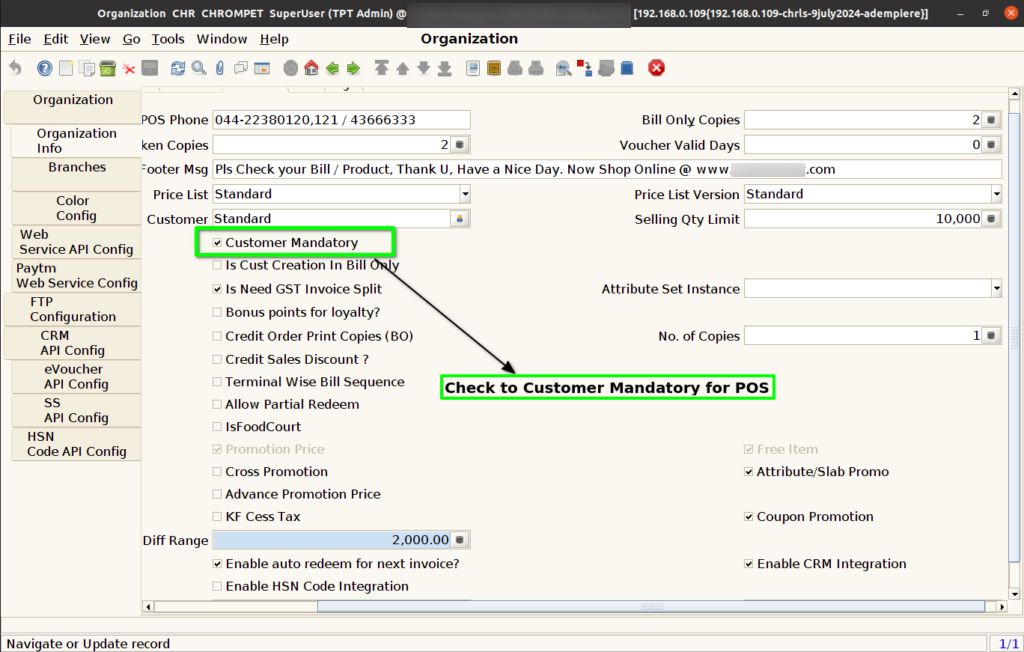
Step 9 : Check Customer Mandatory to choose customer for POS Order. If Unchecked the default “Standard” customer will process for POS Order.
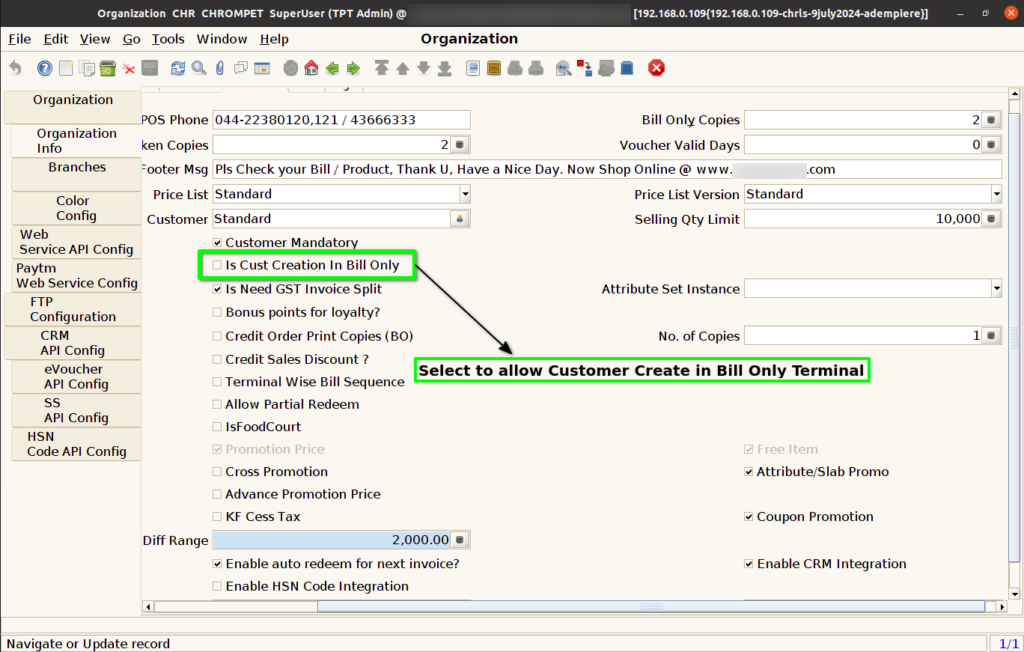
Step 10 : Check to allow create customer in Bill Only Terminal. If Unchecked not allow to create customer in Bill only terminal.
Step 11 : Check to enable Need GST invoice Split for B2B invoice not allow to create GST 0% Tax products in same invoice. If Unchecked it allow to create a all Tax products in same invoice.

Step 12 : Check to enable Bonus Point Calculation for Carry Bag not required. If Unchecked bonus points not calculate.

Step 13 : Check to enable for Credit order Print copies more than one. Enter No.Of Copies need for Credit Order.

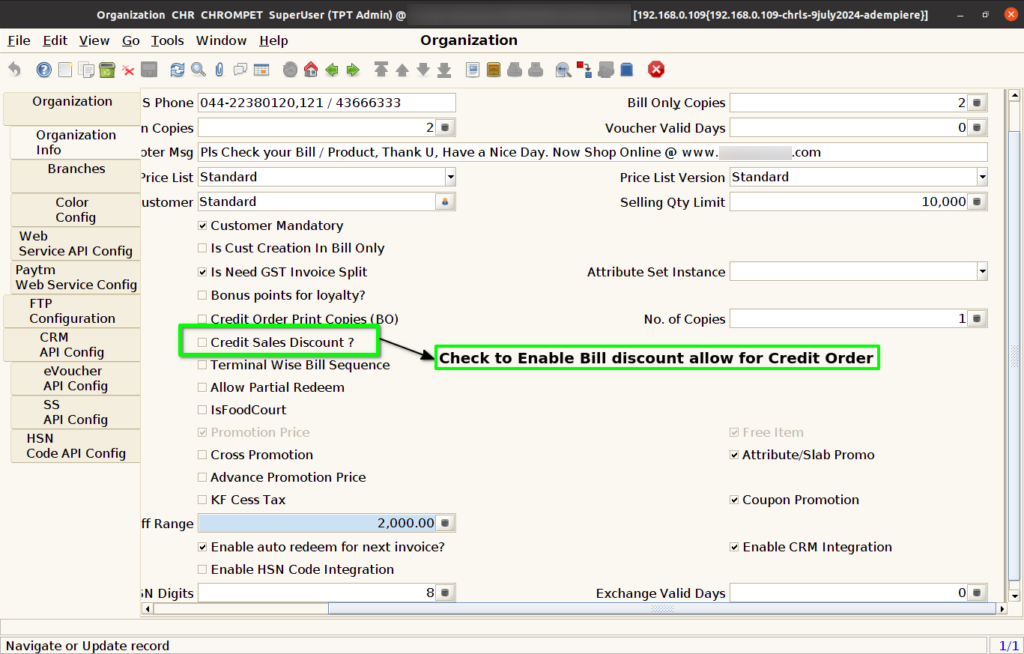
Step 14 : Check to enable Credit order allow for Bill Discount. If unchecked Bill discount not allowed for Credit order.
Step 15 : Check to enable Terminal wise bill sequence for POS Order. If Unchecked Bill sequence common for all POS Order.
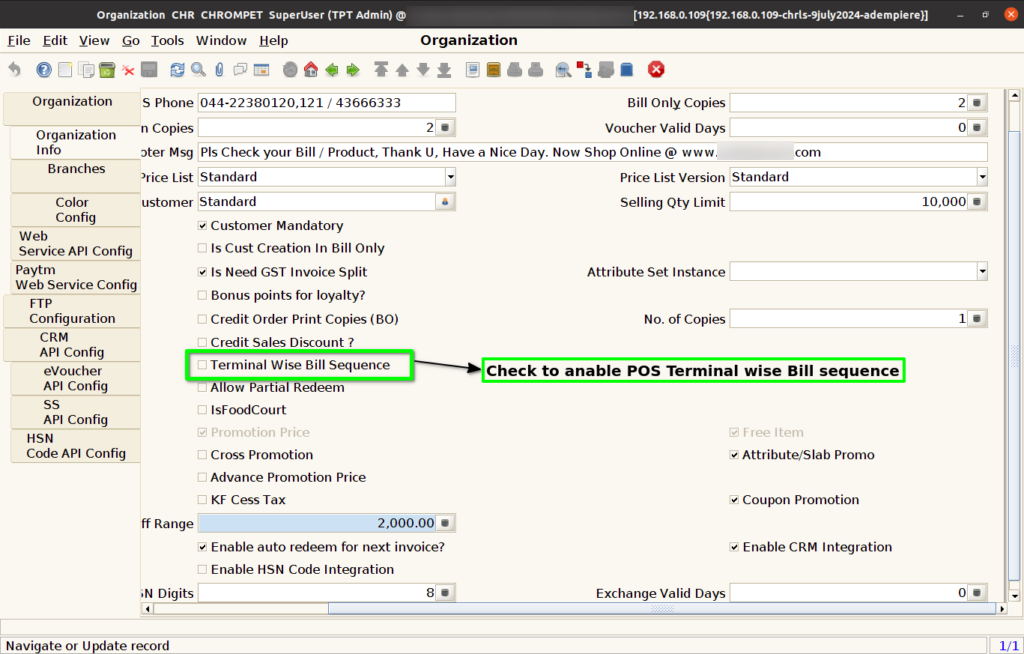
Step 16 : Check to allow Partial Redeem for coupon. If unchecked only allow to full redeem.
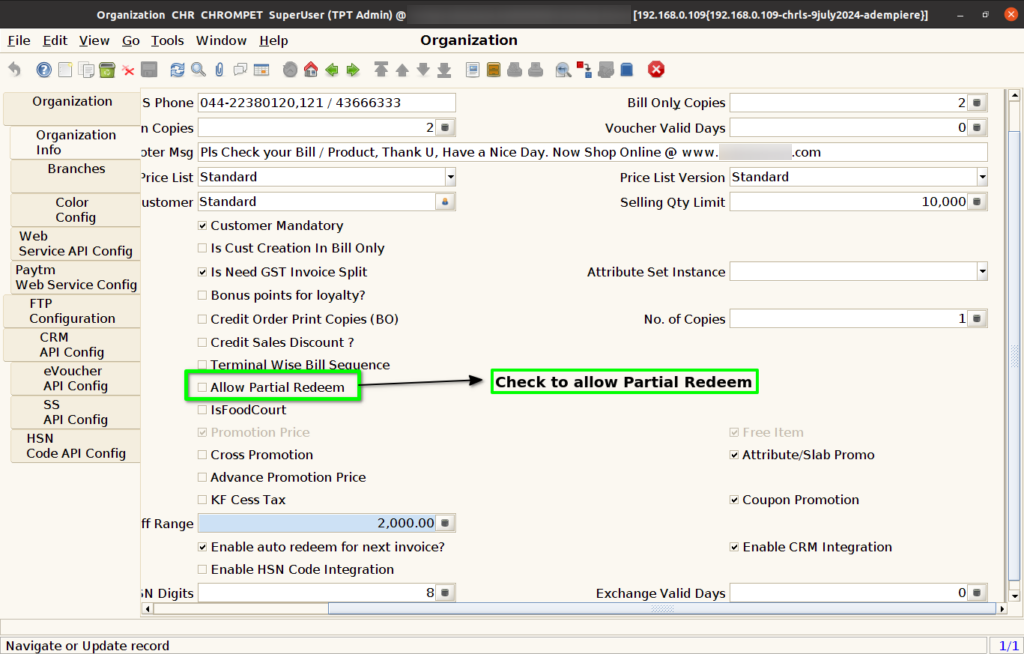
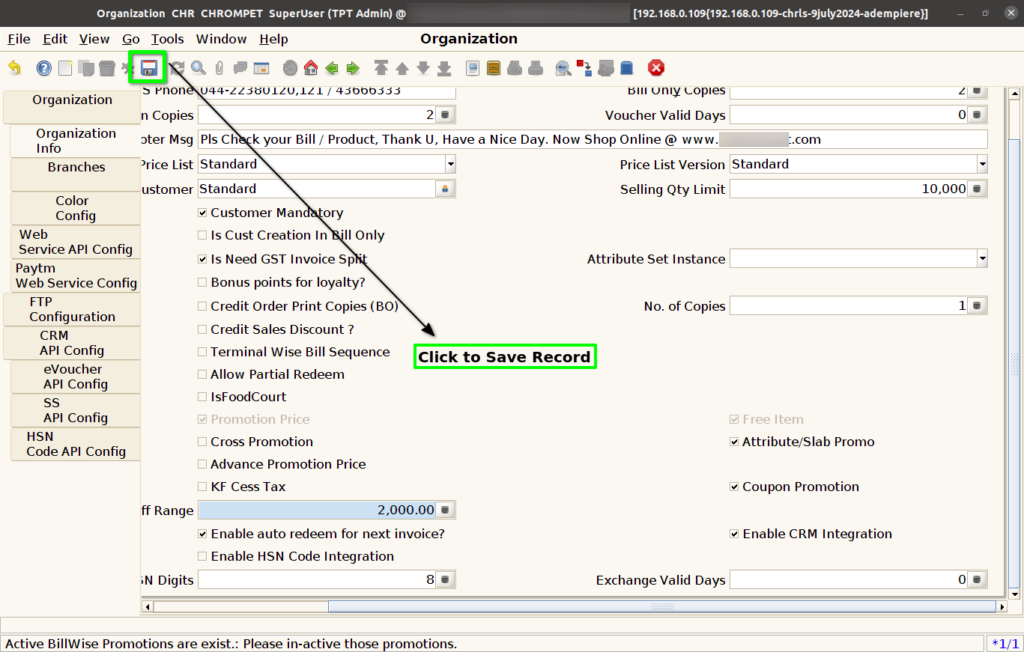
Step 17 : Enter Bill Only Copies print in POS.
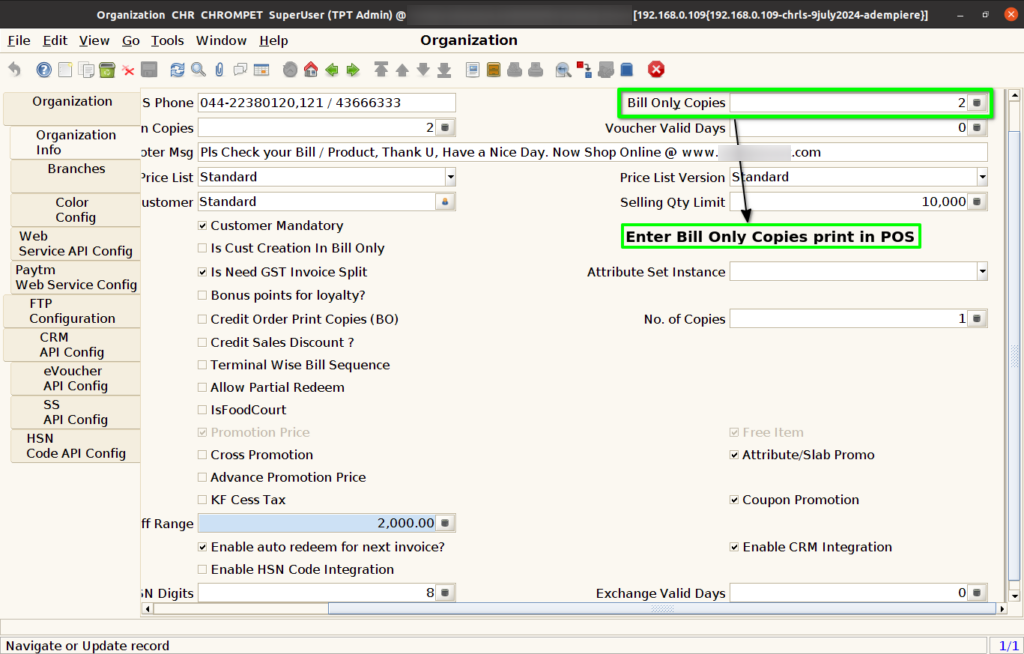
Step 18 : Enter Selling Qty Limit in POS.
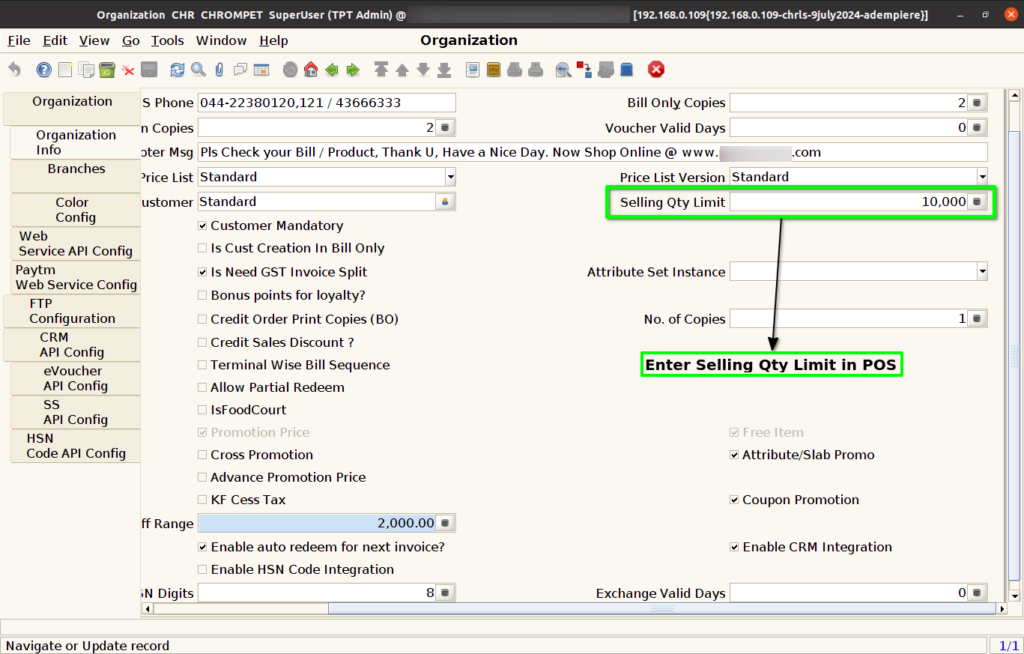
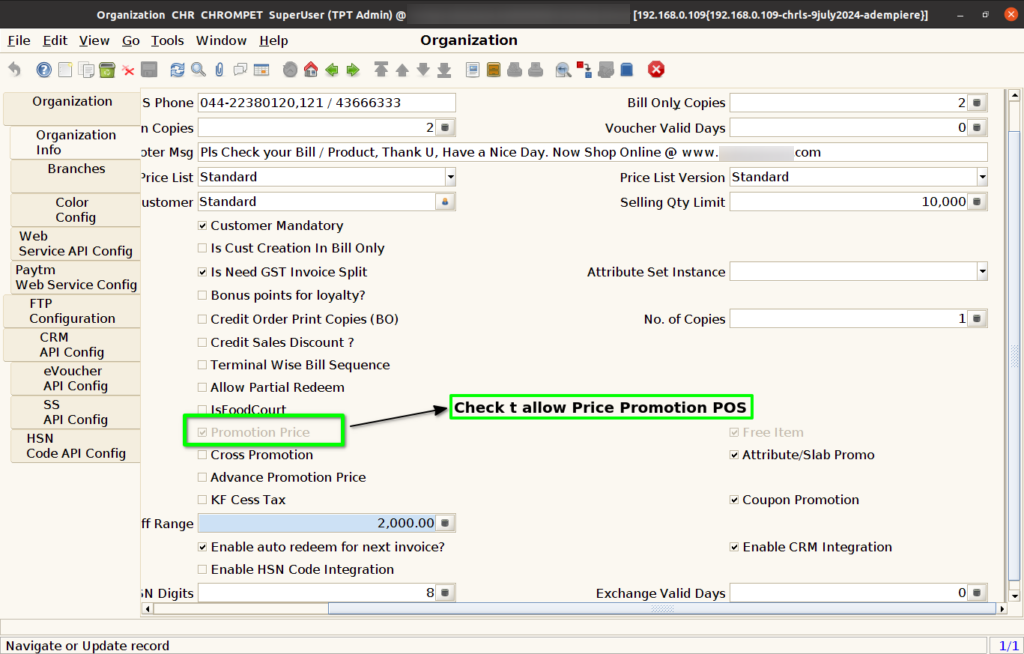
Step 19 : Check to enable Price Promotion allow in POS. If Unchecked Price Promotion not allow.
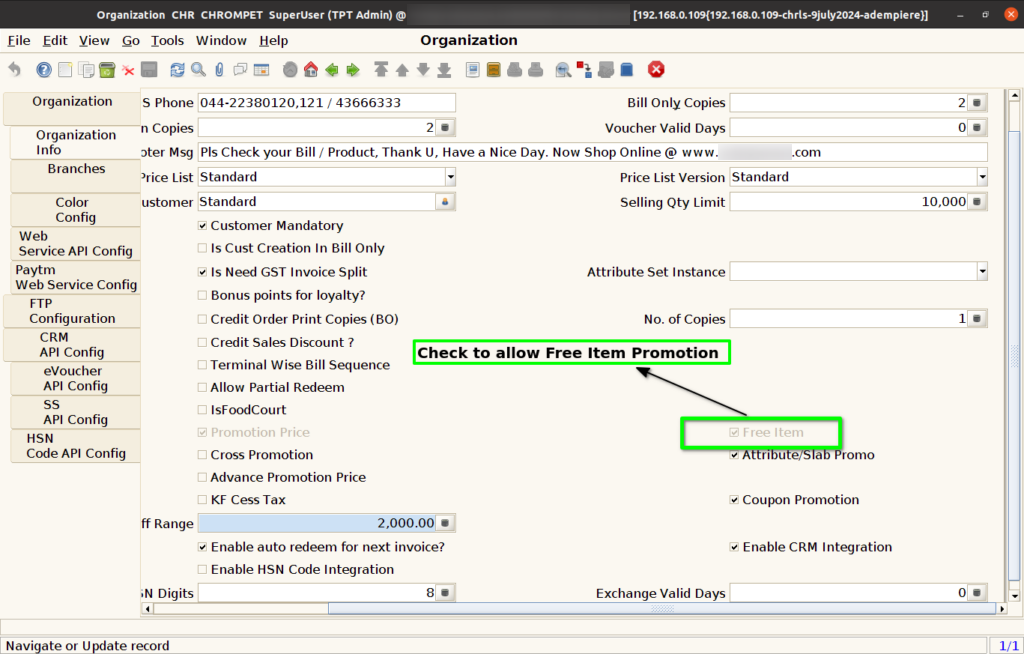
Step 20 : Check to enable Free Item Promotion allow in POS. If Unchecked Free Item Promotion not allow.
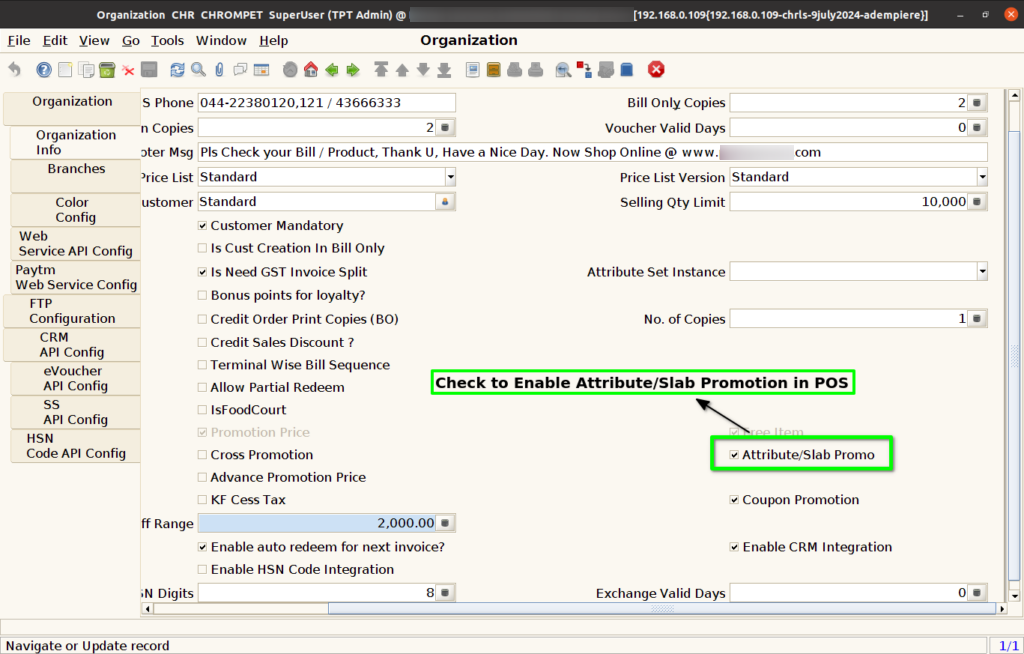
Step 21 : Check to enable Attribute/Slab Promotion allow in POS. If Unchecked Attribute/Slab Promotion not allow.
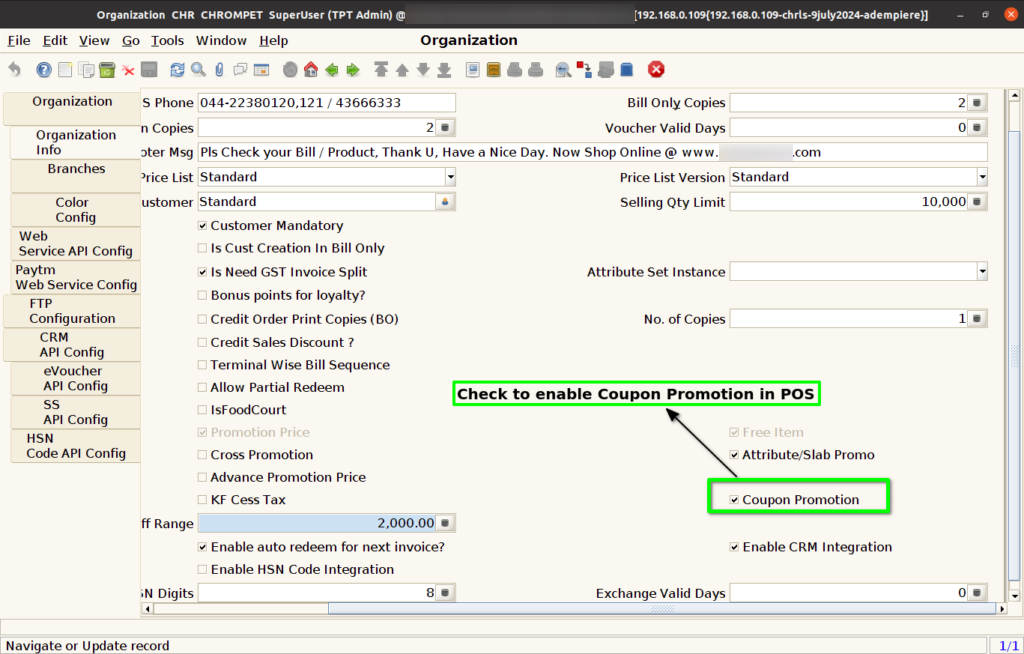
Step 22 : Check to enable Coupon Promotion allow in POS. If Unchecked Coupon Promotion not allow.
Step 23 : Check to enable Additional Bounus Points calculate for F&V Products.
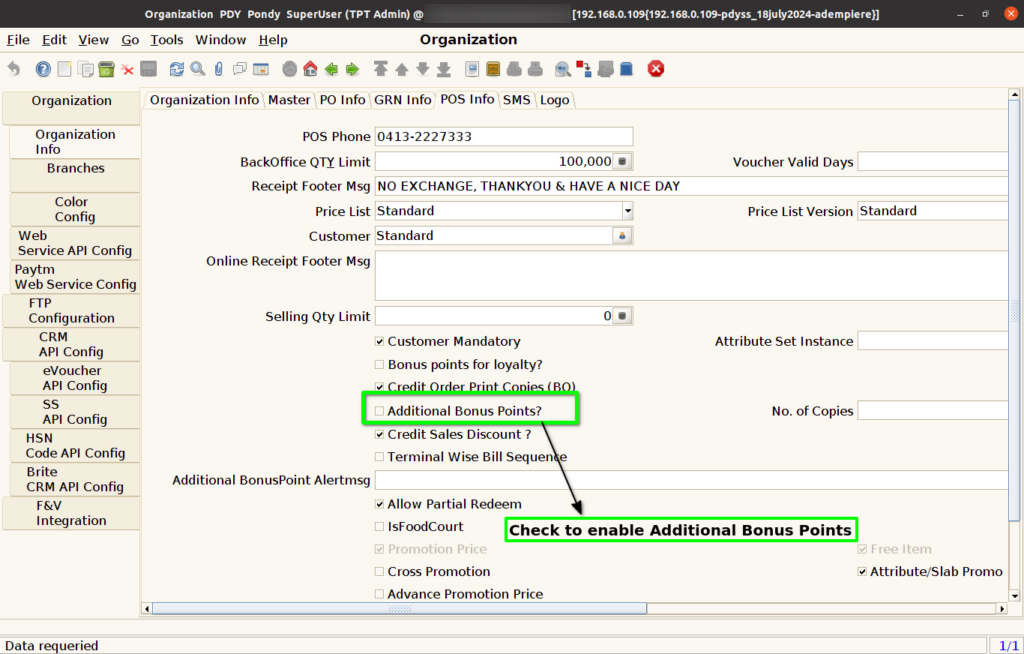
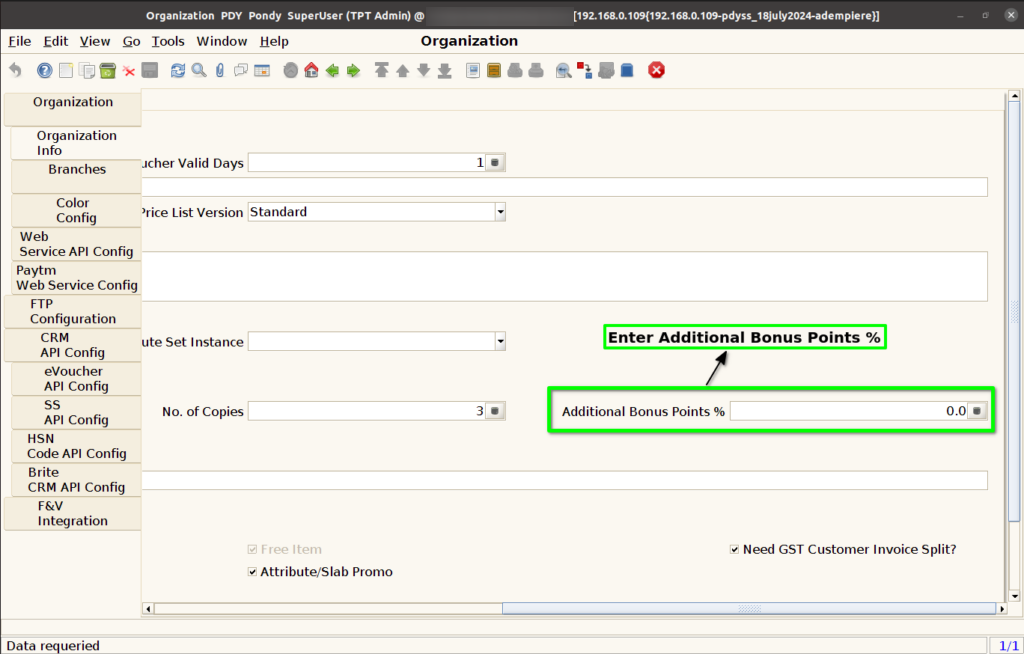
Step 24 : Enter Additional Bonus Points % to calculate F&V products.
Step 25 : Check to enable auto redeem for next invoice based on Loyalty Points.

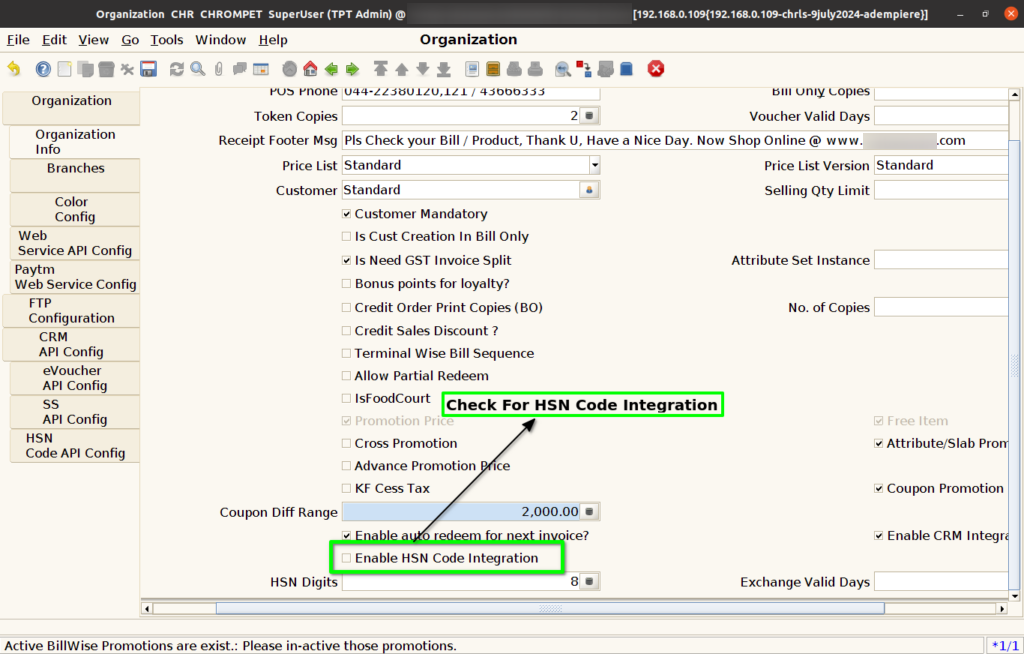
Step 26 : Check to enable HSN Code Integration.
Step 27 : Check to enable CRM Integration for loyalty points redemption. If unchecked Loyalty points redemption not working.

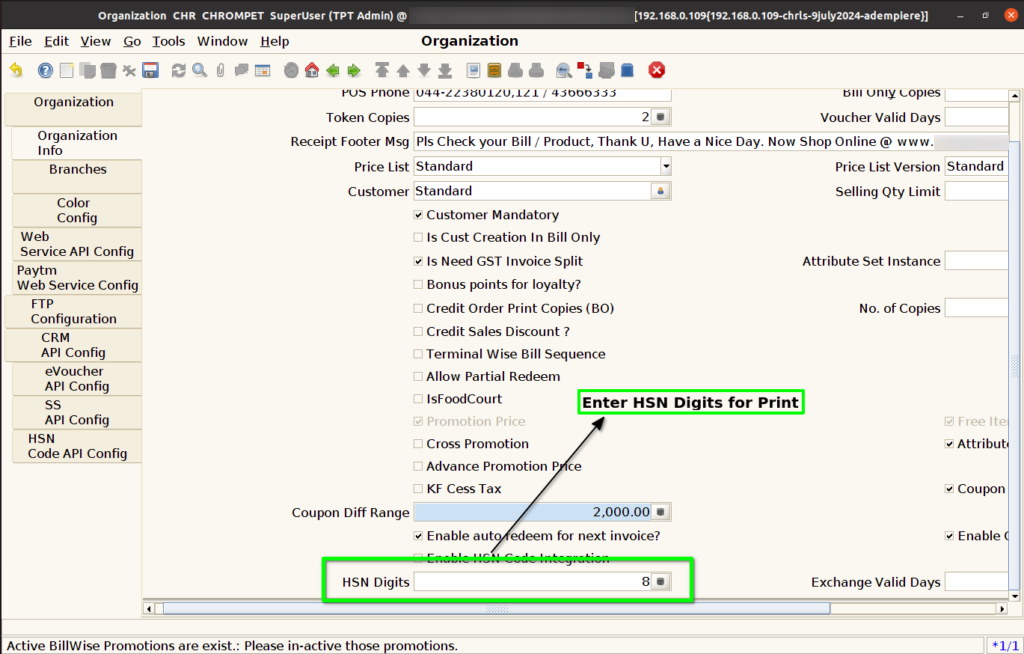
Step 28 : Enter HSN Digits, Based on this HSN Code digits will show in print.
Step 29 : Enter Exchange Valid Days for exchange valid for redemption.
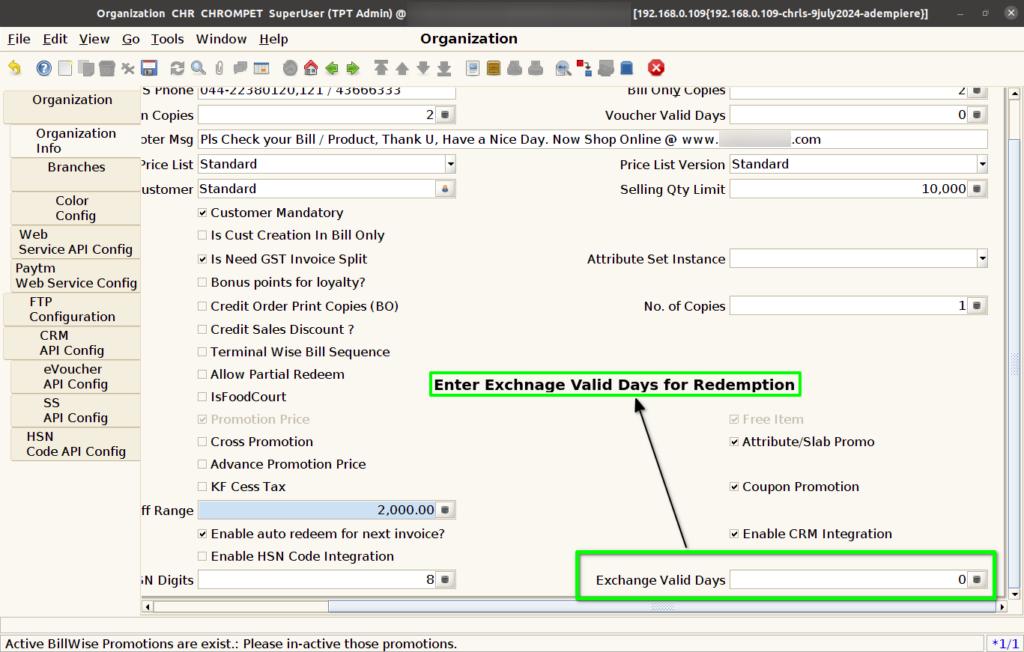
Step 30 : Click to Save Record.