How Does Import CSV Process Works in iDempiere
The Import CSV Process is used to upload data from a CSV file into a selected iDempiere window using a predefined Import Template. The process validates the file format, column headers, and user permissions before importing the data. It supports Insert, Update, and Merge operations based on the selected import mode.
Business Rules
- An active Import Template must exist before running the Import CSV Process.
- The uploaded CSV file must match the column layout defined in the Import Template.
- The selected Import Mode must be permitted for the user’s role.
- The file character set, separator, and quote character must match the Import Template settings.
- The system validates the uploaded file before importing the data.
- Only users with permission to use the Import Template can execute the process.
- Insert mode creates new records.
- Update mode updates existing records.
- Merge mode inserts new records or updates existing records based on matching keys.
- Invalid records are reported in the generated import log.
Process Flow

Prerequisites
- An active Import Template has been created.
- The user has permission to use the Import Template.
- The CSV file follows the template format.
- The required import window (for example, Business Partner) is available.
Navigation
Menu → System Admin → General Rules → Import CSV Process
The Import CSV Process window allows users to select an Import Template, choose the CSV file, select the Import Mode, and execute the import.
Configuration Steps
Step 1: Select the Import Template
The Import Template defines the structure of the CSV file and the target window where the data will be imported.
Instructions
- Open Import CSV Process.
- Select the required Import Template.
- Choose the CSV file to upload.
- Select the required Import Mode.
- Click OK to start the import.


Field Reference
| Field | Sample Value | Mandatory | Description |
| Import Template | Import Business Partner | Yes | Template that defines the import structure. |
| File Name | ImportBusinessPartner.csv | Yes | CSV file to upload. |
| Import Mode | Insert / Update / Merge | Yes | Defines how the records are processed. |
Step 2: Execute the Import
After clicking OK, the system validates the uploaded CSV file using the selected Import Template.
The process checks:
- User access to the template
- CSV header format
- Character encoding
- File format
- Import mode permission
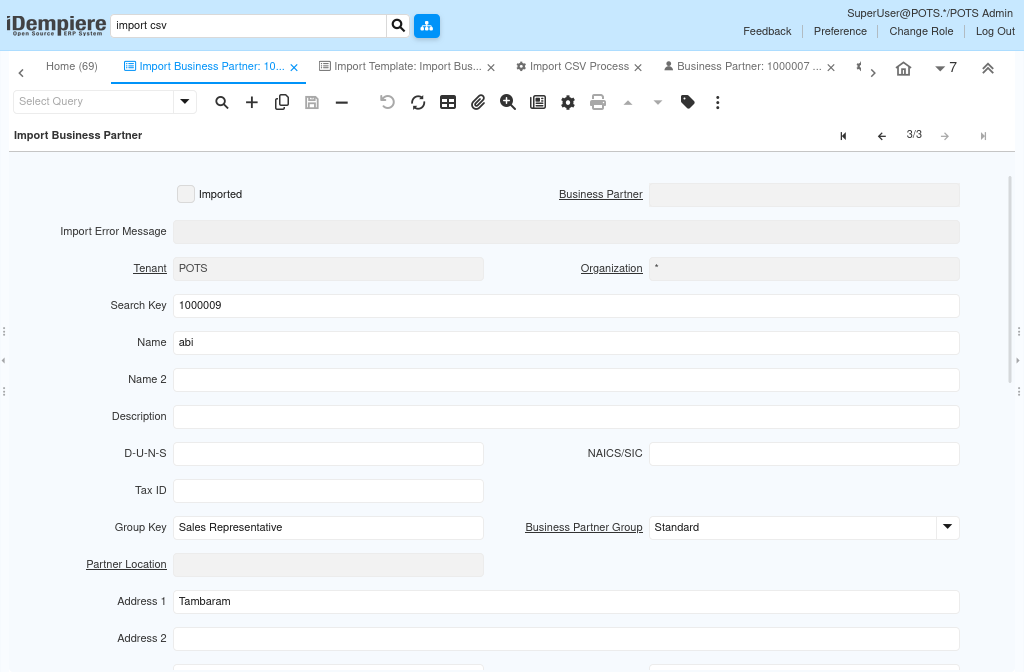
If validation is successful, the data is imported into the corresponding Import (Staging) table.
Step 3: Complete the Business Import Process
The Import CSV Process only uploads data into the Import (Staging) table. It does not directly create records in the master window.
For example, when importing Business Partners, the uploaded data is stored in the Import Business Partner table. The user must then run the Import Business Partner process to validate the records and transfer them to the Business Partner master window.
Common Issues and Resolutions
| Issue | Cause | Resolution |
| Import Template not available | Template is inactive or access is not granted | Activate the template and assign the required role. |
| Invalid CSV Header | Header does not match the Import Template | Correct the CSV header to match the template. |
| Import Mode unavailable | Permission not granted | Enable Insert, Update, or Merge in Import Template Access. |
| File validation failed | Incorrect separator, quote character, or encoding | Update the CSV file to match the Import Template settings. |
| Records not available in the master window | Business import process not executed | Run the corresponding Import process (for example, Import Business Partner). |
Next Steps
- Review the generated import log for any validation errors.
- Correct failed records and upload the file again if necessary.
- Run the related business import process to transfer data from the staging table to the master table.
- Verify the imported records in the target application window.