How The Sales Rep Info Window Works in iDempiere
Introduction
The Sales Rep Info window records details of sales representatives, also known as Company Agents, who work with customers and suppliers on behalf of the business.
It is used across standard sales and purchase activities to identify who is responsible for a customer, an order, or a service request.
Every representative set up here becomes available for selection on transactions and reports, supporting accurate performance tracking and accountability.
Process Flow

Business Rules
- Only active sales representatives appear in selection lists on transactions.
- Each sales representative record is linked to one business partner record.
- Supervisor field builds a reporting line between sales representatives.
- Trx Organization allows a representative to work across more than one organization.
- Orders and Invoices tabs display only the records tied to that representative.
- Email and phone details support customer and supplier follow up.
Prerequisites
- Business Partner record created for the person acting as sales representative.
- Organization configured for the business unit the representative belongs to.
- Partner Location configured under the linked business partner.
- Supervisor record already set up, if a reporting hierarchy is required.
Navigation
Menu → Partner Relations → Sales Rep Info
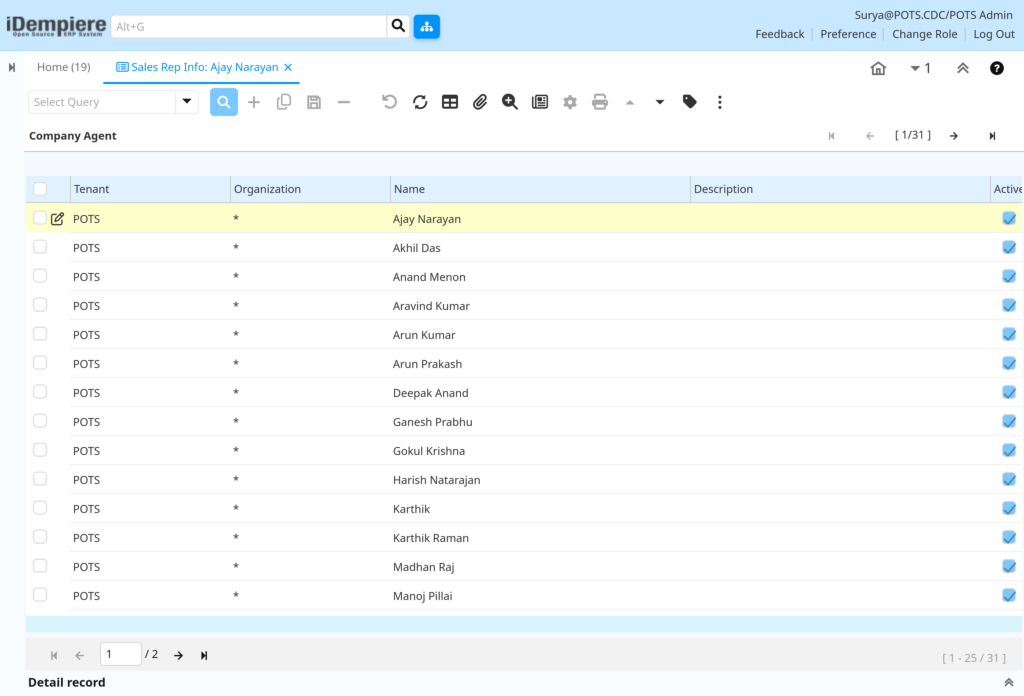
Opening this window shows the list of existing sales representatives along with their organization and contact details. Selecting a record opens the full form with linked Orders, Order Lines, Invoices, and Invoice Line information at the bottom of the screen.
Configuration Steps
Step 1: Identify the Organization and Representative
This step scopes the representative record to the correct business unit and gives it a recognizable name for use across the business.
Instructions
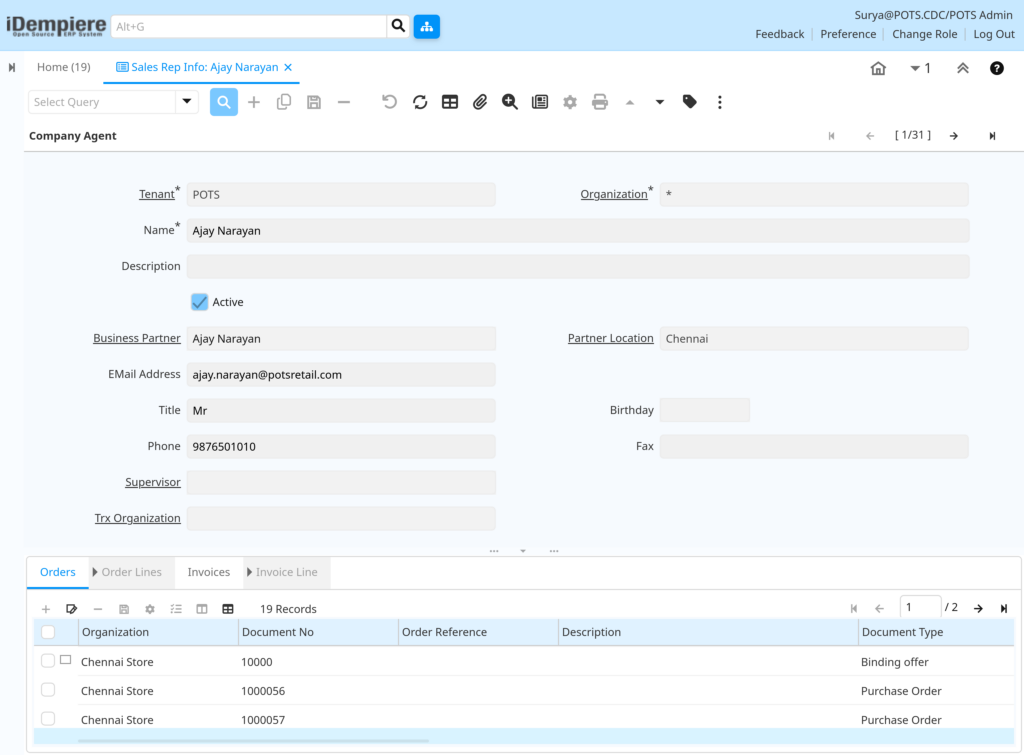
Shows the Organization the representative belongs to, enter their full Name, add an optional Description, and keep the record marked Active so it is available for transactions.
| Field | Sample Value | Description |
| Organization | Chennai Store | Business unit the representative is tied to |
| Name | Ajay Narayan | Full name of the sales representative |
| Description | (optional) | Short note about the representative’s role |
| Active | Checked | Makes the record available for selection |
Step 2: Link the Business Partner and Location
Linking the business partner connects the representative to their contact and address records already set up in the business.
Instructions
Shows the matching Business Partner record for the representative, then select their Partner Location from the linked addresses.
| Field | Sample Value | Description |
| Business Partner | Ajay Narayan | Business partner record representing the person |
| Partner Location | Chennai | Address linked to the business partner |
Step 3: Add Contact Information
Contact details keep the representative reachable and appear on related communication and documents where needed.
Instructions
Shows the EMail Address, Title, Phone number, and Birthday if available. Fax can be added if the business still uses it.
| Field | Sample Value | Description |
| EMail Address | ajay.narayan@potsretail.com | Contact email for the representative |
| Title | Mr | Salutation used for the representative |
| Phone | 9876501010 | Contact number for the representative |
| Birthday | (optional) | Date of birth, used for reference |
| Fax | (optional) | Fax number, used where applicable |
Step 4: Set Up Supervisor and Transaction Organization
This step defines reporting structure and cross-organization access, when the business needs either of these.
Instructions
Shows a Supervisor if this representative reports to another representative. Set Trx Organization only if the representative needs to process transactions in a different organization.
| Field | Sample Value | Description |
| Supervisor | (optional) | Representative this person reports to |
| Trx Organization | (optional) | Organization used for cross-unit transactions |
Step 5: Review Linked Orders and Invoices
Once a representative is assigned on transactions, those records appear automatically under this window for quick review.
Instructions
Open the Orders, Order Lines, Invoices, and Invoice Line tabs at the bottom of the screen to see all transactions tied to this representative.
Common Issues and Resolutions
| Issue | Cause | Resolution |
| Representative not visible on Sales Order | Active checkbox left unchecked | Mark the record Active and save |
| Representative not linked to right customer | Business Partner field left blank | Select the correct Business Partner before saving |
| Representative missing in another organization | Trx Organization not set | Set Trx Organization to allow cross-organization use |
| Reporting hierarchy looks incorrect | Wrong record chosen in Supervisor field | Update Supervisor with the correct representative |
| Orders tab shows no records | Representative not yet assigned to any order | Assign the representative on the sales order header |
| Duplicate representative records exist | New record created instead of reusing existing one | Search existing records before creating a new entry |
| Email or phone missing on documents | Contact fields left blank | Update EMail Address and Phone, then save |
Next Steps
- Configure Business Partner records for customers and suppliers.
- Assign representatives on the Sales Order window for new transactions.
- Review the Invoice window to confirm representative linkage on billing documents.
- Complete Organization and Partner Location setup if not already done.