How to Configure ASP Modules in iDempiere
Introduction
The ASP Modules window lets a hosting business group related windows, forms, processes, and workflows into a named package that can be switched on or off for each customer.
It is used by companies that run iDempiere for multiple client businesses and want to offer different feature sets under different subscription plans.
This setup decides what each hosted customer sees on their screen, keeping their workspace simple and matched to the plan they are paying for.
Process Flow

Business Rules
- Only active modules and levels apply to hosted business partners.
- A module can hold multiple levels, arranged from a basic plan to an advanced plan.
- Each level decides whether a window, tab, field, process, form, task, workflow, or list is shown or hidden.
- Setting the status to Undefined leaves the item visible under the normal system rules.
- The All Fields option on a tab shows every field without listing each one separately.
- Changes apply only to the business partners linked to that specific module and level.
- Hiding an item removes it from view; it does not delete or disable it in the system.
Prerequisites
- Business Partner set up for the hosted customer.
- Organization configured for the hosted customer.
- Windows, tabs, fields, processes, forms, tasks, and workflows already created and working normally.
- System Administrator access to configure feature visibility.
Navigation
Menu → System Admin → General Rules → System Rules → ASP Modules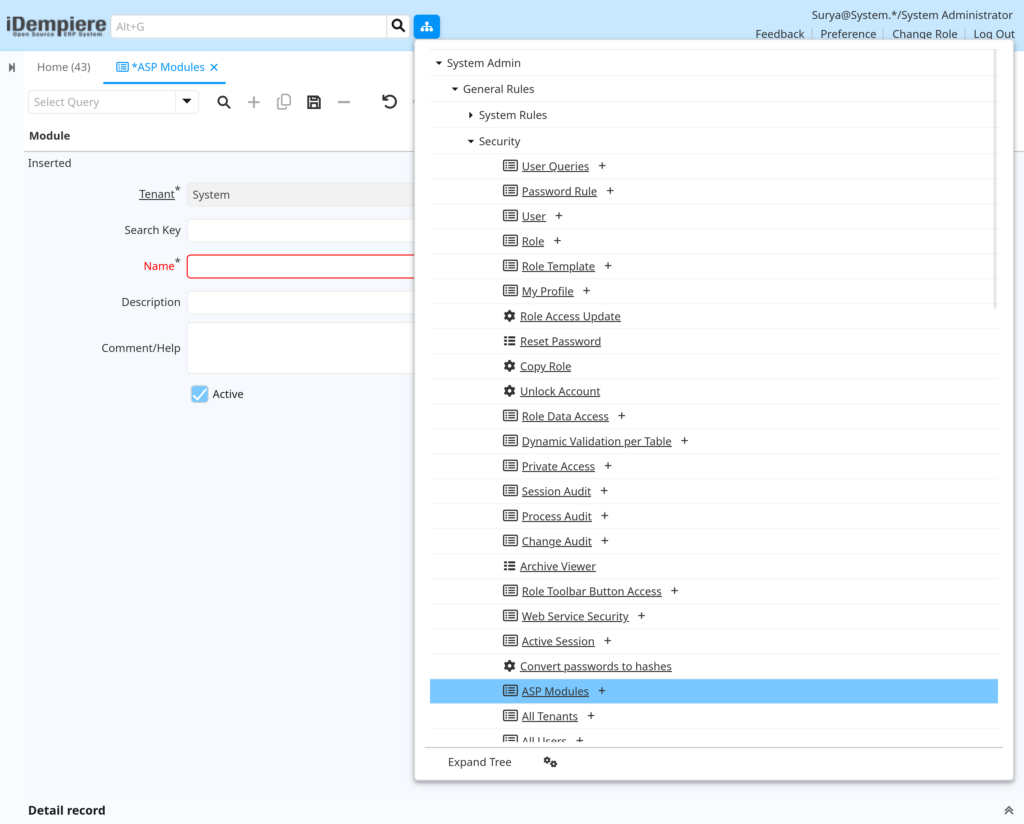
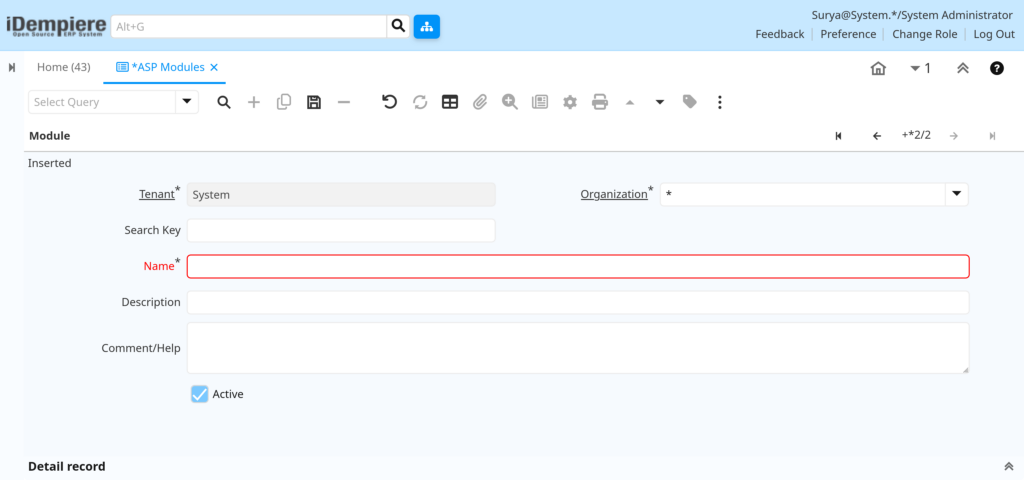
Opening this window shows the Module details at the top, with a Level section below. Each level offers separate tabs to control Window, Tab, Field, Process, Process Parameter, Form, Task, Workflow, and Ref List visibility.
Configuration Steps
Step 1: Create the Module
A module is the named package that groups everything a subscription plan will include, so it must be created before anything can be added to it.
Instructions
Enter a clear Name for the plan, such as “Standard Plan”. Add a Description if it helps identify the plan later. Keep Active checked, then save the record.
| Field | Sample Value | Description |
| Name | Standard Plan | Identifies the subscription plan customers are grouped into |
| Description | Basic feature package | Optional detail explaining what the plan covers |
| Active | Checked | Controls whether the plan can be used |

Step 2: Add a Level to the Module
A level represents one tier within the plan, such as a starting tier or a fuller-featured tier, and holds its own visibility settings.
Instructions
Under the module, open the Level section, give it a Name, and save. Use the “ASP Generate Level” option to automatically bring in the existing windows and settings for review.
| Field | Sample Value | Description |
| Name | Basic | Identifies this tier within the plan |
| ASP Generate Level | (button) | Automatically pulls in existing windows and settings to adjust |
| Active | Checked | Controls whether this tier can be used |

Step 3: Control Which Windows Are Visible
This decides which main screens a customer on this plan is allowed to open.
Instructions
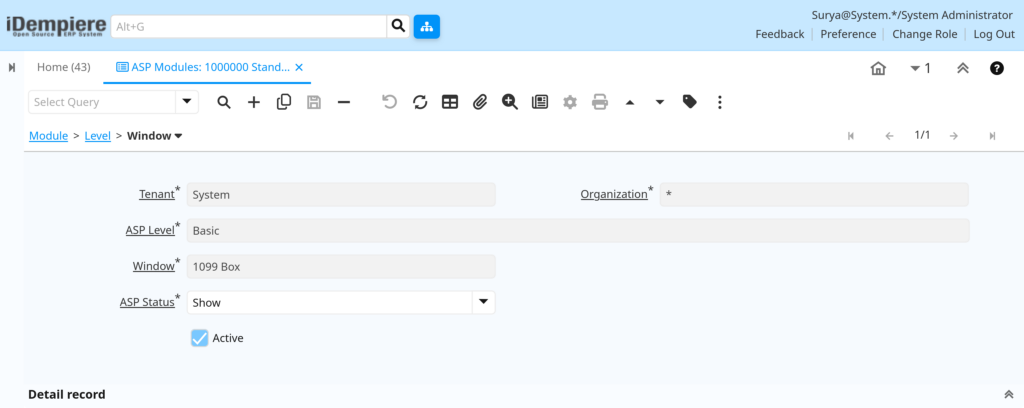
Under the level, open the Window section, choose the window, and set its status to Show, Hide, or Undefined.
| Field | Sample Value | Description |
| Window | 1099 Box | The screen this setting applies to |
| ASP Status | Show | Show, Hide, or Undefined – controls whether the window appears |
Step 4: Control Which Tabs and Fields Are Visible
Some windows have more than one tab, so visibility can be narrowed further, right down to individual fields.
Instructions
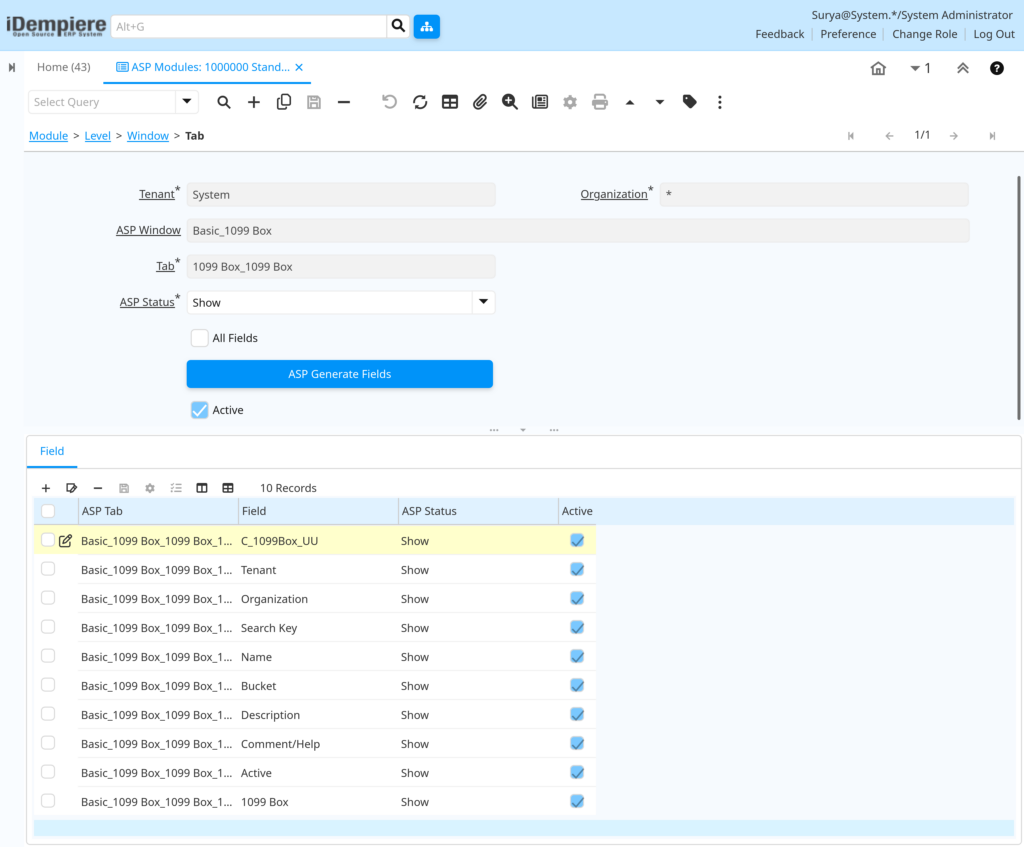
Choose the Tab, set its status, and check All Fields to show every field on that tab. Uncheck All Fields to instead set the status field by field.
| Field | Sample Value | Description |
| Tab | 1099 Box Tab | The tab within the window this setting applies to |
| ASP Status | Show | Controls whether the tab appears |
| All Fields | Checked | Shows every field on the tab without listing each one |
Step 5: Control Which Processes Are Available
This decides which reports or actions a customer on this plan is able to run.
Instructions
Under the level, open the Process section, choose the process, and set its status.
| Field | Sample Value | Description |
| Process | Generate Invoices | The report or action this setting applies to |
| ASP Status | Show | Controls whether the process is available |

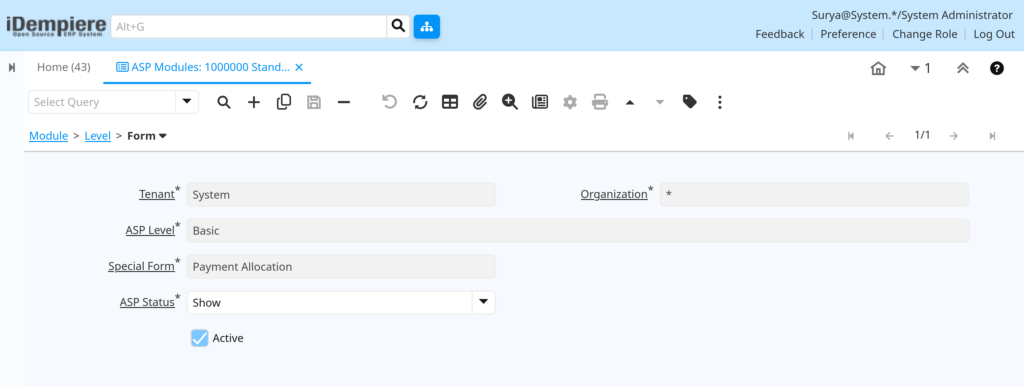
Step 6: Control Special Forms
Some features open as special forms rather than standard windows, and these are controlled separately.
Instructions
Choose the Special Form and set its status the same way as other items.
| Field | Sample Value | Description |
| Special Form | Payment Allocation | The special form this setting applies to |
| ASP Status | Show | Controls whether the form is available |
Step 7: Control Tasks and Approval Workflows
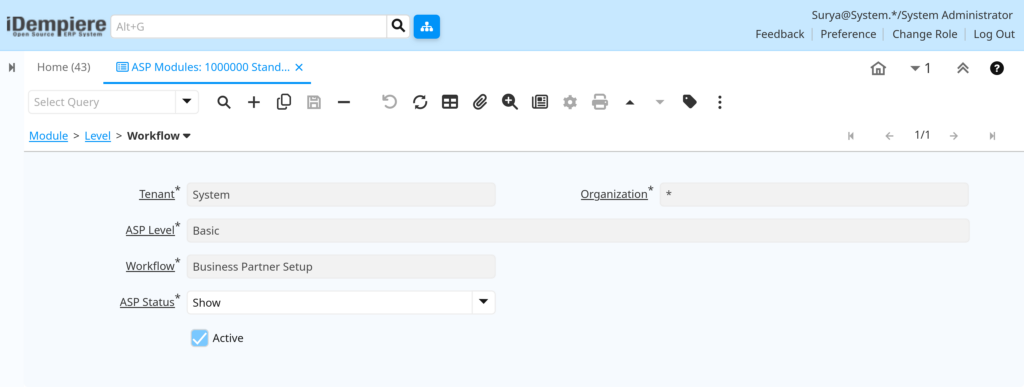
Background tasks and approval routing may not be needed by every plan, so they can be limited here.
Instructions
Open the Task section to control scheduled tasks, and the Workflow section to control approval routing. Set the status for each item.
| Field | Sample Value | Description |
| OS Task | Database Export | The scheduled task this setting applies to |
| Workflow | Business Partner Setup | The approval routing this setting applies to |
| ASP Status | Show | Controls whether the task or workflow is available |

Step 8: Control Dropdown List Values
Dropdown lists that appear throughout the system can also be trimmed so a plan only shows relevant choices.
Instructions
Open the Ref List section, choose the Reference and the specific Reference List value, then set its status.
| Field | Sample Value | Description |
| Reference | C_Payment Tender Type | The dropdown list this setting applies to |
| Reference List | Direct Deposit | The specific choice within that list |
| ASP Status | Show | Controls whether the choice appears in the dropdown |

Note: Run "ASP Generate Level" first when setting up a new level, so existing windows, tabs, and fields are listed automatically instead of being entered one at a time.Common Issues and Resolutions
| Issue | Cause | Resolution |
| New level shows no windows or tabs | “ASP Generate Level” was not run | Run the generate option, then adjust the status of each item as needed |
| Window still visible after hiding it | Customer’s business partner is not linked to that module and level | Check and correct the business partner’s plan assignment |
| Field still visible after hiding it | All Fields is still checked on the tab | Uncheck All Fields, then set the status for the individual field |
| Level record will not save | Name field left blank | Enter a unique Name for the level and save again |
| Report missing for a customer | Process status set to Hide | Change the process status to Show or Undefined |
| Approval step missing for a customer | Workflow status set to Hide at that level | Change the workflow status to Show |
| Expected dropdown choice missing | Reference List value status set to Hide | Change the Ref List status to Show |
| Changes not appearing for the customer | Customer is still in an earlier session | Ask the customer to log out and log back in |
Next Steps
- Business Partner window – link the hosted customer to the correct module and level.
- Organization window – confirm the customer’s organization is set up correctly.
- Window, Tab, and Field definitions – create any new screens before restricting their visibility.