How to Use Import Product Window in iDempiere
Introduction
The Import Product window in iDempiere is a staging screen used to bring product and purchase details into the system. It belongs to the Data Import group of tools that prepare records before they update live business data.
Businesses use it whenever new products or updated vendor pricing must be added quickly, particularly when a ready-made loader format is not available and the staging entry has to be created directly in the window.
Once processed, the entry updates the Product and Product Purchasing records that drive purchasing, pricing, and inventory transactions across the system.
Process Flow

Business Rules
- Only records not yet marked as imported are picked up when the process runs.
- A blank Product link creates a new product; a filled link updates an existing one.
- Existing products are matched using Search Key, UPC, or Partner Product Key.
- Purchase details are saved only when a valid Business Partner Key is provided.
- Selecting a Price List Version during processing also updates product prices.
- Records that fail validation are flagged with an error message and stay unprocessed.
- The Imported and Processed checkboxes confirm a record was applied successfully.
- Records are always scoped to the Tenant selected when the process is run.
Prerequisites
- Business Partner configured for the vendor supplying the product.
- Unit of Measure configured and matching the UOM Code used.
- Product Category configured and matching the Product Category Key used.
- Currency configured for the purchase price entered.
- Price List Version configured, if prices should be updated during import.
- Tenant and Organization access confirmed for the user running the import.
Navigation
Menu → System Admin → Data → Data Import → Import Product
Opening the window shows an empty Import Product entry screen. It contains fields for product identification, category, business partner, purchase, and pricing details, along with Imported and Processed status indicators.

Configuration Steps
Step 1: Create a New Import Record
A ready-made loader format is not available in this setup, so the staging record must be entered directly in the window instead of being generated from a file.
Instructions
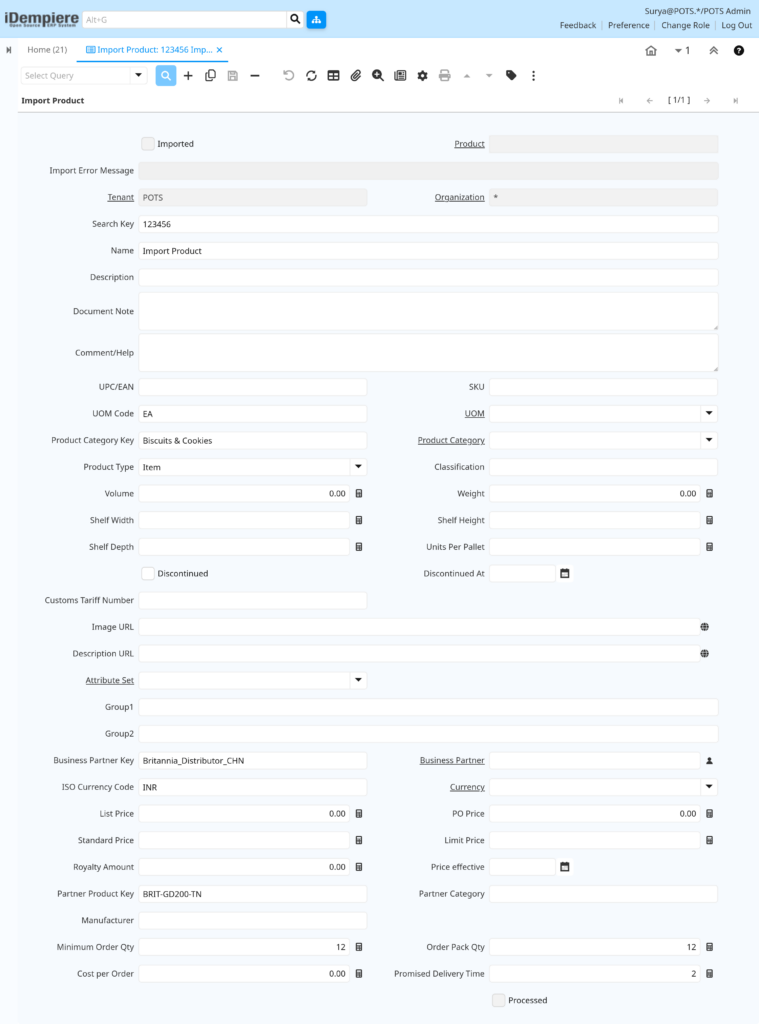
Click the New icon on the Import Product window. Enter a Search Key, Name, and Description to identify the product being added or updated.
| Field | Sample Value | Description |
| Search Key | 123456 | Internal reference used to identify the import record |
| Name | Import Product | Product name entered for the record |
| Description | Crunchy butter cookies, 200 g pack | Descriptive text for the product |
Step 2: Enter Product Identification Details
Product identity fields let iDempiere match the record to an existing product or create a new one correctly.
Instructions
Enter the UOM Code, Product Category Key, and Product Type. Leave the Product field blank so the system creates a new product during processing.
| Field | Sample Value | Purpose |
| UOM Code | EA | Defines the unit of measure for the product |
| Product Category Key | Biscuits & Cookies | Groups the product under an existing category |
| Product Type | Item | Classifies the record as a stock item |
Step 3: Enter Business Partner and Purchase Details
These fields link the product to a vendor and capture the purchase terms used for future ordering.
Instructions
Enter the Business Partner Key, Partner Product Key, Currency Code, list and purchase prices, order quantities, and delivery time.
| Field | Sample Value | Purpose |
| Business Partner Key | Britannia_Distributor_CHN | Identifies the vendor supplying the product |
| Partner Product Key | BRIT-GD200-TN | Vendor’s own reference code for the product |
| ISO Currency Code | INR | Currency used for the purchase price |
| Minimum Order Qty | 12 | Smallest quantity that can be ordered |
| Order Pack Qty | 12 | Quantity contained in one purchase pack |
| Promised Delivery Time | 2 | Number of days the vendor commits to deliver |
Step 4: Save the Import Record
Saving stores the entry in the staging area so it can be validated and processed.
Instructions
Click Save. Confirm mandatory fields, such as Search Key and Business Partner Key, are filled in before continuing.
Step 5: Run the Import Product Process
Running the process moves the validated record from the staging area into the live Product and Product Purchasing records.
Instructions
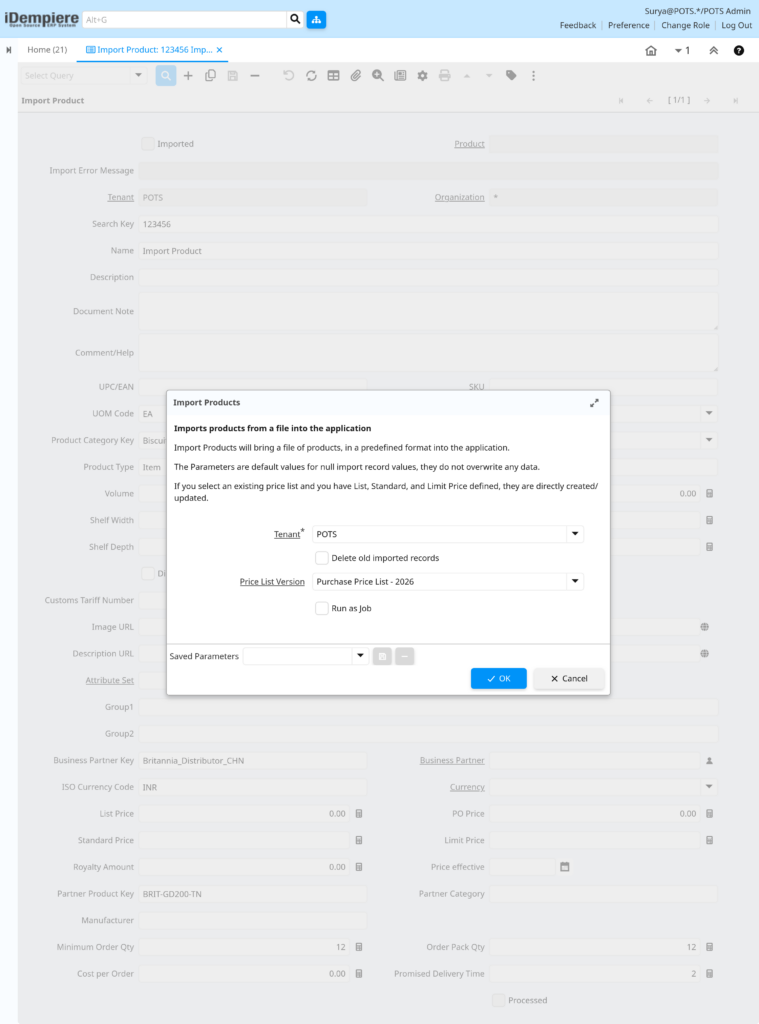
Click the Process icon. Select the Tenant, choose whether to delete old imported records, select a Price List Version if prices should update, then click OK.
| Field | Sample Value | Purpose |
| Tenant | POTS | Confirms which company data is imported into |
| Delete old imported records | Unchecked | Removes previously imported records before running |
| Price List Version | Purchase Price List – 2026 | Applies List, Standard, and Limit prices to the product |
Step 6: Review the Process Result
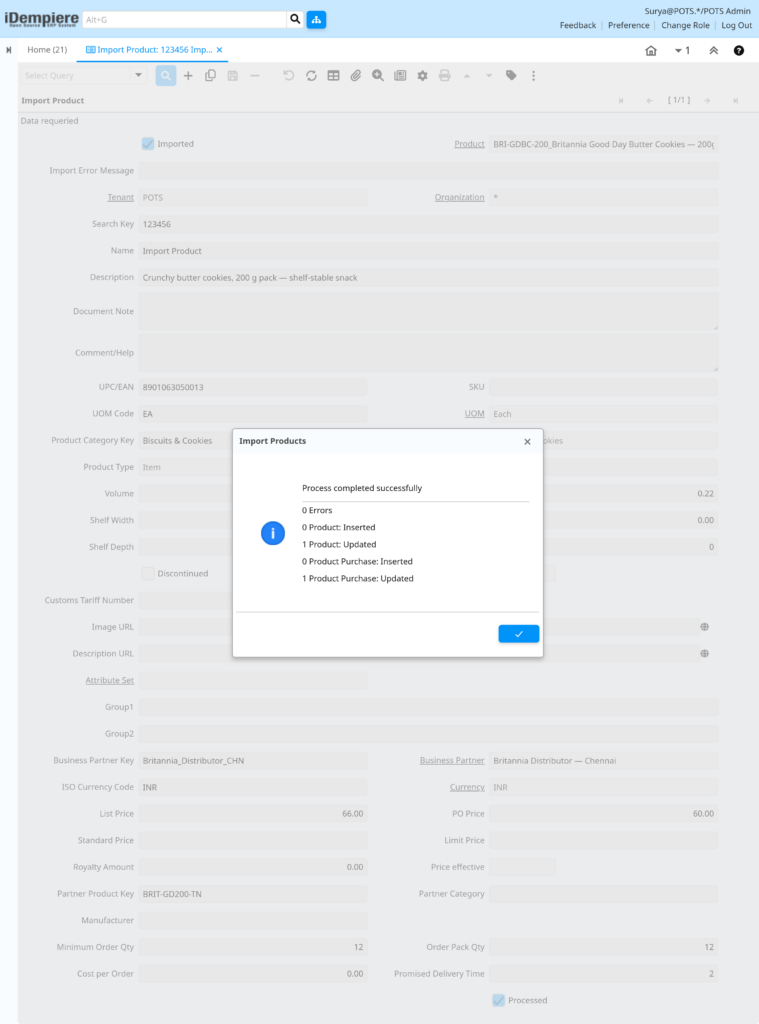
The result summary confirms whether the record was inserted, updated, or failed with errors.
Instructions
Read the confirmation message showing the number of products and purchase records inserted or updated, then close the dialog.
Step 7: Verify the Imported Record
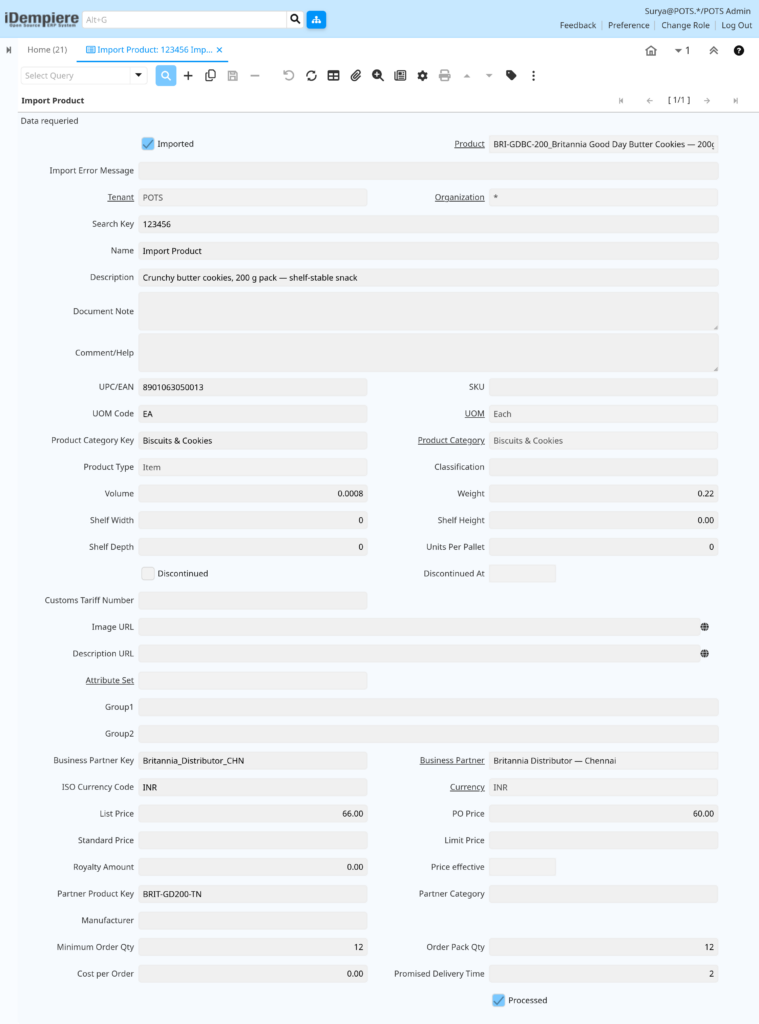
Verification confirms the product and purchase details were applied correctly.
Instructions
Check that Imported and Processed are selected, and that the Product field shows the product created or updated by the process.
Common Issues and Resolutions
| Issue | Cause | Resolution |
| Record shows an error and stays unprocessed | A required value, such as Business Partner Key or UOM Code, does not match an existing record | Correct the value to match an active record, then run the process again |
| Product is updated incorrectly | The Product field was linked to the wrong existing product | Clear the link or correct the Search Key, UPC, or Partner Product Key used for matching |
| Purchase details are missing after import | Business Partner Key was left blank on the record | Enter a valid Business Partner Key before running the process |
| Prices are not applied to the product | No Price List Version was selected during processing | Run the process again and select the correct Price List Version |
| Duplicate product error appears | The Search Key or UPC already exists on another active product | Use a unique Search Key or UPC, or correct the duplicate record |
| Record remains marked as not imported | The process was run for a different Tenant than the record belongs to | Confirm the Tenant selected matches the record’s data |
| Category is not applied to the product | Product Category Key does not match any existing category | Create the category first, or correct the spelling to match |
Next Steps
- Product window – review or adjust the newly created or updated product record.
- Product Purchasing window – confirm vendor pricing and order terms.
- Price List window – verify prices applied through the Price List Version.
- Product Category window – set up any new categories before future imports.