How to Review the All Role Window in iDempiere
The Role window in iDempiere defines the security profile assigned to every user, controlling what data, organizations, and functions they can access.
Because this window is read-only for users, it is primarily used to review existing role configurations before assigning them, ensuring transactions, reports, and accounting data stay properly restricted.
Process Flow

Business Rules
- Only Active roles can be assigned to users for login.
- User Level determines whether a role sees System, Client, or Organization data.
- Client+Organization level restricts a role to its assigned store only.
- Can Export controls whether a role may extract data to file.
- Can Report controls whether a role may run standard reports.
- Show Accounting controls visibility of GL and financial postings.
- Access all Orgs allows a role to view data across multiple stores.
Prerequisites
- Tenant (Client) configured for the retail business.
- Organization or store record configured.
- User accounts created in the User window.
- Org Access and Document Action Access reviewed for each role.
Navigation
Menu → General Rules → Security → Role
Configuration Steps
Step 1: Review Tenant and Name Fields
Check the Tenant (All) and Name fields, e.g., ‘POTS’ and ‘POTS Admin’, match the intended store or business unit.
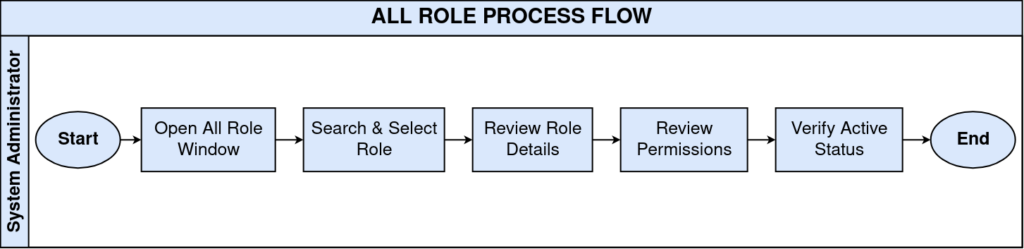
Step 2: Verify User Level and Preference Level
Confirm User Level matches the intended scope (e.g., Client+Organization for store-level roles) and Preference Level is set correctly.
Step 3: Check Function Permission Checkboxes
Review Can Export, Can Report, Show Accounting, and Access Advanced to confirm they match the role’s intended responsibilities.
| Field | Sample Value | Description |
| Tenant (All) | POTS | Client/tenant the role belongs to |
| Name | POTS Admin | Role display name shown at login |
| User Level | Client+Organization | Defines System, Client, or Organization data scope |
| Preference Level | Client | Level at which user preferences and defaults apply |
| Can Export | Checked | Allows exporting grid data to file |
| Can Report | Checked | Allows running standard reports |
| Show Accounting | Checked | Allows viewing GL and accounting facts |
| Access Advanced | Checked | Enables access to advanced tabs and fields |
| Active | Checked | Role is enabled and assignable to users |
| Role Type | Blank | Optional classification, e.g., Manager, Cashier |
Step 4: Confirm Active Status
Verify the Active checkbox is ticked for any role currently in use by store staff.
Step 5: Cross-check Role Type for Store Assignment
Confirm Role Type is set consistently so store onboarding staff can assign the correct role without confusion.
Common Issues and Resolutions
| Issue | Cause | Resolution |
| Role not available at login | Active checkbox unticked | Activate the role in the Role window |
| User sees data from other stores | Access all Orgs enabled | Disable Access all Orgs for store-level roles |
| Staff cannot export reports | Can Export unchecked | Enable Can Export for the role |
| Role changes not applied to user | Active session cached old role | Ask user to log out and log back in |
| Duplicate or unclear role names | No naming convention used | Standardize names, e.g., Store-Cashier, Store-Manager |
| New store staff cannot access org data | Organization missing from role access | Add the organization in the Org Access tab |
| Inconsistent report results between roles | Different Preference Level settings | Align Preference Level across similar roles |
Next Steps
- Configure User window to assign reviewed roles to staff.
- Set up Org Access tab for store-specific data restrictions.
- Review Document Action Access for transaction-level permissions.
- Configure Client Info for tenant-wide retail settings.