How to Configure Initial Tenant Setup in iDempiere
The Initial Tenant Setup process creates the core business structure required to begin using iDempiere. It automatically generates the Tenant, Organization, users, roles, accounting structure, warehouse, and other standard master records required for system configuration and business operations.
Process Flow

Business Rules
- Tenant Name and Organization information must be entered to create the business environment.
- Administrative User details must be provided, and Set Initial Password should be enabled.
- If a custom Chart of Accounts is unavailable, enable Use Default CoA.
- Material Policy should be configured before inventory transactions are processed. It controls the inventory costing method used for stock consumption.
- Email settings must be configured and Test Email should complete successfully before using email communication.
Step-by-Step Configuration
Step 1: Open Initial Tenant Setup
Navigate to:
Menu → Initial Tenant Setup
The process window displays the required setup fields.
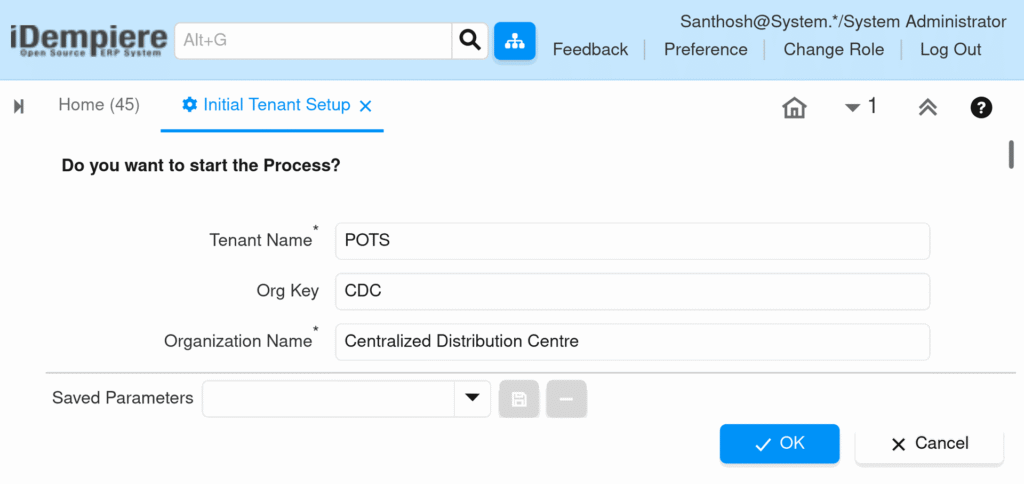
Step 2: Enter Business Information
Enter the organization details as shown below.
| Field | Example Value | Purpose |
| Tenant Name | POTS | Creates the company environment |
| Org Key | CDC | Short code used to identify the organization |
| Organization Name | Centralized Distribution Center | Name of the business unit |
Step 3: Configure Initial Users
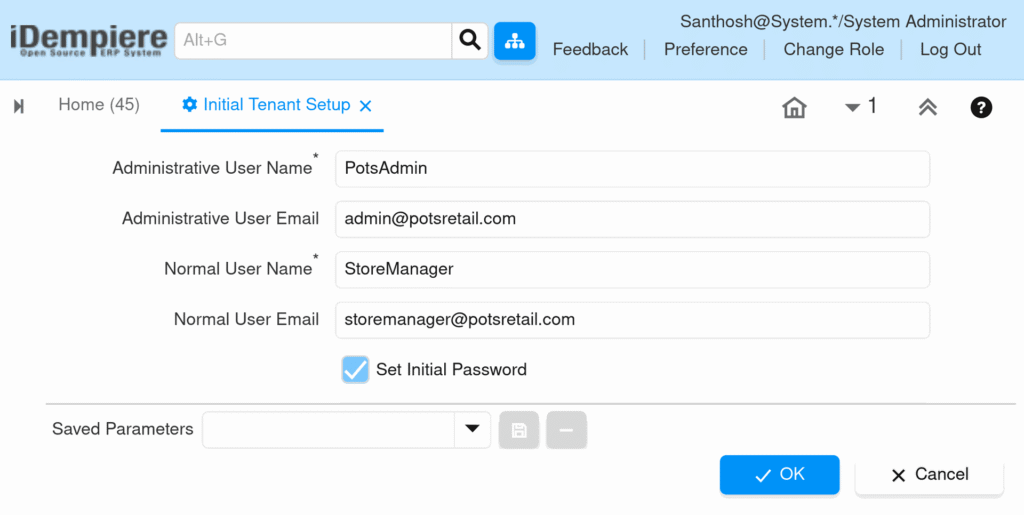
Enter the users who will access the system.
| Field | Example Value | Purpose |
| Administrative User Name | PotsAdmin | Performs configuration and administration activities |
| Administrative User Email | admin@potsretail.com | |
| Normal User Name | StoreManager | Performs daily operational activities |
| Normal User Email | storemanager@potsretail.com |
Important: Enable Set Initial Password to allow the system to create passwords automatically during setup.
Step 4: Enter Organization Location Information
Provide the organization address details.
| Field | Example Value | Purpose |
| Currency | INR | Default currency used for transactions |
| Country | India | Business operating country |
| Region | Tamil Nadu | Organization location detail |
| City Name | Chennai | Organization location detail |
| ZIP | 600001 | Organization location detail |
| Address 1 | Central Office | Business address |
Note: Some location fields can be updated later if required.

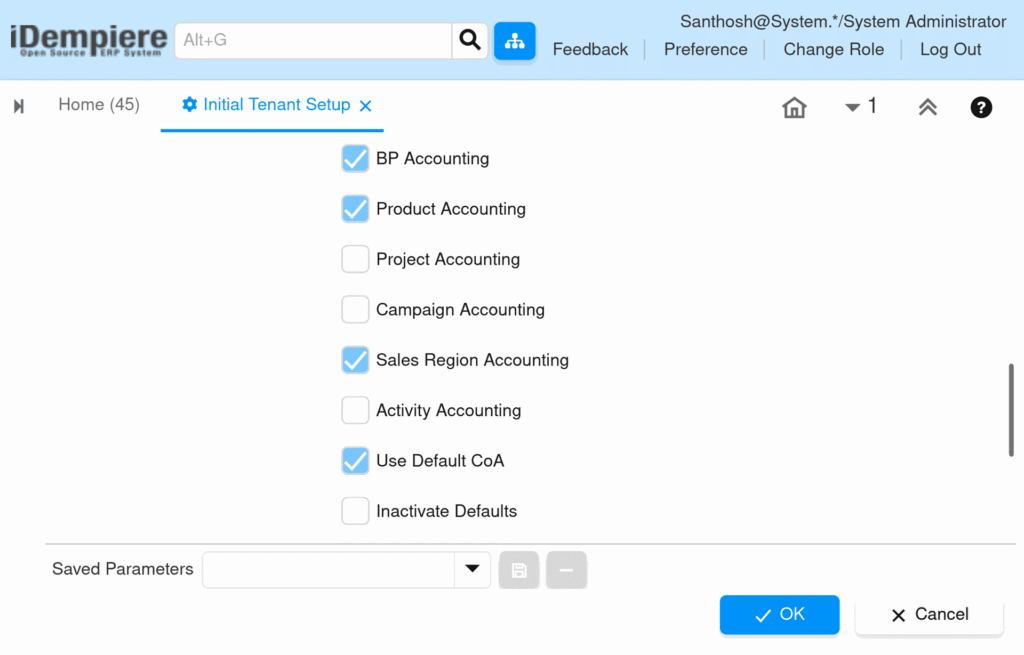
Step 5: Select Required Accounting Options
Enable the following options:
- BP Accounting — Creates accounting setup for customers and vendors
- Product Accounting — Creates accounting setup for inventory and products
- Sales Region Accounting — Creates region-based sales accounting
- Use Default CoA — Automatically creates a standard Chart of Accounts
Leave disabled unless specifically required:
- Project Accounting
- Campaign Accounting
- Activity Accounting
Step 6: Enter Contact Information
Provide the organization contact details.
| Field | Example Value |
| Phone | 04440112233 |
| 2nd Phone | 04440112255 |
| Email Address | support@potsretail.com |
| Tax ID | GST33AABCP7188K1Z5 |

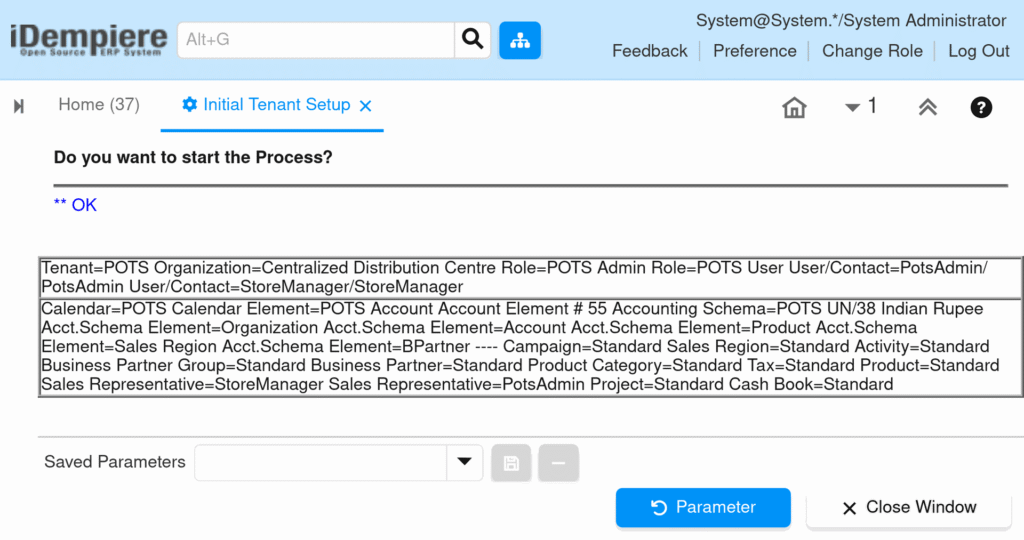
Step 7: Run the Process
Click OK to start the process. The system will begin creating the required setup records automatically.
System Generated Records
Depending on the selected configuration options, the Initial Tenant Setup process automatically creates the following standard records.
Organization and User Records
- Tenant
- Organization
- Admin Role
- User Role
- Administrative User
- Normal User
- Business Partner
- Business Partner–User Mapping
- Sales Representative
- Sales Representative Location
Note: The user setup process is created automatically for both the Administrative User and Normal User.
Accounting Records
- Calendar
- Calendar Element
- Accounting Schema
- Organization Accounting Schema Element
- Product Accounting Schema Element
- Sales Region Accounting Schema Element
Business Master Records
- Business Partner Group
- Sales Region & Sales Region Translation
- Activity & Activity Translation
- Campaign & Campaign Translation
- Project Cycle
- Project
Product and Pricing Records
- Product Category
- Tax Category & Tax Category Translation
- Tax Rate
- Product
- Price List & Price List Version
- Product Price
- Discount Schema
- Payment Term & Payment Term Translation
Location and Inventory Records
- Company Location
- Business Partner Location
- Warehouse Location
- Warehouse
- Locator
Financial and System Records
- Cash Book
- Print Formats
After successful execution, the system creates the core business structure, standard setup data, accounting configuration, and inventory foundation required for further implementation activities.
Reviewing Tenant Configuration
After the Initial Tenant Setup process is completed, iDempiere automatically creates the Tenant record using the information entered during setup. The Tenant window is then used to maintain company-level settings such as Material Policy
and email communication.
Navigation
System Administrator → Tenant
Material Policy
Material Policy determines the inventory costing method used when inventory is consumed during stock transactions.
Configuration
- Open the Tenant window.
- Select the required Material Policy.
- Save the record.
Example – FIFO (First In First Out)
| Batch | Quantity | Unit Cost |
|---|---|---|
| Batch 1 | 100 Units | ₹100 |
| Batch 2 | 100 Units | ₹120 |
If 50 units are sold, inventory is consumed from Batch 1 first and the cost applied is ₹100 per unit.
Email Communication Setup
The Tenant window also contains the email settings used for outbound communication.
Configure Email Server
- Navigate to the Request Management section.
- Enter the Mail Host and SMTP Port.
- Enter the Request Email and Request User.
- Enable SMTP SSL/TLS.
- Save the record.
Example
- Mail Host: smtp.gmail.com
- SMTP Port: 587
Configure Email Authentication
- Enable SMTP Authentication.
- Enter the SMTP authentication credentials (password or application password, depending on the mail provider).
- Save the configuration.
Verify Email Connectivity
- Click Test Email.
- Confirm the process.
- Verify the success message and email delivery.
This confirms that iDempiere can successfully connect to the configured email server and send outbound emails.
Common Issues
| Issue | Resolution |
| Tenant already exists | Use a unique tenant name |
| User creation fails | Verify user information is complete and unique |
| Missing accounting setup | Enable Use Default CoA during setup |
| Currency validation issue | Verify the currency is correctly configured in the system |
| Process completes with warnings | Review the Process Log for details. |
| Email test fails | Verify SMTP server, authentication, and network connectivity. |
Initial Tenant Setup establishes the core business environment in iDempiere by creating the Tenant, Organization, users, roles, accounting structure, warehouse, and other standard master records. This automated process minimizes manual configuration and provides a consistent foundation for subsequent system configuration and business transactions.
Next Steps
After completing the Initial Tenant Setup, continue with the following configuration steps:
- Organization Configuration
- Warehouse Configuration
- Product Setup