How to Configure Time Type in iDempiere
The Time Type window in iDempiere defines categories of working hours, such as Regular Working Hours, Overtime, or Holiday Hours, used to classify employee attendance records.
Business Rules
- Only Active Time Types are available for selection in attendance and time recording entries.
- Each Time Type must have a unique, descriptive Name within its Organization.
- Description should briefly identify the hour category, such as Regular, Overtime, or Night Shift.
- Comment/Help text explains usage context for HR and payroll staff.
- Inactive Time Types remain in historical records but cannot be assigned to new entries.
Navigation
Menu → Partner Relation → Request → Time Type
Configuration Steps
Step 1: Define the Time Type Name
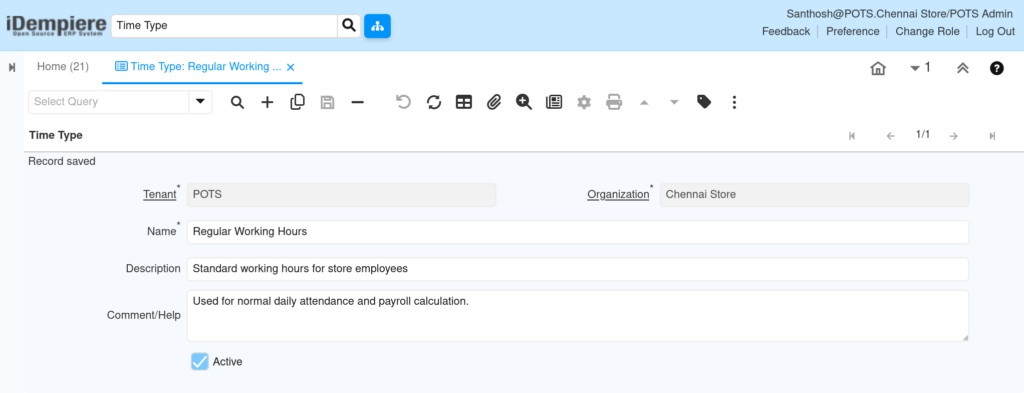
Enter a clear, business-relevant name such as “Regular Working Hours” or “Overtime”. Avoid generic names that HR staff cannot distinguish later.
Step 2: Add Description and Comment/Help
Fill Description with a short summary, for example “Standard working hours for store employees”. Use Comment/Help for detailed usage notes, such as payroll impact.
Field Reference Table
| Field | Sample Value | Description |
| Name | Regular Working Hours | Identifies the time category shown in dropdown lists |
| Description | Standard working hours for store employees | Short label describing the hour type |
| Comment/Help | Used for normal daily attendance and payroll calculation | Extended guidance for HR/payroll staff |
| Active | Checked | Controls whether the Time Type is available for selection |
Step 4: Activate the Time Type
Confirm the Active checkbox is selected, then save the record. Deactivate outdated Time Types instead of deleting them to preserve history.
| Note: Deactivating a Time Type does not remove it from past attendance records; it only prevents future selection. |
Next Steps
- Configure Employee records for attendance tracking.
- Set up the Attendance or Time Recording window.
- Review HR or Payroll reporting windows that reference Time Type.